Showing posts with label Braided Nylon Cord. Show all posts

Saturday, August 17, 2019

Necklace Cord for the Knotted Beaded Charms


To make the necklace cord for the knotted bead charm, you will need the following:

–> 1mm Chinese Knotting Cord

–> 1.5 mm Sterling Silver or Gold Filled Clasp

–>  Poly Zap Super Glue

–> Thread Burner

–> Chain Nose Pliers

For longer cords and smaller charms, I like to use a thinner Chinese Knotting Cord, so look at the New Fine and Fine size, and even the Extra Fine size as possible options. Or choose a thicker Chinese Knotting Cord such as the HDQ weight cords for a heavier charm. 

Or forgo the clasp and use a square knot slide closure. That's the same closure used for the Square Knot Bracelet Trio. 

–> Square Knot Bracelet Trio Kits and Tutorials

Go to the previous post for the tutorial on how to make the Knotted Bead Charm. 

Here are some bracelet - beaded charm combo, I like...


Knotted Bead Charms with Hematite or Halo Ring Beads | DIY Video Tutorial

Gold Halo Beads, with Hematite Bead Centers
Bracelet Knotted with C-Lon Tex 400 Bead Cord
Charm knotted with C-Lon Fine Weight Bead Cord Tex 135
Necklace cord made with 1mm Black Chinese Knotting Cord


Knotted Bead Charms with Hematite or Halo Ring Beads | DIY Video Tutorial

All Hematite, with Pearlescent White Hematite Beads
Bracelet Knotted with C-Lon Tex 400 Bead Cord
Charm knotted with the standard size of C-Lon Bead Cord
Necklace cord made with New Fine 201 Pearl Grey Chinese Knotting Cord


Knotted Bead Charms with Hematite or Halo Ring Beads | DIY Video Tutorial

Bracelets made with Gunmetal Halo Beads, and Pearlescent Pink Coral Hematite Beads, knotted with Chinese Coral, Pink Lemonade and Charcoal C-Lon Tex 400 Bead Cord.

Charm knotted with the standard size of C-Lon Bead Cord, with Hematite Ring Beads and Pearlescent Pink Coral Hematite Beads.
Necklace cord made with 1mm Black Chinese Knotting Cord


Friday, May 25, 2018

Turkish Flat Bead Crochet Bracelet Tutorial with Metallic Cord

Turkish Flat Bead Crochet Bracelet Tutorial with Metallic Cord


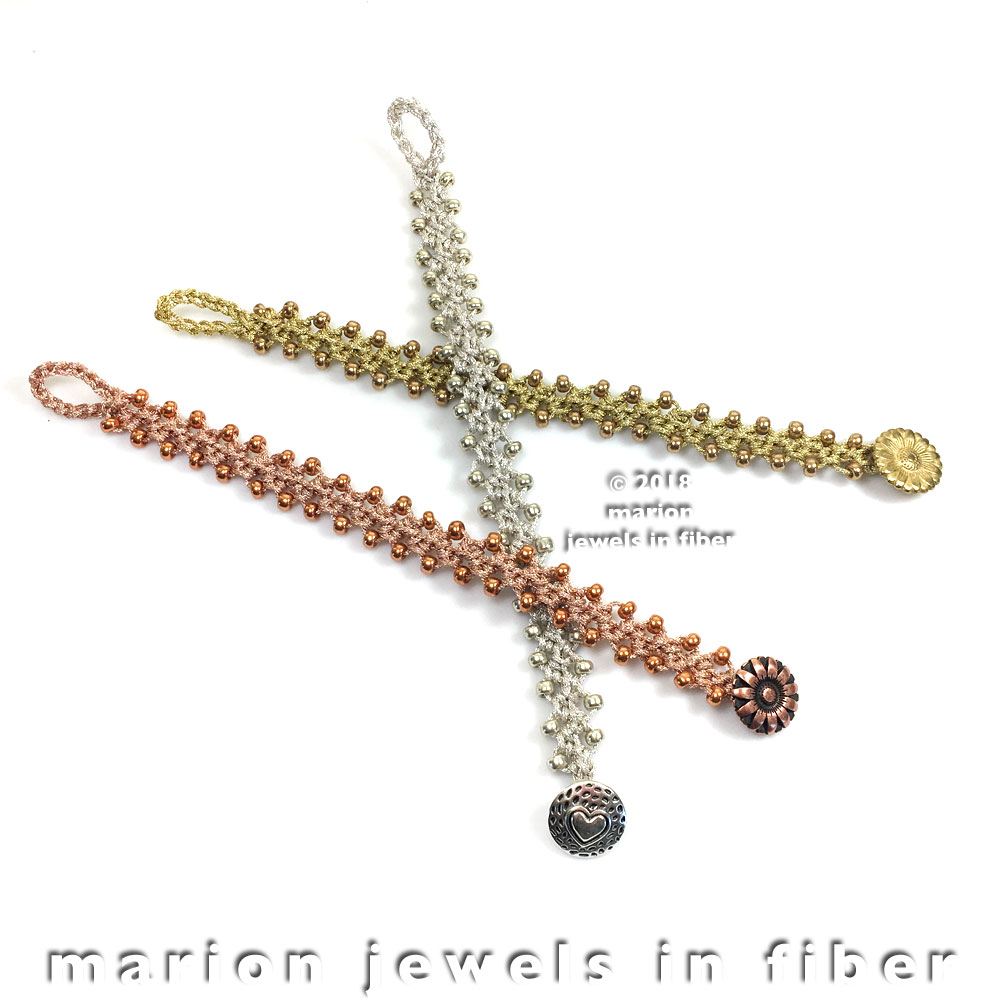
This is a new version based on a very popular crochet bracelet I first wrote about in 2012. Please refer to the original post of December 16, 2012 for an alternate tutorial. A brand new Metallic Braided Nylon Cord is featured in this new tutorial with coordinated beads and buttons. However the crochet process is the same and it uses only chain stitch and single crochet stitch, so it is easy to learn.


Turkish Flat Bead Crochet Bracelet Tutorial with Metallic Cord


Here are the materials you will need to make 2 bracelets:

- 1 Spool of Metallic Braided Nylon Cord - 0.9 mm in Ø - Gold, Silver or Copper - 6 m/6.5 yd
- 2 Buttons - Antique Silver, Brass or Copper
- Miyuki Duracoat Galvanized Seed Beads - Size 6 ~ 100 beads
- 1 Tapestry Needle Size 20

Or you can get a kit HERE with all the supplies listed above.

And why 2 bracelets? It is because each bracelet takes about 3 yard of cord. so there is enough on the spool for two bracelets...

Tools needed:
- 1 Crochet Hook - Amour Size 0, Clover Soft Touch 0, or Lacis 3
- Thread Burner or Zapper - Available Here
- 1 Bead Mat


Turkish Flat Bead Crochet Bracelet Tutorial with Metallic Cord - Step 1

1. With the thread burner, melt the end of the cord and make a pointed end, just like a needle. 


Turkish Flat Bead Crochet Bracelet Tutorial with Metallic Cord - Step 2

2. Load about 50 beads. 


Turkish Flat Bead Crochet Bracelet Tutorial with Metallic Cord - Step 3

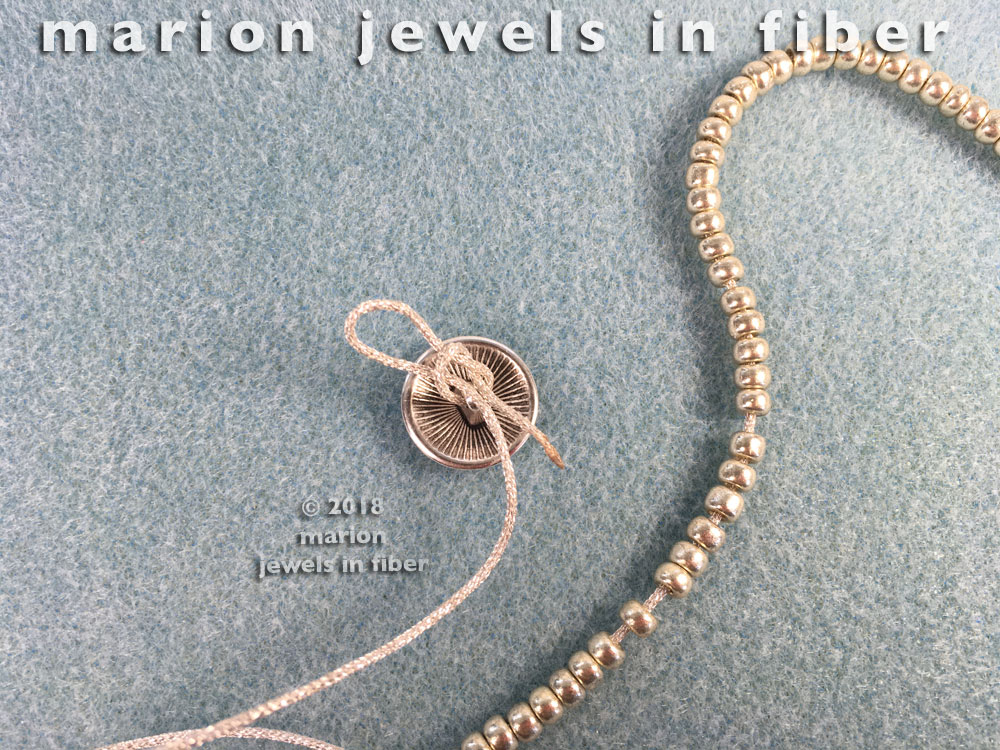
3. If you already know which button you will be using, put to cord though the shank. If you are not sure which button you will use, you can wait to attach it until later. 


Turkish Flat Bead Crochet Bracelet Tutorial with Metallic Cord - Step 4

4. Make a slip knot. 


Turkish Flat Bead Crochet Bracelet Tutorial with Metallic Cord - Step 5

5. Insert the crochet hook into the slip knot.  


Turkish Flat Bead Crochet Bracelet Tutorial with Metallic Cord - Step 6

6. Crochet 2 chain stitch. Slide 1 bead down. Crochet 1 chain stitch.


Turkish Flat Bead Crochet Bracelet Tutorial with Metallic Cord - Step 7

7. Turn the work around and make 1 single crochet stitch right into the first chain stitch. Slide a bead down and make a chain stitch. 


Turkish Flat Bead Crochet Bracelet Tutorial with Metallic Cord - Step 10

8. Turn the work around. Make 1 single crochet stitch right into the previous bead (not the one you just added, but the one already in on the other side). Slide 1 bead and add a single crochet chain stitch. 

Repeat this step until you get the bracelet length you want. 


Turkish Flat Bead Crochet Bracelet Tutorial with Metallic Cord - Step 8

9. Tighten the button in. With the thread burner cut the cord leaving a 2mm tail. 


Turkish Flat Bead Crochet Bracelet Tutorial with Metallic Cord - Step 9

10. With the thread burner melt the end and press it in with your finger or the thread burner cap. If you have never done this before, test this step first on a small piece of cord before proceeding on the bracelet. 


Turkish Flat Bead Crochet Bracelet Tutorial with Metallic Cord - Step 11

11. Make the button loop with single chain stitches. 


12. Cut the cord with the thread burner. Melt the end and press it flat in with your finger or the thread burner cap so it will fit into the tapestry needle Size 20. Stitch the loop back in. Cut the cord leaving a tail about 2-3mm long. Melt the tail and press it into the crochet. Doing this close to one of the bead will make the burn mark less noticeable. 


Turkish Flat Bead Crochet Bracelet Tutorial with Metallic Cord


The first bracelet is now ready to wear. Repeat these steps for the second bracelet and give the second one to your best friend or daughter... These bracelets are easy to wear and light weight. They can be stacked, worn in water, and washed when needed. 


References

Turkish Flat Bead Crochet Bracelet with C-Lon Tex 400 Bead Cord  - Go here to see this step by step tutorial 


Materials & Tools


Thursday, May 17, 2018

Celtic Bracelet DIY Tutorial | Knotted Bracelet made with Pretzel Knots, Josephine Knots, or Carrick Bend Knots

Celtic Knotted Bracelet DIY Tutorial | Bracelet made with Pretzel Knot, Josephine Knot , or Carrick Bend Knot


These bracelets are made with a repeated knot pattern. The actual knot follows a braided pattern and is sometimes called a Carrick Bend, a Josephine Knot, a Pretzel Knot, or Pretzel Link depending on which tradition you follow. The knot is easy to do once it is mastered. 

Metallic Braided Nylon Cord

For these Celtic Knotted Bracelets, I followed the DIY Ombre Knotted Bracelet Tutorial written by Beth on the Remarkably Domestic Blog with a few differences shown below. The Ombre Knotted Bracelet is made with Chinese Knotting Cord in Medium Weight available HERE. Whereas I used Metallic Braided Nylon Cord (Copper, Silver, and Gold) for the first bracelet I made shown at the top. Then I played around the the Metallic Cord and Black Chinese Knotting Cord. I really like how it emphasizes the Celtic look of the knot. I also altered the way the button is attached and how the cords are ended, using a thread burner rather than glue. It is nor permanent and faster. 

Here is how to make these Celtic Knotted Bracelets:

- 4 yard of Metallic Braided Nylon Cord - 0.9 mm in Ø
- 2 yard of Black Chinese Knotting Cord - 1mm Ø
-1 Heart Button - Available Here (8th down the page)
- A Thread Burner - Available Here

If you want to make all three bracelets, get a material kit here.

Cut two metallic cord and one 1mm chinese knotting cord in 2 yard lengths. 

Celtic Bracelet DIY Tutorial | Knotted Bracelet made with Pretzel Knots, Josephine Knots, or Carrick Bend Knots

Celtic Bracelet DIY Tutorial | Knotted Bracelet made with Pretzel Knots, Josephine Knots, or Carrick Bend Knots

Celtic Bracelet DIY Tutorial | Knotted Bracelet made with Pretzel Knots, Josephine Knots, or Carrick Bend Knots

Celtic Bracelet DIY Tutorial | Knotted Bracelet made with Pretzel Knots, Josephine Knots, or Carrick Bend Knots

Celtic Bracelet DIY Tutorial | Knotted Bracelet made with Pretzel Knots, Josephine Knots, or Carrick Bend Knots

Celtic Bracelet DIY Tutorial | Knotted Bracelet made with Pretzel Knots, Josephine Knots, or Carrick Bend Knots

Celtic Bracelet DIY Tutorial | Knotted Bracelet made with Pretzel Knots, Josephine Knots, or Carrick Bend Knots

Celtic Bracelet DIY Tutorial | Knotted Bracelet made with Pretzel Knots, Josephine Knots, or Carrick Bend Knots

Celtic Bracelet DIY Tutorial | Knotted Bracelet made with Pretzel Knots, Josephine Knots, or Carrick Bend Knots

Celtic Bracelet DIY Tutorial | Knotted Bracelet made with Pretzel Knots, Josephine Knots, or Carrick Bend Knots

Celtic Bracelet DIY Tutorial | Knotted Bracelet made with Pretzel Knots, Josephine Knots, or Carrick Bend Knots

Celtic Bracelet DIY Tutorial | Knotted Bracelet made with Pretzel Knots, Josephine Knots, or Carrick Bend Knots

Celtic Bracelet DIY Tutorial | Knotted Bracelet made with Pretzel Knots, Josephine Knots, or Carrick Bend Knots

Celtic Bracelet DIY Tutorial | Knotted Bracelet made with Pretzel Knots, Josephine Knots, or Carrick Bend Knots

Celtic Bracelet DIY Tutorial | Knotted Bracelet made with Pretzel Knots, Josephine Knots, or Carrick Bend Knots

Celtic Bracelet DIY Tutorial | Knotted Bracelet made with Pretzel Knots, Josephine Knots, or Carrick Bend Knots

Celtic Bracelet DIY Tutorial | Knotted Bracelet made with Pretzel Knots, Josephine Knots, or Carrick Bend Knots

The bracelet is all done. The silver and black one shown below has 14 consecutive knots and measure approximately 7 inch (17.5 cm). The copper and black one has 15 knots and measure 7.5 inch (19 cm). The gold and black one, 16 knots, 8 inch (20 cm). Your measurement may vary a bit depending on how tightly you tie the knots.

Celtic Bracelet DIY Tutorial | Knotted Bracelet made with Pretzel Knots, Josephine Knots, or Carrick Bend Knots


I hope you had a good time making this bracelet. Now try alternative materials, thicker or thinner cords, other colors... Find out what you like best, play around... This bracelet below is made with the 3 metallic colors Copper, Silver and Gold...


References


Materials

Heart Buttons - 8th down the page


Sunday, July 30, 2017

Kumihimo with PIP Beads

Kumihimo with PIP Beads


I bought some Preciosa PIP Beads a while ago... and thought they would be perfect for kumihimo. I decided to play around with them and to do a quick project... Many bracelets later, I have now 4 design variations, a 25 page manual with all the steps, the beads sequences for each variation, the bracelet length versus wrist size, and bead numbers charts, all broken down in easy to follow steps with over 50 clear and easy to understand pictures and charts. 


How did this happen?


Kumihimo with PIP Beads


While working on this project, I fell in love with the PIP beads. They are shaped like small petals and perfectly suited for kumihimo. They lend themselves to flower designs and to dimensional geometrical designs. 


Here is what I learned along the way... 


Kumihimo Bracelet Tutorial with PIP Beads


PIPS  All Around - Design 1

My first design, very dimensional, sculptural and geometrical, has a simple bead placement with Preciosa PIPs and Miyuki 8s.

Choices
While making these, I experimented using the standard C-Lon Bead Cord and C-Lon Fine Weight Bead Cord. The result is the same, even I cannot tell which one was done with which cord, but the Fine Weight is a lot easier to work with. The beads slide up and down the cord more freely. And since I add a central cord at the braid center for my bracelets, the C-Lon Fine Weight Bead Cord with a 24 lb breaking strength is plenty strong enough. So that's settled, Fine Weight is the way to go.

Then of course there is the choice of central cord size, I played around a bit and the 1 mm Nylon Satin Cord works well. It does not add bulk to the bracelet, and it keeps the bracelet nice and flexible.

Next I decided to try a bracelet with a smaller flatter profile. The PIP All Around is round...


Kumihimo Bracelet Tutorial with PIP Beads


Half Round PIP Design - Design 2

So I designed one with PIPs (mixed with 8s) on one side and 8s on the other side. That required careful notes, charts to keep track of the bead pattern and ultimately the creation of a system to keep track of the bead sequences. I ended up coming up with a great way using spreadsheets and charts. It makes following bead patterns very simple and easy.

The bracelet is very modern, with a lower profile than the first design... It is half round.

At this point, I was really intrigued, I had developed a system to keep track of the bead placement and sequences, and I really wanted to make something with a flower design with kumihimo... So more experimentation and later... The result...


Kumihimo with PIP Beads

PIP Flowers - Design 3

Flowers like little cluster of petals placed at regular intervals on the beaded braid. So yes, now I was pretty happy, I had three design variations in three colors. I did a demo at an art center and everyone loved the bracelets. Lots of woman wanted to buy one, but they are samples not for sale... So next - time to write the manual.


Kumihimo with PIP beads


By the time I write a manual, I have already made the piece that will be in the tutorial many times. The process by then has been refined, all the production kinks are already out of the way. And while making the piece to be featured, I stop to take pictures and I write down the steps one by one. When that's done, I start over again and make another bracelet, but this time I simply follow the directions I wrote, and edit as I go. The goal is to make sure everyone can follow the steps.

This is not the way I used to write tutorials years ago. I have learned that doing it this way will save us lots of time in the long run. Less hassles for you, less questions, less emails for me to respond to...

So yes, I was all done ready for the final steps, an outside editor and the kit assembly... To assemble kits, cords have to be cut, beads measured and counted, clasp added, then it gets packaged and labeled. But late at night... 


Duo PIP Flower Design - Design 4

I decided to experiment once again with a new version of the flower design with a center bead and dual coated PIP beads, PIPs with one color on one side and another on the other side. 


So yes, the next design challenge, figuring out how to load the dual sided PIPs onto the cord to get them to face the right way... More charts, more spreadsheets, another addition to the tutorial, and three additional colors. I am finally done!


The flowers alternate, one with the transparent colored side up, the next with the metallic coated side facing us, and the flower has a bead at the center of each flower design.


Color Choices


And the colors with the dual sided PIPs...


You can find out more about this project HERE and if you interested in making these bracelets without having to spend the time experimenting, undoing and redoing... The 25 page manual, the kits with all the cord & beads, and tool bags are available at Marion Jewels in Fiber online store. 

I thought it would be nice to write about the process of creating a kit and a tutorial... and I could go on. I could speak about how the braid starts and endings evolved. The new way presented in this kit, not seen elsewhere, is so much easier and simpler than my early attempts. Simple and elegant seem simple, right, but that's when someone else has already done it and shows the way. Otherwise it is often only found after a long search. Simplifying is harder than it looks... You might have to get a kit or manual to understand what I am talking about. -Marion ;))

Oh, and read my next post comparing kumihimo to other beading techniques... It has newer pictures of the PIP bracelets.