Showing posts with label Turkish Crochet. Show all posts

Friday, May 25, 2018

Turkish Flat Bead Crochet Bracelet Tutorial with Metallic Cord

Turkish Flat Bead Crochet Bracelet Tutorial with Metallic Cord


This is a new version based on a very popular crochet bracelet I first wrote about in 2012. Please refer to the original post of December 16, 2012 for an alternate tutorial. A brand new Metallic Braided Nylon Cord is featured in this new tutorial with coordinated beads and buttons. However the crochet process is the same and it uses only chain stitch and single crochet stitch, so it is easy to learn.


Turkish Flat Bead Crochet Bracelet Tutorial with Metallic Cord


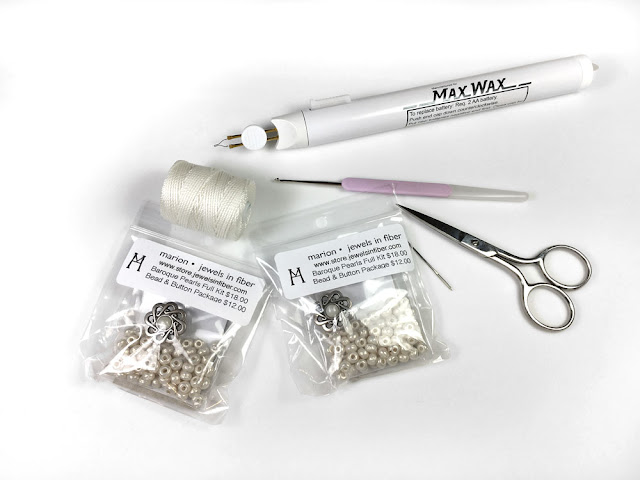
Here are the materials you will need to make 2 bracelets:

- 1 Spool of Metallic Braided Nylon Cord - 0.9 mm in Ø - Gold, Silver or Copper - 6 m/6.5 yd
- 2 Buttons - Antique Silver, Brass or Copper
- Miyuki Duracoat Galvanized Seed Beads - Size 6 ~ 100 beads
- 1 Tapestry Needle Size 20

Or you can get a kit HERE with all the supplies listed above.

And why 2 bracelets? It is because each bracelet takes about 3 yard of cord. so there is enough on the spool for two bracelets...

Tools needed:
- 1 Crochet Hook - Amour Size 0, Clover Soft Touch 0, or Lacis 3
- Thread Burner or Zapper - Available Here
- 1 Bead Mat


Turkish Flat Bead Crochet Bracelet Tutorial with Metallic Cord - Step 1

1. With the thread burner, melt the end of the cord and make a pointed end, just like a needle. 


Turkish Flat Bead Crochet Bracelet Tutorial with Metallic Cord - Step 2

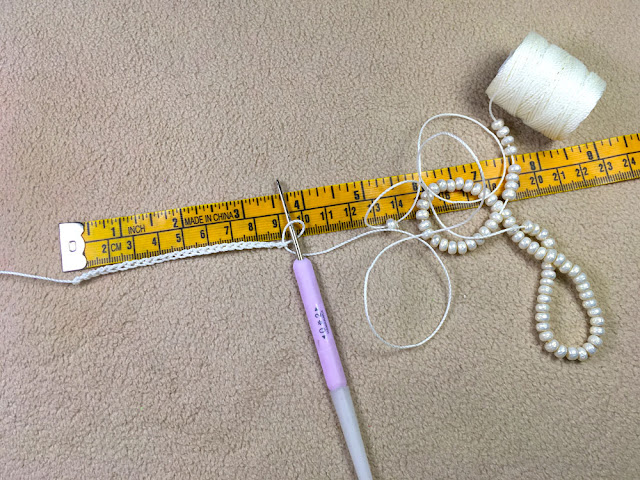
2. Load about 50 beads. 


Turkish Flat Bead Crochet Bracelet Tutorial with Metallic Cord - Step 3

3. If you already know which button you will be using, put to cord though the shank. If you are not sure which button you will use, you can wait to attach it until later. 


Turkish Flat Bead Crochet Bracelet Tutorial with Metallic Cord - Step 4

4. Make a slip knot. 


Turkish Flat Bead Crochet Bracelet Tutorial with Metallic Cord - Step 5

5. Insert the crochet hook into the slip knot.  


Turkish Flat Bead Crochet Bracelet Tutorial with Metallic Cord - Step 6

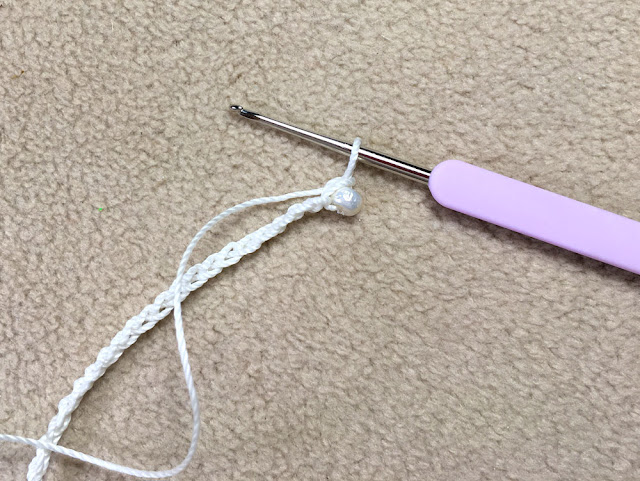
6. Crochet 2 chain stitch. Slide 1 bead down. Crochet 1 chain stitch.


Turkish Flat Bead Crochet Bracelet Tutorial with Metallic Cord - Step 7

7. Turn the work around and make 1 single crochet stitch right into the first chain stitch. Slide a bead down and make a chain stitch. 


Turkish Flat Bead Crochet Bracelet Tutorial with Metallic Cord - Step 10

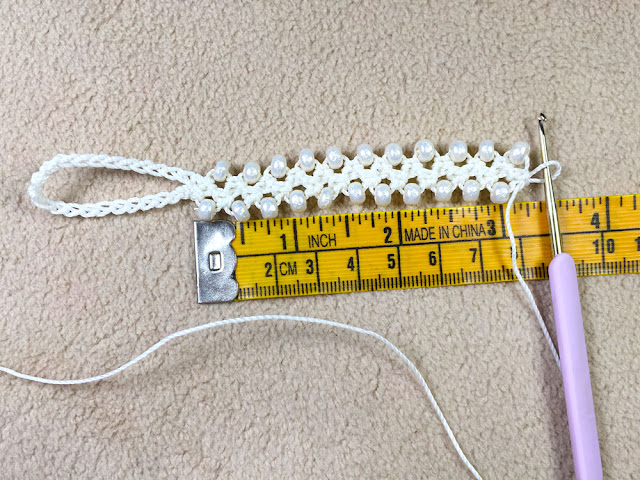
8. Turn the work around. Make 1 single crochet stitch right into the previous bead (not the one you just added, but the one already in on the other side). Slide 1 bead and add a single crochet chain stitch. 

Repeat this step until you get the bracelet length you want. 


Turkish Flat Bead Crochet Bracelet Tutorial with Metallic Cord - Step 8

9. Tighten the button in. With the thread burner cut the cord leaving a 2mm tail. 


Turkish Flat Bead Crochet Bracelet Tutorial with Metallic Cord - Step 9

10. With the thread burner melt the end and press it in with your finger or the thread burner cap. If you have never done this before, test this step first on a small piece of cord before proceeding on the bracelet. 


Turkish Flat Bead Crochet Bracelet Tutorial with Metallic Cord - Step 11

11. Make the button loop with single chain stitches. 


12. Cut the cord with the thread burner. Melt the end and press it flat in with your finger or the thread burner cap so it will fit into the tapestry needle Size 20. Stitch the loop back in. Cut the cord leaving a tail about 2-3mm long. Melt the tail and press it into the crochet. Doing this close to one of the bead will make the burn mark less noticeable. 


Turkish Flat Bead Crochet Bracelet Tutorial with Metallic Cord


The first bracelet is now ready to wear. Repeat these steps for the second bracelet and give the second one to your best friend or daughter... These bracelets are easy to wear and light weight. They can be stacked, worn in water, and washed when needed. 


References

Turkish Flat Bead Crochet Bracelet with C-Lon Tex 400 Bead Cord  - Go here to see this step by step tutorial 


Materials & Tools


Wednesday, July 13, 2016

Barefoot Sandals - Jewelry for your Feet - DIY Tutorial

Barefoot Sandals - DIY Crochet Tutorial


Barefoot sandals is a fabulous way to decorate your feet for a day at the beach, a beach wedding, for walking around the house barefoot in summer, or hanging out by a pool. Barefoot sandals can also be worn in combination with pumps, or in addition to regular sandals.

Making barefoot sandals is a perfect summer project. Here is a pattern made with Turkish Flat Bead Crochet and C-Lon Tex 400 Bead Cord. For more detailed instruction on the pattern, go to previous post on the Turkish Flat Bead Crochet Bracelet or go to YouTube Video.


Barefoot Sandals - DIY Crochet Tutorial

Materials and Tools


Turkish Flat Bead Crochet Kits -1 Full Kit + 1 additional Bead & Button Package. Each bead package has enough beads and 1 button for 1 barefoot sandal. In addition to the bead pack, the full kit includes a tapestry needle, a spool of C-Lon Tex 400 Bead Cord, and a quick printed reference of the Turkish Flat Bead Crochet. 


Steel Crochet Hook - I like the Hamanaka 0-2 as one side is good for the Tex 400 cord and the other for the standard C-Lon Bead Cord, but any of the hooks recommended for C-Lon Tex 400 Bead Cord will do. 

Thread Burner or Zapper - To finish the ends cleanly.

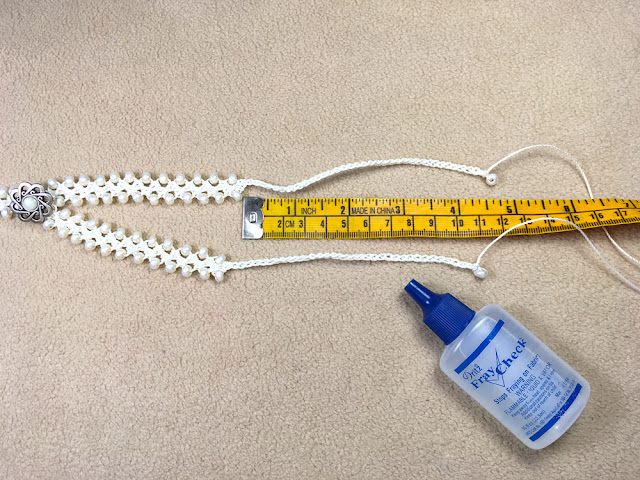
Fray Check - If you work with white or light colors and do not want a burn mark to show. 

Turkish Flat Bead Crochet Bracelet Tutorial - Go to this earlier post for detailed crochet instructions. 

 Step by Step

Barefoot Sandals - DIY Crochet Tutorial

1. Count all the beads in both bead packages and divide them equally. Beads are measured by volume and weight, not by exact amount of beads. Load half of the beads onto the cord. The other half will be for the second barefoot sandal. 

In mine, the central section has 22 beads, the two side sections have 24 beads, and 1 bead is at the end of each chain, so that is a total of 72 beads. If you have less than 144 beads, then adjust the central or side section and make them with fewer beads. 


Barefoot Sandals - DIY Crochet Tutorial

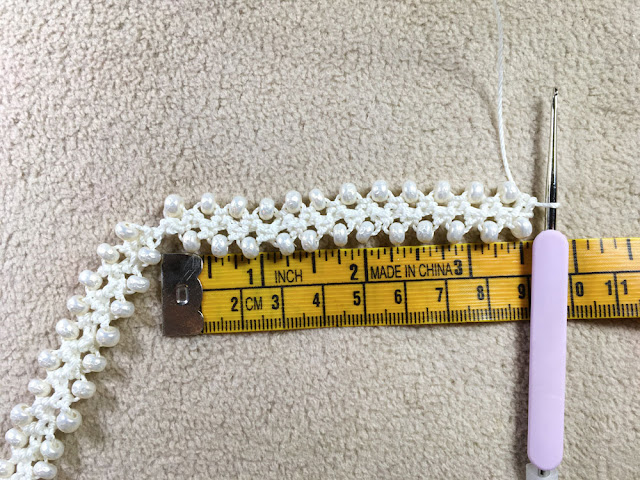
2. Make a chain with chain stitch 9 cm (3.54 inch) long. I make my chain stitch taut, but pulling the loop closed after each chain stitch. I called this technique Closed Loop Chain


Barefoot Sandals - DIY Crochet Tutorial

3. Slide a bead down. Make a chain stitch right after the bead. It locks the bead in place. Insert the crochet hook back into the 2nd chain stitch prior to the bead and make a single crochet stitch. * Slide a bead. Make a chain stitch. Turn the work around. Insert the crochet hook right above the previous bead (not the one you just added) and do a single crochet stitch. * (Continue from * to *)


Barefoot Sandals - DIY Crochet Tutorial

4. Make this section with 18-22 beads, approximately 7.5 cm to 9 cm (2.75 inch to 3.54 inch) long. Secure the cord end for the toe loop. Try it on to see if like the positioning before proceeding to the next step.


Barefoot Sandals - DIY Crochet Tutorial

5. Start the next section. Make 2 chain stitches, slide a bead, and make 1 chain stitch. 


Barefoot Sandals - DIY Crochet Tutorial

6. Turn the work over, insert the crochet hook at the first chain stitch, and make a single crochet stitch. 

Barefoot Sandals - DIY Crochet Tutorial

7. Slide a bead and continue.

Barefoot Sandals - DIY Crochet Tutorial

8. Make this section with 18-24 beads, approximately 7.5 cm to 9.5 cm (2.75 inch to 3.75 inch) long. Continue with the closed loop chain section for 12 cm (4.75 inch) long. Secure 1 bead at the end of the chain. Cut the cord off.


Barefoot Sandals - DIY Crochet Tutorial

9. Make a new section repeating Steps 5 through 8. Now with the tapestry needle, stitch the separate section to the middle. Attach the button. Stitch the toe loop closed if you did not do it in step 4.


Barefoot Sandals - DIY Crochet Tutorial

10. Secure the ends either with a thread burner or with Fray Check.

With the thread burner practice on a spare piece of cord, until you get it right. I cut my cord leaving a 3 mm (1/8th of an inch) tail and then I melt the end into a small bead and flatten it against the rest of the crochet. As it leaves a small burn mark I do it behind the button and behind at the toe loop. 

For the end at the end of the closed loop chain, I prefer to use Fray Check, especially with light colored cord. With Fray Check, put a drop on the cord end and where the cord touches the other cords. Wait for it to dry. Cut the end and put another drop. Let it dry. 


Barefoot Sandals - DIY Crochet Tutorial


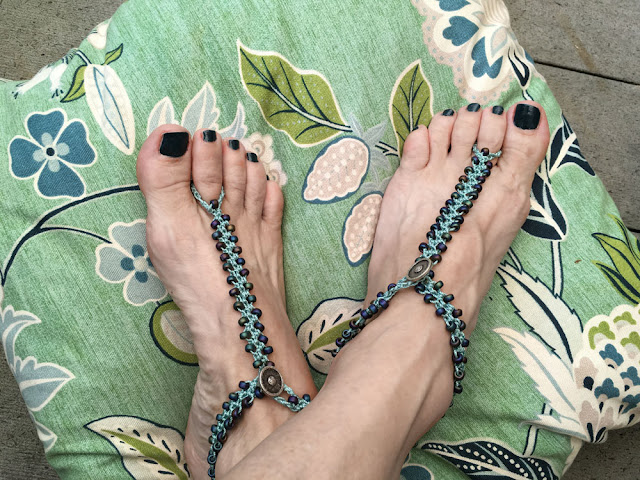
Over July 4th weekend I designed barefoot sandals out of existing bracelet kits. I wore this pair on July 4th at a pool party in Paradise, CA. I live down from Paradise in Chico, CA. The pictures below were taken after most guests had already left...


Design Alternatives

This design with the tie in the back of the foot will fit most feet. The first design I did which is below was not as adjustable, but it is a very pretty alternative if you are making these for yourself as you can easily fit them to your feet and toes. 

Other option is to make hand decoration. Attach the toe loop on your middle finger instead and tie the cord around your wrist. Or use the design alternative shown below... and loop the bracelet over the button. 


Barefoot Sandals - DIY Crochet Tutorial

These were made as follows. First the toe loop, I made mine a bit short. It fit my toe, but will not fit someone with a larger toe... Then the first central section. I made mine with 24 beads. Then the second section goes all around the ankle and is finished by a loop that goes over the button.


Care for the Barefoot Sandals

The C-Lon Tex 400 Bead Cord as all bonded nylons is very durable. It can be washed with soap and water as needed. If it gets wet, it dries quickly. Occasional exposure to sea water and pools does not seem to be damaging, but rinsing after exposure is recommended. Colors will fade with long exposure in the sun, so if you are sunbathing, removing the barefoot sandals might be best. 

I will test if an application of Thread Heaven is helpful as a UV protector, so keep posted... If you have any questions about this project, do not hesitate to leave a comment or contact me directly via my website. Have a great summer! - Marion

References


Saturday, September 20, 2014

Princess-Warrior Bracelet Continued


Occasionally I find better buttons for a design, so I changed the antique copper flower buttons to heart buttons for the closure for this bracelet. The flowers are still used as decorative elements.


Then we can play around with positioning. 


By bringing the flowers closer together...


Or setting them at a diagonal...


or by using them for another project and leaving them out completely...


Or we can create a triangular composition with the flowers. This is my favorite one at present. 

Let me know if you come up with another possibility... See earlier posts about Turkish Flat Bead Crochet and the Princess Warrior Bracelets

Get kits, bead & button packages, and the tutorials > Turkish Flat Bead Crochet & Princess Warrior Bracelet Kits

Wednesday, August 27, 2014

The Princess Warrior Bracelet Collection

Variations of the Princess Warrior Bracelet - Golden Flowers done with C-Lon Bead Cord in Black & Tan,
Gold Miyuki Duracoat Galvanized Beads and Italian Metal Buttons


This is the next step up from the Turkish Flat Bead Crochet Bracelet. The Turkish Flat Bead Crochet is patterned after Turkish Oya, the beautiful crochet trims found mostly around scarves edges in Anatolia. 

This new bracelet is an original design. I have never seen it done anywhere, although that does not mean someone else did not stumble on this same design elsewhere. This wider bracelet is made with C-Lon Bead Cord and Miyuki 6/0 beads, whereas the Turkish Flat Bead Crochet Bracelet is made with C-Lon Bead Cord Tex 400 and 5/0 beads. This sophisticated bracelet is reminiscent of armor, the Viking or Greek, "Princess Warrior" look, so I decided to keep this collection with metallic beads. The kits are made with Miyuki duracoat galvanized beads and include Italian metal buttons collected over time. The duracoat finish gives the Miyuki beads a durable metallic coat, so you can expect the bracelet to last over time.

Princess Warrior Bracelet - Golden Flowers Bead & Button Pack & Spool of C-Lon Bead Cord 

Several of the bracelets I have been wearing are earlier prototypes made as I was refining the techniques to create the final bracelets. The final design adopted for this bracelet tutorial minimizes stretch, wear well over time, and includes technical aspects that will help if ever the buttons need to be moved, restitched, or the button loops repaired.

Picture from the tutorial

Once the final design was selected, I photographed each of the steps while making the bracelet. The next step was to make a second bracelet while writing the instructions and looking at the photos. Then, I revised the written instructions accompanying the photos, while making a third bracelet.  The full tutorial is a 15 page PDF document with over 20 large pictures. A paired and scaled down printed version comes with the kits and the larger PDF version is sent by email. Both include the Turkish Flat Bead Crochet Mantra, an easy way to remember the pattern. 


Princess Warrior Bracelet - Silver Zuni Circles Bead & Button Pack & Spool of C-Lon Bead Cord 

Matching materials for these kits has been a challenge. I can attest to it by the number of bead finishes and buttons I purchased over time that did not make the final cut. Most of the Italian buttons used in these kits are no longer available, so the number of kits available is limited to the stock on hand.


Princess Warrior Bracelet - Bronze Double X

While wearing the earlier and final versions of this bracelet at shows, shops, restaurants, I have gotten lots of comments from people at large. This bracelet attracts lots of attention from a wide range of people of all ages, so make one for yourself, one for your daughter, or some for friends.


Princess Warrior Bracelet - Pewter Bindu Circles 

Design variations can be done by adding attached elements, by changing the width of the bracelets and of course by altering colors, beads, and buttons. 

Princess Warrior Bracelet - Antique Copper Flowers

The Antique Copper Flower Bead & Button kit is the only one that comes with newly produced copper buttons. These flower buttons are a traditional button design. The Bronze Double X comes with Bronze Metallic Miyuki Beads Size 6 - the metallic finish on these beads is more susceptible to darkening over time than the Duracoat finishes. 

Complete Princess Warrior Kit with the Tool Bag including a Super Max Thread Burner
Bead & button packages are also available for the simpler version of this bracelet made with C-Lon Bead Cord Tex 400 and Miyuki Seed Bead Size 5.

Get kits, bead & button packages, and the tutorials > Turkish Flat Bead Crochet & Princess Warrior Bracelet Kits

Sunday, December 16, 2012

Turkish Flat Bead Crochet Bracelet Tutorial
Turkish Flat Bead Crochet Bracelet


Turkish Flat Bead Crochet is easy and fun. A while ago posted this picture and got lots of requests for a tutorial. So here it is to celebrate the arrival of 16 new colors of C-Lon Tex 400 Bead Cord, bringing the total of colors of C-Lon Tex 400 Bead Cord to 72. (As of now there is 116 colors!). That is truly amazing to have all these color choices. It makes working with this cord a pleasure. This tutorial is my holiday present to anyone following my blog and to all my fabulous customers - Thank you!


Turkish Flat Bead Crochet Bracelet Tutorial with C-Lon Tex 400 Bead Cord

Supplies: C-Lon Tex 400 Bead Cord, Beads, Button, Crochet Hook, Scissors, Tapestry Needle


Choosing the color of C-Lon Tex 400 Bead Cord to go with the Miyuki Seed Beads Size E... 

With C-Lon Tex 400 Bead Cord, I use either Miyuki seed beads size 6 or 5 (E), a Hamanaka Double Pointed Steel Crochet Hook Size 0 & 2 (1.5-1.75 mm) or a Kollage Square Crochet Size B. The Hamanaka double pointed crochet hook is fabulous as one end, the larger one, works with Tex 400 Cord and the other end, the smaller one works with the standard size of C-Lon Bead Cord, so all I need is one crochet hook for both sizes of cord. The Kollage hook has the nice square ebony wood handle, but it is out of production at this time, so stock is low. I switch crochet hooks as I work, it is just like changing shoes... 

Turkish Flat Bead Crochet Bracelet Tutorial with C-Lon Tex 400 Bead Cord

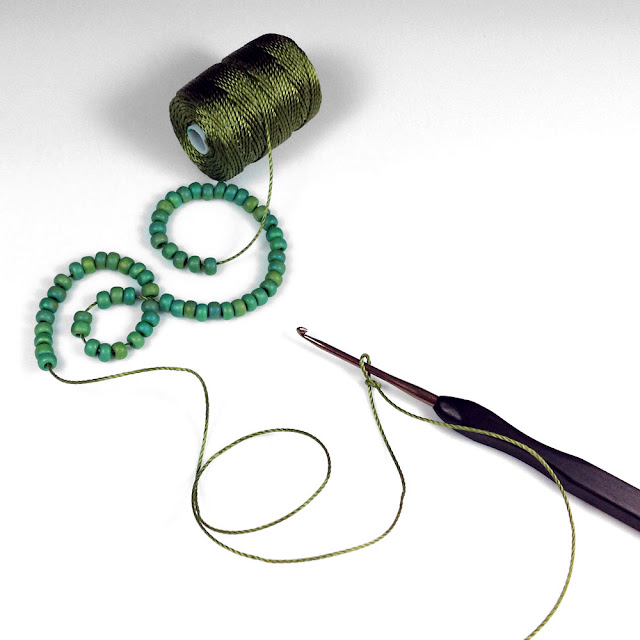
1. Load about 50 beads on the C-Lon Tex 400 Bead Cord.
Make 1 slip knot.


2. Crochet 2 chain stitches.


3. Slide 1 bead and crochet 1 chain stitch. 


4. Turn the work around and make 1 single crochet stitch right into the first chain stitch.


Here is the single crochet stitch complete. 


5. Slide a bead and make 1 chain stitch.
Shown in process above and completed below. 

Turkish Flat Bead Crochet Bracelet Tutorial with C-Lon Tex 400 Bead Cord

Step 5 complete. 


6. Turn the work around. Make 1 single crochet stitch right above the previous bead (not the one you just added), slide 1 bead and add 1 single chain. This shows the step completed. 

Turkish Flat Bead Crochet Bracelet Tutorial with C-Lon Tex 400 Bead Cord


7. Repeat Step 6 until desired length is achieved. This process adds a bead on each side back and forth, with the crocheted part in the center.
In the picture below, the center part of the bracelet has an extra beads in the center. I experimented with this addition, but thus far I tend to prefer the bracelets without the addition. 


Turkish Flat Bead Crochet Bracelet Tutorial with C-Lon Tex 400 Bead Cord

8. Using single chain stitches make the button loop. Attach the button using a tapestry needle and the end tail at the beginning. Adjust loop and stitch ends in. Cut ends or secure them by melting them with the Super Max Thread Burner. 


Turkish Flat Bead Crochet Bracelet Tutorial with C-Lon Tex 400 Bead Cord


9. Hey, the bracelet is finished!!!!

On this piece, I added a bead right at the loop and played around with adding a bead every other row when on the right side. It created a ridge with the bead slightly at an angle. These additions are not necessary but it is fun to play around…

Get bead & button, and tool packages to make this bracelet > Turkish Flat Bead Crochet Kits

If you do not know how to crochet, it is really easy. Check locally for classes or do further research on the web.

—> Check all the fabulous colors of C-Lon Bead Tex 400 Cord
—> Check Options for Metal Buttons
—> Check Bead Crochet Tools  including the crochet hooks mentioned above and the Tubular Bead Crochet Starter Jig & Tutorial to make bead crochet ropes
—> Check the Super Max Thread Burner
—> Earlier post on Turkish Flat Bead Crochet


Turkish Flat Bead Crochet Barefoot Sandals

Check this new tutorial for barefoot sandals made with the same technique > Barefoot Sandals - Jewelry for your Feet

Princess-Warrior Bracelets


PLUS - Once the basic Turkish Flat Bead Crochet is mastered, take it to the next step to wider armor like bracelets reminiscent of Warrior-Princess ornaments > Princess-Warrior Bracelet Collection
 
Leftover beads?
 

Make a key chain ornament, a zipper pull or a purse embellishment... Mix beads... Let your imagination soar and have fun with this technique.