Showing posts with label Kits. Show all posts

Saturday, August 17, 2019

Necklace Cord for the Knotted Beaded Charms


To make the necklace cord for the knotted bead charm, you will need the following:

–> 1mm Chinese Knotting Cord

–> 1.5 mm Sterling Silver or Gold Filled Clasp

–>  Poly Zap Super Glue

–> Thread Burner

–> Chain Nose Pliers

For longer cords and smaller charms, I like to use a thinner Chinese Knotting Cord, so look at the New Fine and Fine size, and even the Extra Fine size as possible options. Or choose a thicker Chinese Knotting Cord such as the HDQ weight cords for a heavier charm. 

Or forgo the clasp and use a square knot slide closure. That's the same closure used for the Square Knot Bracelet Trio. 

–> Square Knot Bracelet Trio Kits and Tutorials

Go to the previous post for the tutorial on how to make the Knotted Bead Charm. 

Here are some bracelet - beaded charm combo, I like...


Knotted Bead Charms with Hematite or Halo Ring Beads | DIY Video Tutorial

Gold Halo Beads, with Hematite Bead Centers
Bracelet Knotted with C-Lon Tex 400 Bead Cord
Charm knotted with C-Lon Fine Weight Bead Cord Tex 135
Necklace cord made with 1mm Black Chinese Knotting Cord


Knotted Bead Charms with Hematite or Halo Ring Beads | DIY Video Tutorial

All Hematite, with Pearlescent White Hematite Beads
Bracelet Knotted with C-Lon Tex 400 Bead Cord
Charm knotted with the standard size of C-Lon Bead Cord
Necklace cord made with New Fine 201 Pearl Grey Chinese Knotting Cord


Knotted Bead Charms with Hematite or Halo Ring Beads | DIY Video Tutorial

Bracelets made with Gunmetal Halo Beads, and Pearlescent Pink Coral Hematite Beads, knotted with Chinese Coral, Pink Lemonade and Charcoal C-Lon Tex 400 Bead Cord.

Charm knotted with the standard size of C-Lon Bead Cord, with Hematite Ring Beads and Pearlescent Pink Coral Hematite Beads.
Necklace cord made with 1mm Black Chinese Knotting Cord


Friday, May 25, 2018

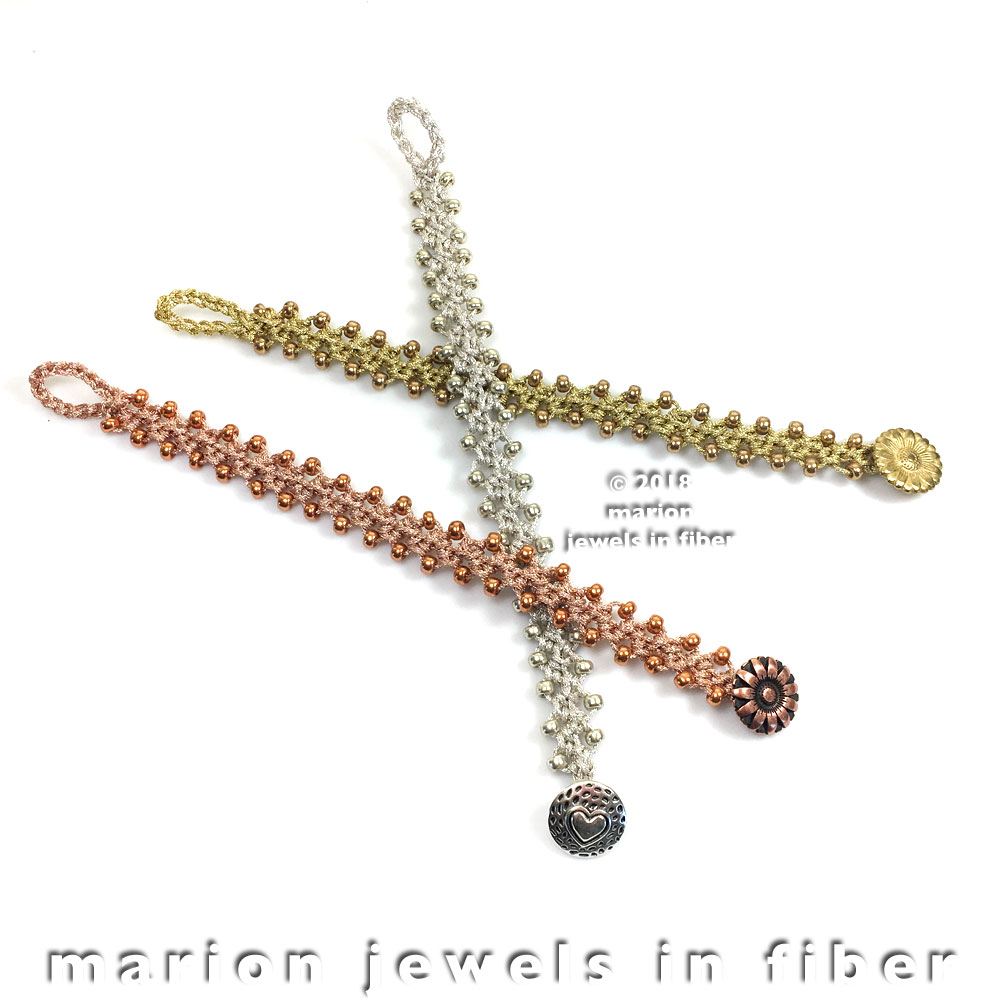
Turkish Flat Bead Crochet Bracelet Tutorial with Metallic Cord

Turkish Flat Bead Crochet Bracelet Tutorial with Metallic Cord


This is a new version based on a very popular crochet bracelet I first wrote about in 2012. Please refer to the original post of December 16, 2012 for an alternate tutorial. A brand new Metallic Braided Nylon Cord is featured in this new tutorial with coordinated beads and buttons. However the crochet process is the same and it uses only chain stitch and single crochet stitch, so it is easy to learn.


Turkish Flat Bead Crochet Bracelet Tutorial with Metallic Cord


Here are the materials you will need to make 2 bracelets:

- 1 Spool of Metallic Braided Nylon Cord - 0.9 mm in Ø - Gold, Silver or Copper - 6 m/6.5 yd
- 2 Buttons - Antique Silver, Brass or Copper
- Miyuki Duracoat Galvanized Seed Beads - Size 6 ~ 100 beads
- 1 Tapestry Needle Size 20

Or you can get a kit HERE with all the supplies listed above.

And why 2 bracelets? It is because each bracelet takes about 3 yard of cord. so there is enough on the spool for two bracelets...

Tools needed:
- 1 Crochet Hook - Amour Size 0, Clover Soft Touch 0, or Lacis 3
- Thread Burner or Zapper - Available Here
- 1 Bead Mat


Turkish Flat Bead Crochet Bracelet Tutorial with Metallic Cord - Step 1

1. With the thread burner, melt the end of the cord and make a pointed end, just like a needle. 


Turkish Flat Bead Crochet Bracelet Tutorial with Metallic Cord - Step 2

2. Load about 50 beads. 


Turkish Flat Bead Crochet Bracelet Tutorial with Metallic Cord - Step 3

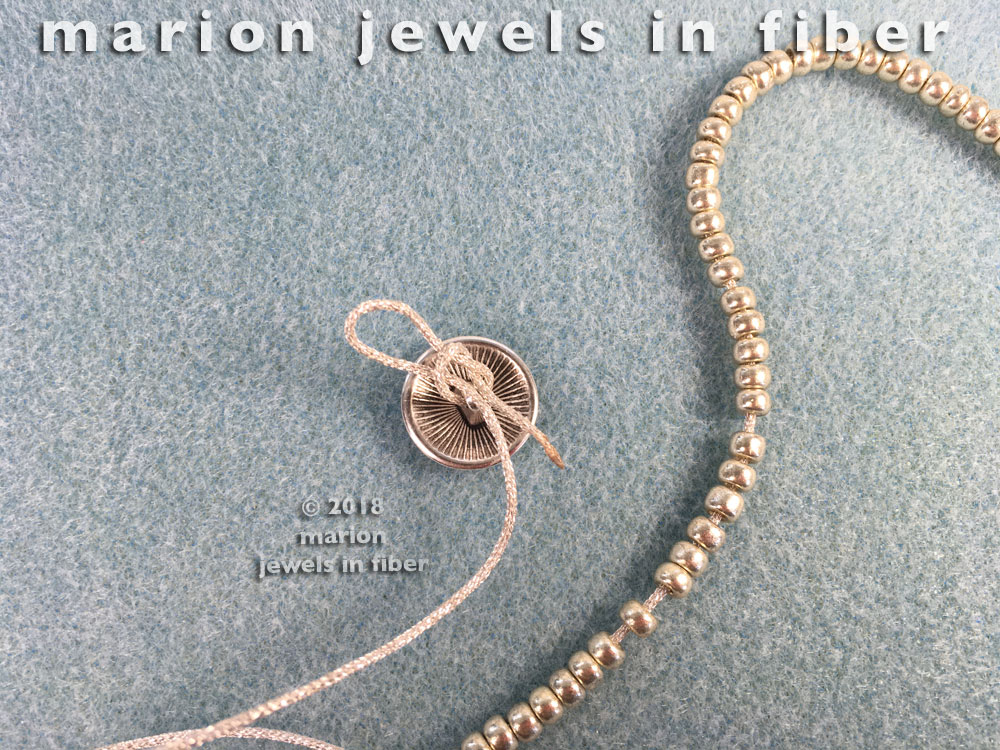
3. If you already know which button you will be using, put to cord though the shank. If you are not sure which button you will use, you can wait to attach it until later. 


Turkish Flat Bead Crochet Bracelet Tutorial with Metallic Cord - Step 4

4. Make a slip knot. 


Turkish Flat Bead Crochet Bracelet Tutorial with Metallic Cord - Step 5

5. Insert the crochet hook into the slip knot.  


Turkish Flat Bead Crochet Bracelet Tutorial with Metallic Cord - Step 6

6. Crochet 2 chain stitch. Slide 1 bead down. Crochet 1 chain stitch.


Turkish Flat Bead Crochet Bracelet Tutorial with Metallic Cord - Step 7

7. Turn the work around and make 1 single crochet stitch right into the first chain stitch. Slide a bead down and make a chain stitch. 


Turkish Flat Bead Crochet Bracelet Tutorial with Metallic Cord - Step 10

8. Turn the work around. Make 1 single crochet stitch right into the previous bead (not the one you just added, but the one already in on the other side). Slide 1 bead and add a single crochet chain stitch. 

Repeat this step until you get the bracelet length you want. 


Turkish Flat Bead Crochet Bracelet Tutorial with Metallic Cord - Step 8

9. Tighten the button in. With the thread burner cut the cord leaving a 2mm tail. 


Turkish Flat Bead Crochet Bracelet Tutorial with Metallic Cord - Step 9

10. With the thread burner melt the end and press it in with your finger or the thread burner cap. If you have never done this before, test this step first on a small piece of cord before proceeding on the bracelet. 


Turkish Flat Bead Crochet Bracelet Tutorial with Metallic Cord - Step 11

11. Make the button loop with single chain stitches. 


12. Cut the cord with the thread burner. Melt the end and press it flat in with your finger or the thread burner cap so it will fit into the tapestry needle Size 20. Stitch the loop back in. Cut the cord leaving a tail about 2-3mm long. Melt the tail and press it into the crochet. Doing this close to one of the bead will make the burn mark less noticeable. 


Turkish Flat Bead Crochet Bracelet Tutorial with Metallic Cord


The first bracelet is now ready to wear. Repeat these steps for the second bracelet and give the second one to your best friend or daughter... These bracelets are easy to wear and light weight. They can be stacked, worn in water, and washed when needed. 


References

Turkish Flat Bead Crochet Bracelet with C-Lon Tex 400 Bead Cord  - Go here to see this step by step tutorial 


Materials & Tools


Friday, September 21, 2012

Kumihimo with Bead Clusters

Braid in Progress - Golden Berries

Braiding in segments or intervals alternating fiber only parts and beads became an obsession. After experimenting on the last piece, shown in my last blog entry on Kumihimo with C-Lon Bead Cord and Beads, I decided to take my experiments one step further. In the previous piece I had played with bead placement and having beads only on specific EZ-Bobs. It created some problems down the line as cords got used at different speed. 

This time I played with groups of bobbins... alternating groups, and found something I have not seen before. The Bead Cluster Kumihimo Kit was born.

Bead Cluster Kit - Pomegranate

The beads in the clusters are in line and it creates a unique look. I choose to keep the segment fairly uniform in length and to repeat bead placement. The length between clusters are shorter for the bracelet and longer for the neckpiece.


Bracelet and Part of Neckpiece Shown

The hand dyed rayon ribbon has a knitted tube structure and is well suited for kumihimo. It variegations when lined up created subtle color shifts. The ribbon has a beautiful sheen, it is slightly iridescent. It is soft against the skin, yet strong. One of the amazing thing about this ribbon is that it collapses onto itself making it possible to load beads with a needle right onto the ribbon. 


Braid in Progress - Passion Flower
Or is it a jelly at the Montery Aquarium?

Choosing the beads was interesting and at time surprising. I run into some problems after choosing a few beads that snagged the ribbon. They had a rough spot inside their holes, so I had to search again for new bead colors. I must have ordered a test tube of almost every color available of Miyuki Size 5 and 6!

Braid in Progress - Blue & Tan


The ribbon in this kit is laid out, cut and tied together. Several steps are already done, this way you will get to the braiding in no time. Just lay the end of the cord into the disk hole and insert the cords right into the slots on each side of the back dot. Insert some of the beads following the sequences marked on the bead bag. Roll the cord onto the EZ-Bobs and start braiding.  


Tool Kit


I braided all my samples with a Mini Kumihimo Disk and Small E-Z Bobs. A tool kit is available for this project and it comes with a project bag making it easy to take your kumi to go. I keep one bag in the car or ready to go at all time, so I can braid anywhere... 

Go to > Bead Cluster Kumihimo Kit


Bracelet and Necklace - Aqua & Bronze


Sunday, June 10, 2012

Shambhala Bracelet Kit


Shambhala Bracelet Kits

Shambhala Bracelet Kits have been on my to do list for a long time out of pure survival.  One can only answer the same question so many times. Blogs are absolutely great for this purpose.

Chinese square knot bracelets can be found on the Hong Kong and Chinese markets made with Jade or various gemstone beads with many knotting variations. Several common denominators are usually present: many square knots, a sliding knot closure and the use of Chinese Knotting Cord. Beyond that the actual design layout, the size and the type of beads and the cord weight are up to the designer. This type of bracelet, updated to a modern version, has become very popular. Some bracelets with real diamonds, precious metals and Tahitian pearls are intended for affluent customers. Stars have been wearing them. JZ was on the cover a magazine wearing one... Hey I had to be told who he was, so much for stars following...


My Shambhala bracelet version is pure Bling without the Ding, dressy or casual, fashionably chic. Last year I made and sold many variations at local markets in the search for the perfect design. I ended up streamlining the stringing, the knotting process and coming up with my own variation - at least it's one I have not seen anywhere else. My customers loved this new version as it is easy to put on and off by oneself, and some of the problems that occur with the sliding closure have been resolved. The kit includes sizing tips and all the material to make one bracelet. It is available in these six original colors:


Rose
Swarovski Crystal Pearls, Stardust & Rhinestone
Bead Accent with Dark Grey Knotting Cord

Black & White
Swarovski Crystal Pearls, Ebony Beads, Beadelle
Pave Bead Accent with Dark Grey Knotting Cord

Black
Swarovski Crystal Pearls, Stardust & Beadelle Pave Bead Accents
with Black Knotting Cord

Copper
Swarovski Crystal Pearls, Stardust & Beadelle Pave Bead Accents
with Brown Knotting Cord

Gold
Swarovski Crystal Pearls, Stardust & Beadelle Pave Bead Accents
with Beige Knotting Cord

Silver
Swarovski Crystal Pearls, Stardust & Beadelle Pave Bead Accents
with Light Grey Knotting Cord

I promised myself that I would contain myself with the 6 original colors, but could not help myself and added this version with the Night Blue Pearls right away... 

Night Blue
Swarovski Crystal Pearls, Stardust & Rhinestone Bead Accents
with Dark Grey Knotting Cord

And here I go again, after one of my customer requested this version,
I had to make the actual bracelet and I like it....

White
Swarovski Crystal Pearls, Stardust & Beadelle Pave
Bead Accents with White Cord 


Get a kit or just the instructions and try this new version of this classical Chinese bracelet updated for 2012!

Oh, and why has this bracelet been called Shambhala or Shambala, depending on the spelling... Shambhala, in the Tibbetan buddhist tradition, is a lost valley, a mythic or real place to be found between the Himalaya and the Gobi desert representing some form of paradise. It also represents the heart chakra or the Buddha nature, and basic human wisdom. Knots have lots of meaning in the Tibetan Buddhist tradition as they represent interconnectedness and perfection especially when they are synetrical. Tying knots is a form of meditation.


>  Shambhala Bracelet Kit