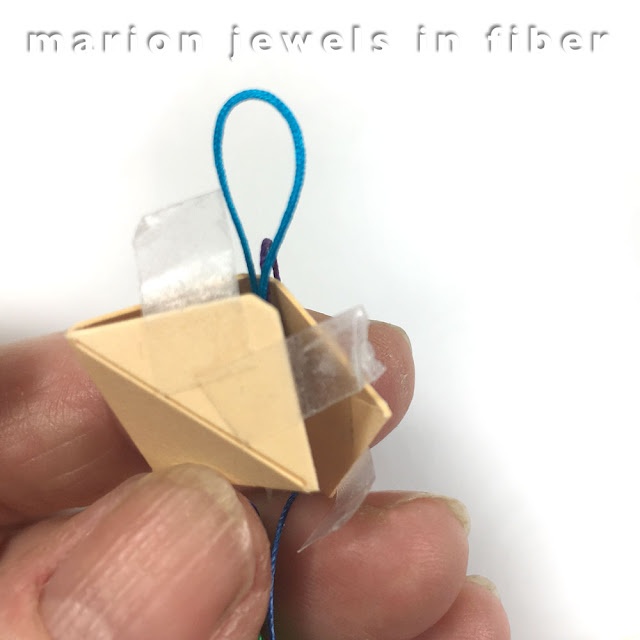
1. If you did not secure the silk thread for wrapping before closing the 3D shape, use a piece of double stick tape as shown above. Work with the thread right out of the spool or card.
Saturday, October 30, 2021
Sankakusui-Koma | Japanese Tops | Wrapping Silk Thread | Tutorial Part 3
In this final part of the Sankakusui-Koma tutorial we will wrap the triangular bi-pyramid with the silk thread. This picks up from the previous post...
2. Secure the thread along one of the top spine with the thread coming out close to the top loop.
4. Go around the the point (blue arrow) and go back towards the loop. The thread does not need to be flushed against the spine, this will get covered later with thread wrapping.
6. Now go around the last point.
7. Continue the wrap following the thread shown with blue arrows. Go around each points keeping the thread right next to each other.
8. As you continue you will see how the thread covers over the top edges and it crosses over at the middle on the sides of the triangular pyramid.
9. To add a new color, or switch colors, use a piece of tape.
10. For this design, continue with both thread colors, keeping one on right and one on left, so they are side by side and do not cross over each other.
11. When the shape is covered, cut the thread off the spool and card. Stitch it underneath the silk wrapping up towards the bi-pyramid edge, then entering back towards the tassel but entering 2 or two thread over. Cut the ends.
Notes, Options and Alternatives
Try any leftover thread you have. So far besides all the tops shown in the tutorial with the material listed, I also made a larger top with a 2 inch by 6 inch rectangular base with Madeira Silk Floss and Metallic Thread. I found the Madeira Silk Floss a bit matte, the metallic thread was perfect. I will keep posting more photos and suggestions. I plan to make a lot more as they will be part of my gift wrapping this year.
Friday, October 29, 2021
Sankakusui-Koma | Japanese Tops | Foundation Shape | Tutorial Part 2
A bit of origami to make the tops, the triangular bi-pyramids called in Japanese Sankakusui-Koma. Continuing from the previous post... Turn rectangular cardboard shapes into a 3 dimensional forms...
You can start with a ready made koma form as shown here or make your own out of cardboard. The sizes of the ready made one I received from Japan are as follows:
Small (Very Tiny) - Japan is really into miniatures... 10 x 30 mm rectangle folds into a triangular bi-pyramid 14 mm wide at its center base and 11 mm tall
Part 2. Foundation Shape
You can start with a ready made koma form as shown here or make your own out of cardboard. The sizes of the ready made one I received from Japan are as follows:
Small (Very Tiny) - Japan is really into miniatures... 10 x 30 mm rectangle folds into a triangular bi-pyramid 14 mm wide at its center base and 11 mm tall
Medium (Perfect Small Size) - That's the one in this tutorial. 15 x 45 mm rectangle folds into a triangular bi-pyramid 21 mm wide at its center base and 17 mm tall
Large (Still Small) - I will play around with this size next... 20 x 60 mm rectangle folds into a triangular bi-pyramid 28 mm wide at its center base and 22 mm tall
Larger Sizes - Print this PDF template at 100%. Or if you want smaller sizes print at lower percentage. Cut the paper shapes. Glue the shapes to cardstock or mark the cardstock the same way. Cut the cardstock. Mark the folds, and score them using a ruler and the back of a butter knife or a bone folder if you have one. Fold away each at each score mark and smooth the fold with your ruler.
1. Orient correctly with score lines at back.
2. Attach the tassel with a piece of double stick tape. For more precise rectangle pieces, cut the tape with scissors. The dispenser cutting edge tool is not accurate enough. If you want to add a bead between the top and the tassel, add it before this step.
3. Fold cord back onto the double stick tape and cut. Repeat for loop.
4. Apply drop of glue to secure. Ot if you prefer you can apply a second piece of tape over the first one as shown on next photo.
5. Pre-attach pieces of double stick tape on top left and left, and bottom right and right as shown in red.
6. Secure thread for wrapping the shape with double stick tape. Leave it attached to the spool or card. Have it come out by the loop at top. Note: this tassel has a bead attached on the suspension cord.
7. Fold top left corner toward loop. Secure double stick tape. Add more pieces of tape if necessary.
8. Fold bottom right corner towards tassel. Secure tape, adding more if necessary. Add double stick tape to the three top and bottom edges of the triangular pyramid. You do not need to cover the base edge of the bi-pyramid.
Optional
• The very tips, the 3 corner at the base of the pyramids remain uncovered, so if you want, color them with a permanent marker like a sharpie.
• Before closing the shape, fill it with rice or a bell if you want it to make sounds.
Thursday, October 28, 2021
Sankakusui-Koma | Japanese Tops | Tassel and Loop | Part 1
For this first part of the Sankakusui-Koma tutorial, we will make the tassel with Winter, a Special Twist Anaito 100% Silk Thread. It is a 3-ply twist of these 3 colors: KNK-800, KNK-075 and KNK-White. We will add a solid color of Anaito 100% Silk Thread KNK-004 for contrast. See the full project description in the previous post.
Part 1: The Tassel and Loop
1. If you have a thread dispenser for the spools, use it. Note: If you use solid colors on cards, either iron out the creases or wash them away at step 7.
2. Fold a 6 inches (15 cm) piece of card stock in 1/2 and wrap it with the silk thread 45 to 60 times depending on how thick you want your tassel to be.
3. With a 12 inch (31 cm) piece of thread and a tapestry needle, go around the thread bundle at the folded side of the card stock. This will be the tassel suspension cord. Use a stronger bonded nylon cord for this part if desired.
4. Tie the 2 thread ends together making sure the bundle is highly help. Use a flat knot, aka square knot reef knot, or common knot, right over left, and left over right. Look at how to tie this knot here if you forgot how. Make sure to tighten the first part of the knot before tightening the second half.
5. Cut the thread at the opposite side of card stock with sharp scissors.
6. Choose the color for the neck wrap. Cut an 18 inch (40 cm) length.
7. Wet the tassel under running water. This is especially important if you work with Anaito Silk on cards as creases leftover from being wrapped around the cards need to be washed out or ironed out ahead of time.
8. Wrap the tassel with a piece of clear plastic and secure it with rubber bands.
9. Pull plastic wrap down to make space for the tassel head and neck. Start the wrap by securing one end of the new thread under the elastic band.
10. Fold it back into a loop. Hold it right at edge of the plastic wrap.
11. Wrap around at edge of plastic wrap, pull through loop, and tighten. Repeat wrap and half hitch.
12. Continue with wraps. End last 2 wraps with half hitches.
13. Put end of thread through the loop.
14. Pull on thread by plastic wrap. It will pull the end on the right. Once it is right at center, and all the loose ends are tucked in, cut the 2 thread ends.
15. Bring the plastic wrap up, and cut the ends of the tassel skirt with sharp scissors. I like to use larger scissor for this task.
The tassel is now completed. Its anatomy comprises of the suspension cord, the head, the wrapped neck, and the tassel skirt.16. For the loop, just take a piece of Chinese Knotting Cord Size E for this project or a larger size for larger komas. Fold it in half and tie it with an overhand knot. It makes a loop.
Sankakusui-Koma - Traditional Japanese Thread Craft Ornamental Top Tutorial
This is a free tutorial on making Japanese ornamental tops known as Sankakusui-Koma, Sankaku-Koma, Hishi-Koma, Hishi-Kazari in Japan, Dragonboat in China, or Berlingot in France.
In Japan these ornaments symbolize good luck and best wishes. I think they will make perfect small gifts or additions to my gift and gift wrapping this year.
As new special dyes and twists Anaito silk just came in, when I was in the middle of designing this new tutorial for these precious ornaments, I decided to play around with the new colors and they are featured here. I also did some in traditional Christmas colors. See photo below.
Special Twists: left - Summer (Red, Blue and White Mix) with Solid KNK Anaito Color #11
Center - Winter (Grey, Navy, White Mix) with Solid KNK Anaito Color #4
Right - Autumn (Red, Blue, Yellow Mix) with Solid KNK Anaito Color #5
These komas are made by folding rectangular pieces of cardboard into a triangular by-pyramids and covering them by wrapping thread around the 3 dimensional shape. This involves a bit of origami, traditional Japanese thread craft, and just for fun an added tassel.
This tutorial is separated in sections:
Japanese Terms
Koma = Top
Sankaku = Triangle
Sankakusui = Triangular Bi-Pyramid
Hishi = Diamond
Kazari = Decoration
Anaito = Buttonhole Twist
Special Dyes: left - Vivid (Dark Mix) with Solid KNK Anaito Color #85
Middle Left - Pastel (Light Mix) with Solid KNK Anaito Color #17
Middle Right - Hydrangea (Mix) with Solid KNK Anaito Color #11
Right - Maple (Mix) with Solid KNK Anaito Color #5
Here is what you need:
- Chinese Knotting Cord Size E, F or G for Loops
- Cardboard Koma Form (ready made medium size for this tutorial) or make your own
- Extra card stock, plastic bag, rubber bands
- Permanent archival double stick tape (Scotch Brand)
- Scissors
- Tapestry Needle (Size 20 to 24)
- Glue, any super glue, or tacky glue will work
Optional - Permanent Markers, Metallic Thread, Temari 100% Silk Thread or other thread, Beads
A Koma Material Bag with all 7 Special Twist and Dye Colors,
6 Solid Anaito Silk Cards, 24 Koma Forms ready to fold,
Chinese Knotting Cord for the loops,
plus a couple of 6 mm beads is available HERE
Or get all the materials separately...
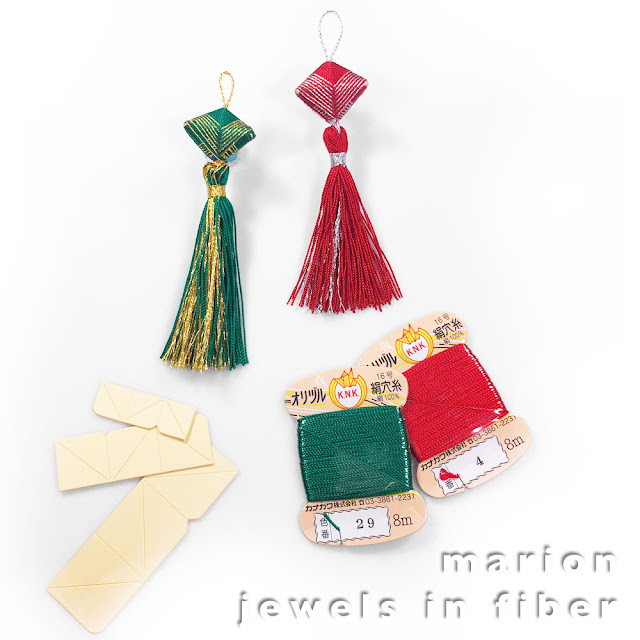
Or get Anaito Silk Colors in Green and Red, and Twisted Metallic Cord, 0.1mm for the wrapping and the 0.4 mm for the loops
The following tutorial was written after making many tops and refining the technique. Even the sequences of steps was changed along the way. Following the instructions step by step will make this project easy and the result will be worth the effort.
Tuesday, September 7, 2021
Compare Anaito and Temari Silk Thread
Anaito Mini-Card Set - 30 Colors Set with 8m Mini-Cards
As an macrame Cavandoli jeweler, I have been working with the "Anaito" Kanagawa 1000 Denier Embroidery Silk for my whole adult life and it is the very best button hole twist thread available in a wide range of colors. I have started importing it directly from the Kanagawa factory this year and I have learned a lot about this thread in the process. Now in addition to the 20 m Anaito silk cards, I am also importing two new products: Anaito Mini-Card Sets, the same silk already available in 20 meter cards, and Temari Silk, a 2-ply silk thread available by cards or as a full set.
I just imported this new silk collection. I can't wait to experiment with it.
Let's compare these two silk thread and learn about thread terms that help understand how these thread are made.
Thread Construction
The KNK Anaito and Temari Silk are made out of filament or reeled silk.
Filament or reeled silk - It means that it is made out of the silk filament reeled out of the cocoon into a continuous fiber. The cocoon has to be of the highest quality, otherwise the filament break.
Anaito - That means buttonhole twist thread in Japanese.
Temari refers to Temari balls, a traditional embroidery thread craft in Japan.
Denier - A unit of weight for thread and cord based on grams per 9 Kilometers whereas the newer Tex unit is grams per 1 kilometer. 1000 Denier corresponds to 111 Tex. (It is a weight measurement so do not use it to compare different type of thread such as nylon versus silk or cotton... Also it is not a diameter nor a tensile strength measurement.)
As you can see, Anaito is made with a 3-ply twisted construction. If you split the thread it separates into 3 parts called plies. If separated further, each of these plies are made out of 12 plies and those plies are made out of silk yarn that is 27 Denier in weight.
If you want to think about it, from a construction point of view, 27 Denier worth of silk yarn (or silk hair, thats the filaments) are first twisted, and 12 of these are plied or twisted in the opposite direction together making a 324 Denier thread (27 d x 12). Then 3 of these newly made thread are twisted and plied together into the final 1000 Denier thread (27d x 12 x 3 = 972d, simplified to the closest round number of 1000.
Whereas, Temari Silk has a 2-ply construction, and one additional process along the way, as the filaments are twisted and plied 4 times along the way versus 3 times for the Anaito Silk.
Kanagawa Anaito vs Fujix Tire #16 Buttonhole Silk - Fujix Tire #16 Buttonhole Silk is composed of 20d x 16 x 3 = 960d, simplified to 1000 Denier.
Twist per Inch - In addition, Anaito is a tighter thread with more twist per inch. This means that when Anaito was twisted into its final 3 ply, more torsion was applied or each plies was given more turns per inch or centimeters, making it a tighter more compact thread. Temari is more softly spun, with less turns per inch or cm, giving the silk a loftier feel. More twist per inch make a more compact thread. Less a loftier one.
2 Ply vs 3 Ply - 2-ply has more sheen and texture, and is oval in shape. 3-ply is round in shape and has a bit less sheen. 3 ply thread is stronger than 2-ply thread.
Card Sizes - Compare card sizes and thread output.
Washing - Both of these silks are can be washed by hand and have permanent dyes that will not bleed when washed. I use lukewarmm water with mild detergent or shampoo. For tougher stains such body oils, try Synthrapol, a detergent with some isopropyl alcohol in it. I keep some on hand to restore any jewelry made with silk thread.
Light - The dyes are however light sensitive and will fade with extended exposure to direct sunlight.
Applications - Based on all of this info, here is my recommendations:
Stringing Beads - Anaito - With or without knots in between, and only with beads with no hard or abrasive edges. If it is too thin, double or triple it or ply it into a 2 or 3 ply cord. Temari not recommended.
Tassels - Anaito - Perfect for flowy tassels. Temari Silk has not been tested yet.
Braiding - Kumihimo - I have braided pieces with Anaito silk without beads. It is gorgeous. Think of it for a very special ceremonial piece worn just a few time a year. Make sure to include a central core, so the silk is not under undue tension. Temari Silk not tested yet.
Bead Crochet - Some of my customers have done beaded crochet with the Anaito silk. I have not. Temari Silk not tested yet.
Bead Knitting - Some of my customers have knitted beaded evening purses with the Anaito silk. I have not. Temari Silk not tested yet.
Bead Embroidery - Some of my customers have done beaded embroidery with the Anaito silk. I have not. Temari Silk not tested yet.
Surface Embroidery - Both silks are perfect.
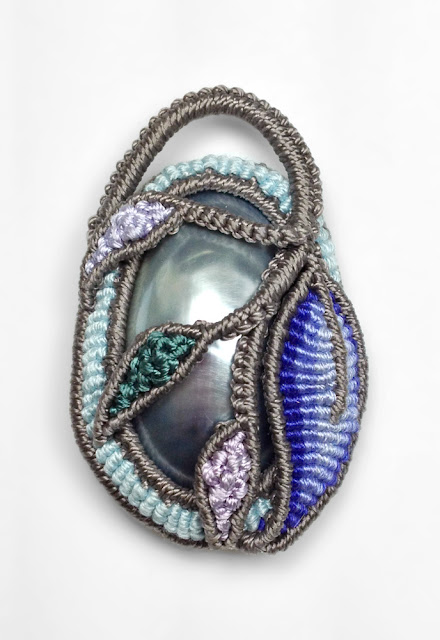
Flowers and Leaves Medallion with C-Lon Bead Cord,
Madeira Silk Floss, and Anaito Silk
©2015-2021 Marion Hunziker-Larsen
Cavandoli Knotted Jewelry - Anaito silk works well, so will the Temari Silk. The additional sheen will be one more thing to play with. I use C-Lon Bead Cord as a base and knot over it with various silks.
Subscribe to:
Posts (Atom)


