Saturday, April 9, 2011

Tips: How to Cut C-Lon Bead Cord and Get Rid of the Curls


This picture shows all four sizes of C-Lon Bead Cord and the
sizes of Miyuki beads that can be strung onto the cord using a beeswax self needle. See one of my earlier blog about the best way of loading beads onto cord. From left to right:
- C-Lon Tex 400 Bead Cord with Miyuki E's (twice/2x), 6/0s, and 8/0s

- C-Lon Bead Cord with Miyuki 6/0s (2x), 8/0s, and 11/0s
- C-Lon Fine Weight Cord with Miyuki 8/0s (2x), 11/0s, and 15/0s

- C-Lon Micro Cord with Miyuki 8/0s (2x), 11/0s, and 15/0s


C-Lon Bead Cord and to a certain extend C-Lon Tex 400 Bead Cord, the 'heavyweight bead cord', tend to curl. This can be especially annoying when working with micro macrame, as it makes the process of finding the right cord to work with more daunting especially when working with a multitude of cords. For applications such a crochet, knitting or kumihimo with EZ-Bobs, the cord having a memory of being on the spool all curled up does not matter. For anyone wanting the curls to go away, several solutions come to mind.

No More Curls Methods
  1. When unwinding the thread, give it a pull one arm's length at a time.
  2. Cut the cord the day before and add a weight to the ends overnight.
  3. Steam the cord.
  4. Iron the cord with a warm iron - a hot iron will damage the cord.
I use method #1 when stringing beads and method #4 when doing micro macrame and Cavandoli knotting. I have not tried the method 2, & 3, but they have been suggested by readers of my newsletters.

Alternative Method
Here is a another good method for micro macrame and Cavandoli knotting, when you need multiple cords, all of the same length. I use this method for workshops or when I plan my work a day ahead of time.
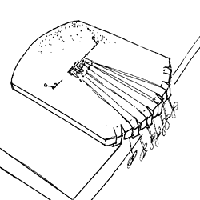
  1. Set up 2 winding posts, warping posts or cup hooks set into pieces of wood attached by a C-clamp to fixed positions at the distance desired for your cord ends.
  2. Attach the cord to the post/hook on your left (post/hook #1).
  3. Unwind the cord towards the second post/hook and give it a hard pull.
  4. Wind it around the second post/hook on your right (post/hook #2).
  5. Return to post/hook #1, unwinding, giving a hard pull and wind the cord around #1.
  6. Repeat steps 3-5 however many times until you have the desired number of cords.
  7. Tie the end back at post/hook #1.
  8. Optional - Let the cord sit on the posts/hooks overnight.
  9. Cut the cords at post/hook #1. Hold the cords by their fold at post/hook #2.
Example: For cords 48 inches long, folded in half, both ends (2 ends) will be 24 inches long. So set up your posts/hooks 24 inches apart and cut he cord only at one of the posts/hooks.

Best with your creative projects! - Marion

To purchase C-Lon Bead Cord > Marion Jewels in Fiber Store

Note on Ironing C-Lon Bead Cord
Use a warm setting. The lowest setting on my iron is acetate/nylon. I tested it with 6 - 48 inches long cords folded in half (24 inches long from fold/loop to ends). For speed I raise the setting to polyester, but then you need to iron quickly. Do not leave the iron in one spot with higher heat setting. Nylon will melt!

Blocking? More on the Knitted Bracelet...

When writing the pattern for the Knitted Bracelet with C-Lon Bead Cord & Pearls, my assistant offered to block one of my bracelet. I did not know much about blocking, but she insisted that it made all the difference and gave knitted goods a professional look. She offered to block a few knitted samples we had done with C-Lon Tex 400 and one of the bracelets knitted with C-Lon Bead Cord. She used wet blocking for the bracelet letting it dry overnight pinned in place, and steam blocking for the Tex 400 samples. Of course since bonded nylon has a mind of its own, it was totally unaffected by the blocking process.

Blocking knitting is a simple technique used mostly by professional knitters and knitting aficionados. The piece of knitting is pulled and stretched into the right shape, laid flat, and pinned in place. Then several methods can be used to actually block the knitted fabric: wet blocking, steam blocking, or spray blocking.

Regardless of the method chosen, the fabric can be shaped first, then pinned, then moistened, steamed or sprayed last. The sequence can be changed by wetting, steaming or spraying first, then shaping and pinning, then letting it dry. This process, if well done, makes the knitted pieces more even, making it easier to seam them together into garments. It evens the stitches out making them look more regular. It helps the knitted pieces hold on to their shapes.

Still intrigued by the idea of blocking the bracelet made with bonded nylon, I decided to experiment... by blocking with rubbing alcohol (see my blog about bond). So after first checking that alcohol did not affect the fresh water pearls, I was ready to test this process and isopropyl alcohol turned out to be the perfect blocking agent for bonded nylon.

To block your knitted bracelet, you will need the following tools:
  • A Macrame Board (a project board with measuring lines or a Lacis Board and a ruler)
  • 1 1/4 " Steel T-Pins
  • Isopropyl Rubbing Alcohol
  • Cotton Swabs (Q-tips) or Small Rag (in color similar to the item you are blocking)


Process:
Pin the bracelet right side up (with pearls up) to the board using the line or a ruler to shape the body of the bracelet into an even shaped rectangle. Pin the triangle leading to the donut button and the loop. Then after dipping the cotton swab into alcohol, dab the knitted nylon in between the pearls evenly. Let it dry. Remove the T-pins. The bracelet should now be nice and flat. If a bit stiff just shake it to loosen. It will loosen regardless as you wear it.

For more info on the knitted bracelet -> Knitted Bracelet with C-Lon Bead Cord & Pearls
To purchase a macrame board and T-pins -> www.store.jewelsinfiber.com/tools.html
To read more about blocking knitted items -> To Block or Not to Block...