Showing posts with label Free Tutorial. Show all posts

Monday, August 15, 2022

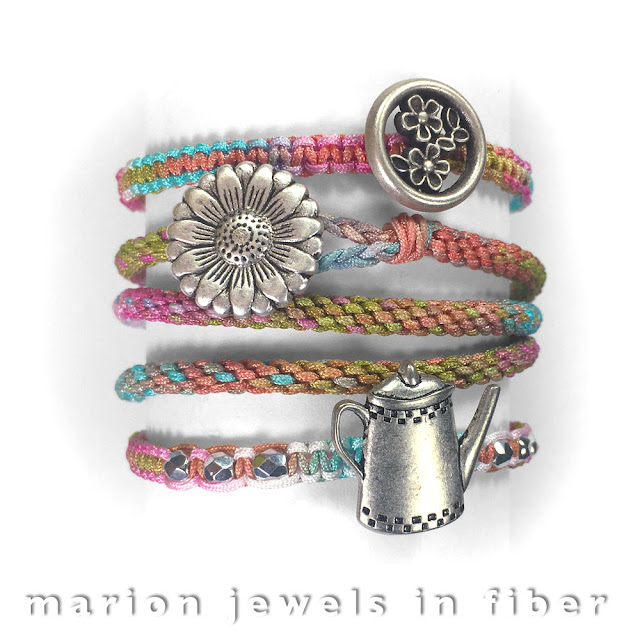
Bracelet Stack #2 made with Space Dyed Chinese Knotting Cord


Bracelet Stack made with Space Dyed Chinese Knotting Cord

This next bracelet stack is made with "Bright Spring Variation", the second colorway I experimented with. Bracelet #1 is not shown on this stack.


Space Dyed Chinese Knotting Cord shown as a Skein 


How is Space Dyed Yarn or Cord made?
 
The cord is first braided with nylon thread, then it is space dyed in skeins with several colors and/or color gradients creating a pattern around the skein. Most skeins are about 50 inch (128 cm) around with some, not all, space dyed with the same colors on both side of the folded skein so the pattern is mirrored on both sides of the skein and repeats with each turn of the skein. After the dying process, the cord is rinsed and dried. In the last step the cord is rolled on spools.
 

This colorway, Bright Spring Variation, is available in a 20 meter spool. Let's see what can be made with a spool. 


Kumihimo Bracelet #1
 

Double Wrap Kumihimo Bracelets made with Space Dyed Chinese Knotting Cord 

Double wrap kumihimo bracelet made with 7 Strand Braiding Method


The 7 Strand Kumihimo Method is explained in the last post and will be covered in a forthcoming tutorial. This was the second bracelet I made this way with the Space Dyed Chinese Knotting Cord. Previously I have experimented with this method with C-Lon Tex 400 Bead Cord. I started with 50 inch cords forded in half so 25 inch cords to braid with and this bracelet ended up a bit shorter than I hoped with a 12.5 inch total length, and a 6.25 inch bracelet length when worn as a double wrap bracelet. That's even a bit short for my small wrists.


Kumihimo Bracelet #1

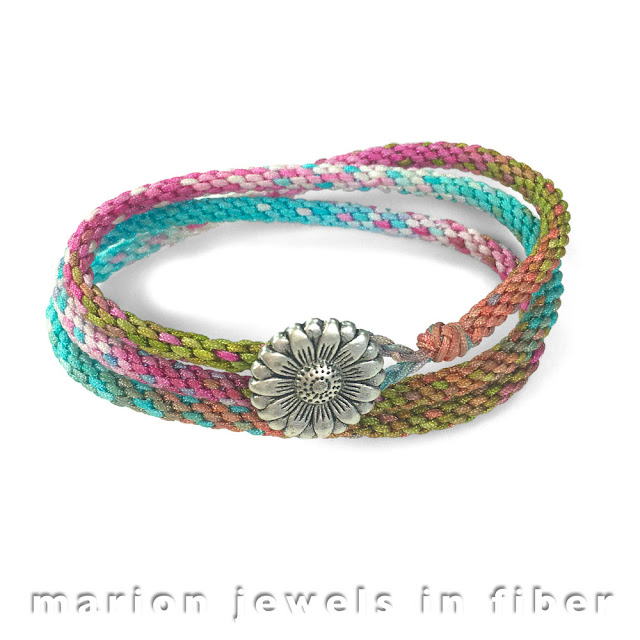
Triple Wrap Kumihimo bracelet made with Space Dyed Chinese Knotting Cord

Triple wrap kumihimo bracelet made with 7 Strand Braiding Method


This next experimental bracelet was more successful as I started with twice as much length with 100 inch folded in half to 50 inch. I ended up with a 24 inch length and adjusted the final length back to 21.5 inches to fit my wrist. The marigold (sunflower) button is available on this page, it is the 5th listing.


Square Knot Bracelet #1


This bracelet is made the same way as the shambhala bracelets, however with thinner cords, and with beads only at the sliding cords ends. I added a Fower and Leaves Button as a center charm. It's the 2nd listing on this web page.


Square Knot Bracelet #2

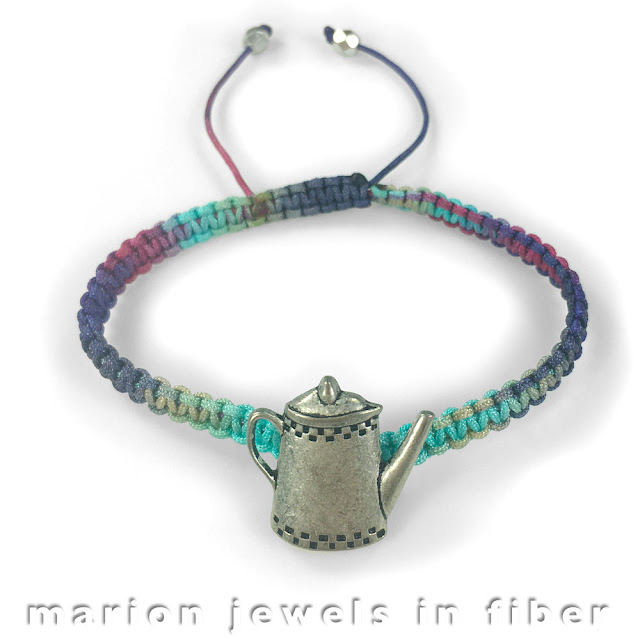
Oops I forgot to take a close up picture...  That's the one with the Teapot Button as a center charm. It's the first listing on this button page. and sliding bead clasp available here. It was made with the remnants leftover of this spool and I had to add beads as I did not have enough cords for all the square knots... 

For more info on these bracelets...

Check the previous post... 

> Space Dyed Chinese Knotting Cord


Space Dyed Chinese Knotting Cord Experimental Bracelets Color Variation #1


I love these new space dyed colors. They are so much fun to play with. Here is the bracelet stack I made with "Turquoise Variation", the first colorway I experimented with.
 
 
What is Space Dyed Chinese Knotting Cord? 
 
Chinese Knotting Cord is a braided nylon cord made in China available in a variety of thickness and usually dyed in solid colors. The cord is made on large braiding machine out of nylon thread, then it is wound on skeins, dyed, rinsed, and dried, then wound on spools. For more info on all the types and sizes of Chinese Knotting Cord, go HERE
 
When cord or yarn are dyed with different colors along a skein, the color changes repeat around each cord turn around the skein. This type of dyeing is called Space Dyed. This can be done by hand at an artisanal scale or in a factory setting with many skeins all dyed at the same time. It is a process that is more labor intensive than dyeing solid colors. 

Space Dyed Chinese Knotting Cord shown as a Skein

 
Why are Space Dyed Colors So Much Fun? 
 
If done correctly with interesting color shifts and variations, it lends itself to so many possibilities... So here are my very first experiments with the new Space Dyed Chinese Knotting Cords I just started importing from China. 
 

This colorway, Turquoise Variation, is available in a 20 meter spool. Let's see what can be made with a spool.

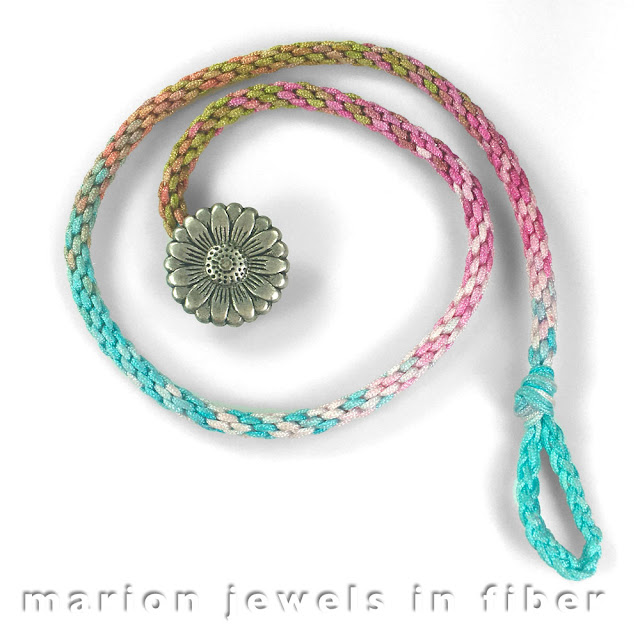
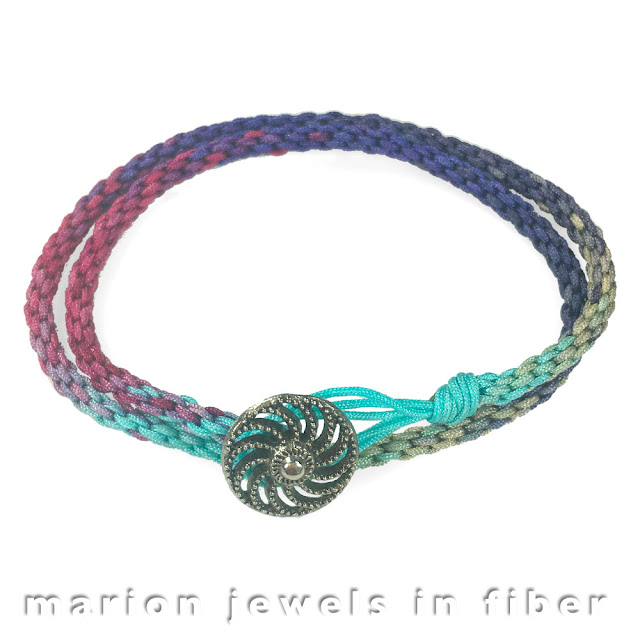
Kumihimo Bracelet 
 
Braided with the 7 strand method, started at the loop and ended with a Pinwheel Button. That's the 9th listing on this page.
 
 
I have been playing with a 7 stand kumihimo pattern and I plan to write a better tutorial on this method with a full step by step tutorial with photos and maybe a video and all the best ways to achieve a professional result on the first try... 
 
This braiding method is really easy. If your kumihimo disk has 4 dots, place 4 strands at the dots, then 3 in between the dots, that leave one space with no cord. Or add 4 extra dots in between the dots with a sharpie marker and place the 7 cords by the dots. There is one empty spot. 

Several ways explain the same cord movements of the braiding process:
 
1. The disk is like a clock. Place the empty slot at 1:30, and take the cord that's at 6 and insert it in the empty spot at 1:30. Then rotate the disk counterclockwise until the empty spot is at 1:30 again and repeat.

2. Count the cords from the empty spot clockwise*. 1, 2 and 3 cords, and taking the 3rd cord up to the empty spot. 
 
 3. By the numbers on the disk with a 32 slot disk. Place the 7 cords right in slots before #8, #12, #16, #20, #24, #28, #32. [Place #32 at the top. Take #16 cord to #4. Place #12 at top. Take #28 to #16. Place #24 at top. Take #8 to #28. Place #4 at top. Take #20 to #8. Place #16 at top. Take #32 to #20. Place #28 at top. Take #12 to #32. Place #8 at top. Take #24 to #12. Place #20 at top. Take #4 to #24.] Repeat []. 
 
* This can be done clockwise or counterclockwise. but you need to be consistent. For me since I am right handed, I prefer to hold the disk with my left hand and move the cord with my right hand. And I prefer to move the cord up rather than down... it;s easier, but it can be done the other way... so long as it is consistent.   
 
Left handed? 
With method 1, place your empty spot at 10:30 instead for 1:30. With method 2, count counterclockwise. With method 3, I will write it if anyone is interested...


Tibetan Knot Bracelet
 
 
I made this one with double stands and line the colors so the color shifts would happen at the same time... For the tutorial go here!


Square Knot Bracelet #1

 
Square Knot Bracelet made with Dyed Chinese Knotting Cord
 
This bracelet is made the same way as the shambhala bracelets, however with thinner cords, and with beads only at the sliding cords ends. I added a Teapot Button as a center charm. It's the first listing on this button page.


Square Knot Bracelet #2
 
Square Knot Bracelet made with Dyed Chinese Knotting Cord 
 
This second bracelet is finished with a sliding bead clasp available here
 
 
Square Knot Bracelet #3

 Square Knot Bracelet made with Dyed Chinese Knotting Cord
 
For this 3rd bracelet iI did not have a lot of cord left, so adding the beads was a perfect solution as it did not use as much cords as all square knots... The beads are 4mm Czech Fire Polished Beads

 
Chain Stitch Bead Crochet Sample


Crochet Sample made with Dyed Chinese Knotting Cord
 
After making all the bracelets above, I just had enough cord left to make a sample... I will make a bracelet of necklace with one of the next color variation.


Tuesday, April 12, 2022

Ukraine Friendship Bracelets + Free Tutorial

Ukraine Friendship Bracelets made with C-Lon Tex 400 Bead Cord

Upon the onset of the war in Ukraine, like everyone else I wanted to do something to help....  

For over a month, I donated 10% of my online sales to non-profits organizations, but as of week 6, I wanted to do something different. As of April 1, I started designing special bracelets to wear in solidarity with Ukraine with the goal in mind to create a fundraiser, or many especially if other makers like you join in the effort. 

I am already selling mine locally at the Chico Art Center Gift Shop with 25% of sales going to the Ukraine Red Cross and I will be selling them at the Chico ART Festival in May with 100% of the profits going to non-profit organizations helping in Ukraine with the humanitarian crisis. I hope this will inspire you to make some bracelets as a fundraiser too.

First I needed colors...

C-Lon Tex 400 Bead Cord Colors for Ukraine

The 8 colors of C-Lon Tex 400 Bead Cord I have been using,  are reminiscent of the Ukraine flag. Four colors represent the sky and sea, Sky Blue, Caribbean Blue, Blue Lagoon and Capri. The other four, the fields of wheat, corn, and sunflowers are Wheat, Golden Yellow, Marigold, and Gold. Originally for the yellows and gold, I had chosen Lemon, but after making a dozen bracelets or so I switched to Gold, as I had not used any Lemon yet.  


C-Lon Bead Cord Colors for Ukraine

I also originally though I would be using only the Tex 400 size with 0.9mm in diameter, but later on I needed the standard weight of C-Lon Bead Cord with 0.5mm in diameter for parts on the bracelets. I am in the process of designing a new bracelet variation that will be completely made with the standard size. 

These C-Lon Cord sets are available on my news page HERE. Or you can make your own set... 


Ukraine Friendship Bracelets made with C-Lon Tex 400 Bead Cord


The first group of bracelets I made are Multi Strand Bracelets from my Far Niente Series, that's the "Do Nothing" Series as they are fun and quick to make... The pattern is available at the bottom of this web page HERE.


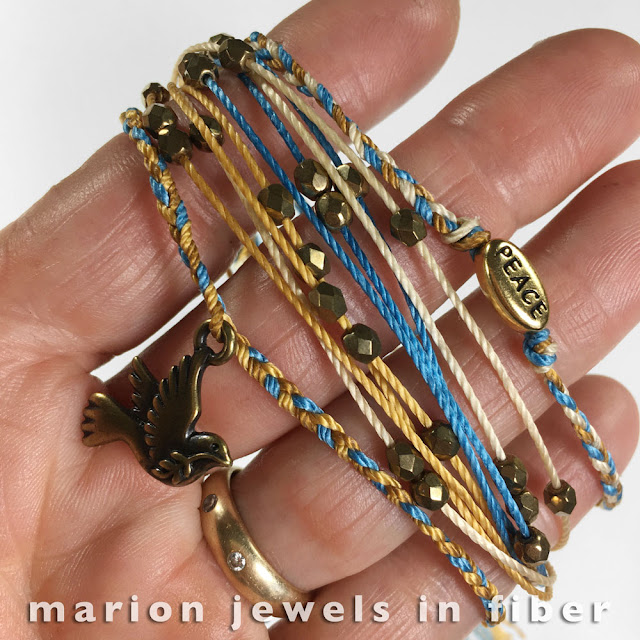
Pura Vida Style Bracelets made with C-Lon Tex 400 Bead Cord
Pura Vida Style Bracelets with C-Lon Tex 400 Bead Cord

Several of the bracelets have no beads, a Pura Vida style bracelet, however made with higher quality cord and a better construction. The peace dove carrying an olive branch charm got added as a last minute idea to make these bracelets more meaningful. Attach the charm right onto the 3-strand braid in between the knot and the sliding knot closure. 


Ukraine Friendship Bracelets made with C-Lon Tex 400 Bead Cord
The others are made with 4mm Czech Fire Polished floating beads. I matched the Antique Brass Metallic with the Antique Brass Peace Dove Charm, and the Argento with the Antique Silver Peace Dove. The 4mm Czech Fire Polished Beads are available HERE


Ukraine Friendship Bracelets made with C-Lon Tex 400 Bead Cord


The next group of bracelets incorporates pewter peace beads made in the USA with high quality plating by TierraCast. The choice of finishes is either a 24k gold plate or a sterling silver plate. This group bypass the multi stand center and it braided all the way through with overhand knots keeping the sliding knot panel from sliding too far in.


Ukraine Friendship Bracelets made with C-Lon Tex 400 Bead Cord

I am still not 100% sure of the best method to insert the central beads. Only 1 cord will fit into its hole... and so far I have tried it several different ways. I think I like to one at the very top. That's the last bracelet I made in this group. It has an overhand knot on each side of the bead, one cord through the beads and the other two are left behind the beads. Another change, this last one has the ends left loose and turned into a thread tassel instead of the cut and melted ends.


Ukraine Friendship Bracelets made with C-Lon Tex 400 Bead Cord


This next series was made with the same concept, but the central beads are replaced by the charms. Oh, and as with the last group, I started making the square knot sliding closure with the thinner standard C-Lon Bead Cord instead of using the Tex 400 Bead Cord. I like the proportions better. I will make all future all bracelets in this style like this. 

Ukraine Friendship Bracelets made with C-Lon Tex 400 Bead Cord
 

For the next style, I went for a minimalist look light to wear. I also wanted to play around with new stopper/sliding beads I just got. They are 6 mm wide and 3 mm long and have a silicone insert with a 1.2 mm opening. They are very simple and quick to make. Here is the free tutorial showing how to make one of these bracelets.

Materials 

–> C-Lon Tex 400 Bead Cord - Colors for Ukraine 

–> Peace Charms & Beads - made in the USA out of pewter with good quality plating.

–> Smart/Stopper/Sliding Beads for Closure - Available in various metal finishes, made in Europe with good hypoallergenic standards.


Tools 

–> Macrame Board - a mini-board with option #1 will work as it includes T-pins and tapestry needles

 –> 100% Organic Beeswax and/or Thread Magic - or get a mini-board with option #2 or #3

 –> Thread Burner - or get a mini-board with option #4

C-Lon Tex 400 Bead Cord Bracelet Free Tutorial

1. Cut 3 pieces of C-Lon Tex 400 Bead Cord 18 inch (50 cm) long.
Iron the curls out on low heat setting.


C-Lon Tex 400 Bead Cord Bracelet Free Tutorial

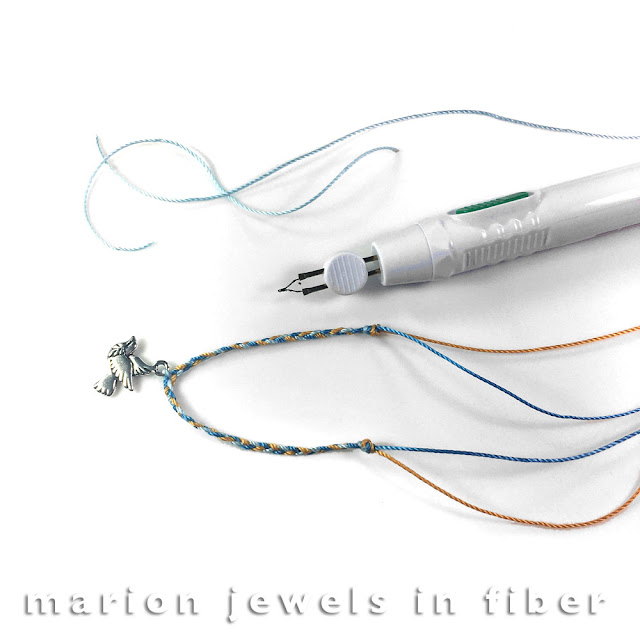
2. Tie an overhand knot with all 3 cords leaving a 6 inches tail.
To tighten the knot, pull on one cord at a time.


C-Lon Tex 400 Bead Cord Bracelet Free Tutorial

3. Make a 3-strand braid 2.5 inch (6 cm) long.
For best results, cross the cords at 90º from each other.
That means the cords are crossing the vertical line at 45º.
Stop by inserting the cords into slots on the side of the board.


C-Lon Tex 400 Bead Cord Bracelet Free Tutorial

4. Add the charm onto one of the cord, then continue the braid until it is 5 inches (12 cm) long. 


C-Lon Tex 400 Bead Cord Bracelet Free Tutorial
5. Tie an overhand knot at the end of the braid with all 3 cords. 


C-Lon Tex 400 Bead Cord Bracelet Free Tutorial

 6. Melt 1 of the cords at each overhand knots with a thread burner. Push the melted ends right into the knot, taking care not to melt the remaining cords or the knot. 


C-Lon Tex 400 Bead Cord Bracelet Free Tutorial 

7. Cut all the cords at the same length.


C-Lon Tex 400 Bead Cord Bracelet Free Tutorial


8. Make a self needle with beeswax at all the ends. 
If you do not know how to make a beeswax self needle, check this post, it has all the best ways to load beads onto cords. 
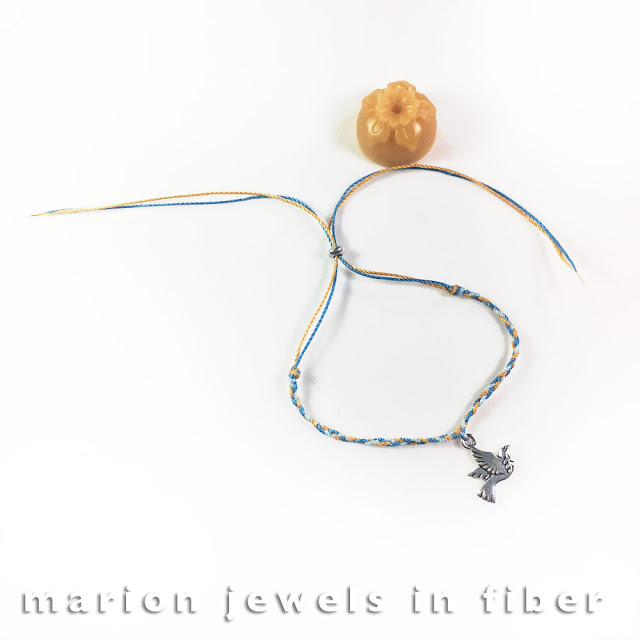
 

C-Lon Tex 400 Bead Cord Bracelet Free Tutorial 

9. Insert the cords through the stopper/sliding bead closure and separate the cords in two groups.


10. Tie an overhand knot 5.5 inch from the center charm.
Repeat for the other set of cords.


11. Melt one of the cord at the last knot. 
Repeat for the other set of cords.

Free Tutorial for C-Lon Tex 40 Bead Cord Bracelet

12. Insert the peace beads and tie an overhand knot right after the beads using tweezers to keep the knot against the bead. 


Now you have a choice as to how to finish the ends of the cords.
Melt the end of the cord right into the knot, or leave the end of the cord as is after cutting it away for the knot, or...

Free Tutorial for C-Lon Tex 40 Bead Cord Bracelet

13. Cut the cords and separate the plies of the nylon fiber with a blunt ended tapestry needle.


Ukraine Friendship Bracelets made with C-Lon Tex 400 Bead Cord

14. Apply some beeswax to the C-Lon Tex 400 Bead Cord that slides in and out of the closure. It will keep the cords from separating.

 
Let me know if you end up making any bracelets like these in support of Ukraine. Of course you can make the same design for a school fundraiser in the school colors. There are lots of possibilities and design options to explore, certainly more than I can explore all by myself. But hey, I already have lots of other new ideas for my next batch of bracelets! 
 

Saturday, October 30, 2021

Sankakusui-Koma | Japanese Tops | Wrapping Silk Thread | Tutorial Part 3


Sankakusui-Koma | Japanese Tops | Wrapping Silk Thread | Tutorial Part 3

In this final part of the Sankakusui-Koma tutorial we will wrap the triangular bi-pyramid with the silk thread. This picks up from the previous post... 


Sankakusui-Koma | Japanese Tops | Wrapping Silk Thread | Tutorial

1. If you did not secure the silk thread for wrapping before closing the 3D shape, use a piece of double stick tape as shown above. Work with the thread right out of the spool or card.


Sankakusui-Koma | Japanese Tops | Wrapping Silk Thread | Tutorial

2. Secure the thread along one of the top spine with the thread coming out close to the top loop. 

Sankakusui-Koma | Japanese Tops | Wrapping Silk Thread | Tutorial
3. Go around the loop, along the spine toward the point (blue arrow). 

Sankakusui-Koma | Japanese Tops | Wrapping Silk Thread | Tutorial
4. Go around the the point (blue arrow) and go back towards the loop. The thread does not need to be flushed against the spine, this will get covered later with thread wrapping. 

Sankakusui-Koma | Japanese Tops | Wrapping Silk Thread | Tutorial
5. Go around the next point shown with blue arrow. 

Sankakusui-Koma | Japanese Tops | Wrapping Silk Thread | Tutorial
6. Now go around the last point. 

Sankakusui-Koma | Japanese Tops | Wrapping Silk Thread | Tutorial
7. Continue the wrap following the thread shown with blue arrows. Go around each points keeping the thread right next to each other. 

Sankakusui-Koma | Japanese Tops | Wrapping Silk Thread | Tutorial
8. As you continue you will see how the thread covers over the top edges and it crosses over at the middle on the sides of the triangular pyramid. 

Sankakusui-Koma | Japanese Tops | Wrapping Silk Thread | Tutorial
9. To add a new color, or switch colors, use a piece of tape.

Sankakusui-Koma | Japanese Tops | Wrapping Silk Thread | Tutorial
10. For this design, continue with both thread colors, keeping one on right and one on left, so they are side by side and do not cross over each other.

Sankakusui-Koma | Japanese Tops | Wrapping Silk Thread | Tutorial
11. When the shape is covered, cut the thread off the spool and card. Stitch it underneath the silk wrapping up towards the bi-pyramid edge, then entering back towards the tassel but entering 2 or two thread over. Cut the ends. 

Sankakusui-Koma Free Tutorial for an Origami and Traditional Japanese Thread Decorated Top aka Hishi-Koma, Hishi-Kazari, or Dragonboat and Berlingot
Congratulation your ornament is finished! Summer, Winter and Autumn Twist Silks and all the supplies to make this project are available HERE

Notes, Options and Alternatives
Try any leftover thread you have. So far besides all the tops shown in the tutorial with the material listed, I also made a larger top with a 2 inch by 6 inch rectangular base with Madeira Silk Floss and Metallic Thread. I found the Madeira Silk Floss a bit matte, the metallic thread was perfect. I will keep posting more photos and suggestions. I plan to make a lot more as they will be part of my gift wrapping this year.