Showing posts with label Kumihimo. Show all posts

Sunday, August 30, 2026

Peyote Stitch Bail - Step By Step Tutorial (Make a Beaded Connector for Adding a Pendant to a Kumihimo Cord)

Peyote Stitch Bail - DIY Connector for Adding a Pendant to a Kumihimo Cord

How to connect beaded kumihimo braids to a pendant is a challenge. After sourcing these new borosilicate glass Nebula Ring Tag Pendants with dichroic chips and gold dust inside, I found that the best solution was to imitate the beaded peyote stitch sleeve or cover over the clasp already part of the design. So before we start, let me reminisce. 

Peyote Stitch was not on my list of beading techniques to learn until I had a problem with magnetic clasps that preferred to attach themselves to metal table legs or armrests. This was solved by the addition of a Beaded Peyote Stitch Sleeve over the clasp preventing the magnetic clasp from sliding off sideways. As a bonus, the beaded sleeve added an aesthetic dimension to the design. This was 11 years ago... For more info check this post.

Making a bail, a connector, or a loop is always a challenge. In this instance, the loop needs to be continuous and permanently attached to the pendant. It cannot be pre-made and then installed; it needs to be finished around the hole in the ring tag pendant. The kumihimo cord can slip in as long as the bail is long enough. 

Here is what you will need to begin:

Peyote Stitch Bail - Make a Beaded Connector for Adding a Pendant to a Kumihimo Cord

  • ~1 g (1/8 tsp) of Miyuki Delicas 11/0
  • 1.5 yd (1.4 m) of Beading Thread (my preference is the one with the closest color to the beads)
  • Beeswax
  • 2 Tapestry Needles Size 28 (with blunt ends)
  • 1 or 2 Bead Embroidery Needles Size 10 or 12 (with blunt ends)
  • Mini-Clip or Mini-Clamp
Step By Step Tutorial

Make a Peyote Stitch Rectangle, 6 beads wide by 31 beads long. Check for size; if the fit it well, zip it into a loop around the Nebula Ring Tag pendant hole. 

Peyote Stitch Bail - Step by Step Tutorial

Step 1 - Cut the thread. If you using C-lon or KO Bead Thread, coat it with beeswax, especially the ends. Attach both ends to the Tapestry Needles Size 28. You can use an extra fine needle threader to do so.


Peyote Stitch Bail - Step By Step Tutorial (Make a Beaded Connector for Adding a Pendant to a Kumihimo Cord)

Step 2 - Use the 2-needle start method: 
  1. *Load the first 2 beads, one on each needle, then slide the beads to the middle of the thread. 
  2. Load 1 bead on both needles, but do it one at a time.* 
  3. Repeat from * to * 2 more times until you have 6 beads across. 
Note: For #2, I pass the first needle through the bead, then hold the bead right past the needle against my left index finger with the needle in between my left index and my middle finger, then I pass the second needle through the bead. This way the first thread is taut, and there is no risk of piercing it with the second needle. If you use the thinner needles, bead embroidery needles Size 10 & 12, you can insert both needles at once. However, the tapestry needle size 28 eyes are larger, making them easier to thread; plus the needles are much stronger and they do not get bent or broken as easily as the thinner needles. 

For more complete images of the process: –> Post on 2 Needle Start

How to count beads across and rows: Now, you have 6 beads across and 2 beads on the left side and 1 on the right side. The 6 beads across is the way you count the width. The side beads are the way you count the rows. With the next thread pass, you will add a bead on the right side, so there will be 2 beads on each side. You do not count rows by the number of thread passes. 


Peyote Stitch Bail - Step By Step Tutorial (Make a Beaded Connector for Adding a Pendant to a Kumihimo Cord)

Step 3 - Clip one of the thread (the shorter one) with a mini-clamp. It will hold the thread tension. With the other needle (and thread), add Bead 1 and insert the needle into the first protruding bead. 

Note: In even-count peyote with 6 beads across, each thread pass add 3 beads (or half the amount of beads across). Two passes add 6 beads and a full row. 

Peyote Stitch Bail - Step By Step Tutorial (Make a Beaded Connector for Adding a Pendant to a Kumihimo Cord)

Bead 2 and 3 will be added in between the protruding beads from the previous pass. 
  

Peyote Stitch Bail - Step By Step Tutorial (Make a Beaded Connector for Adding a Pendant to a Kumihimo Cord)

Step 4 - Reverse direction for the next pass and add Bead 4, 5 and 6. 


Peyote Stitch Bail - Step By Step Tutorial (Make a Beaded Connector for Adding a Pendant to a Kumihimo Cord)

Step 5. Continue adding more beads until you have 31 beads on each side. 

Note: The threads are coming out of opposite sides and the indentations and protrusions at the ends fit into one another. If the thread is coming out of the same side and the ends are exactly the same, either add or remove one pass. 


Peyote Stitch Bail - Step By Step Tutorial (Make a Beaded Connector for Adding a Pendant to a Kumihimo Cord)

Step 6. With the thread on each side reinforce the sides for stability and strength. This step is best done with the finer bead embroidery needles size 10 and 12. 

  1. Go through the edge bead one row up from the bead with the thread.
  2. Go through the next lower bead.
  3. Turn direction and go through the bead on row up. 
  4. Go through the next lower edge bead. That's the same edge bead as in #1.
  5. Repeat 1-4 for every edge bead. Hold off at the last bead.
  6. Repeat 1-5 for the other side.
  7. Reinforce the last rows by running the thread to the other side so both threads come out of the last bead as shown in Step 5. 

Peyote Stitch Bail - Step By Step Tutorial (Make a Beaded Connector for Adding a Pendant to a Kumihimo Cord)

Step 7. Check for fit. Add or remove rows as needed. 


Peyote Stitch Bail - Step By Step Tutorial (Make a Beaded Connector for Adding a Pendant to a Kumihimo Cord)

 Step 8. Zip both end together. See image below for close-up. 


Peyote Stitch Bail - Step By Step Tutorial (Make a Beaded Connector for Adding a Pendant to a Kumihimo Cord)

Go through the protruding beads one at a time. Pull tight and reinforce the joint by a few more passes. Then go around in a circle a few times to secure the thread ends. 

 Step 8. Cut the thread ends at the bead hole or melt the ends with a thread burner making sure not to melt the other thread. If you have never done it before test it on a space piece of peyote stitch. 


Peyote Stitch Bail - Make a Beaded Connector for Adding a Pendant to a Kumihimo Cord


The End. The bail is all done. Congratulations!  

For the Peyote Sleeve, the clasp cover, make a rectangular piece 20 beads across with 18 rows of beads, and zipped it closed. Slip it over the magnetic clasp and stitch it to the side of the braid so it won't fall out when the clasp is opened up. 

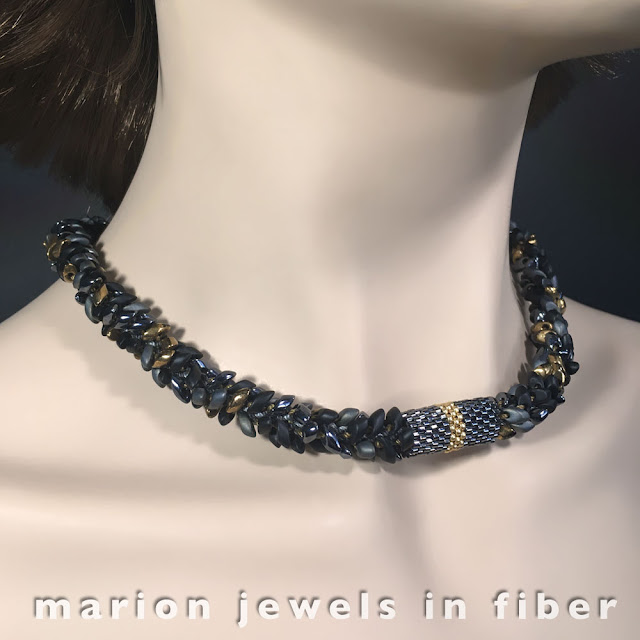
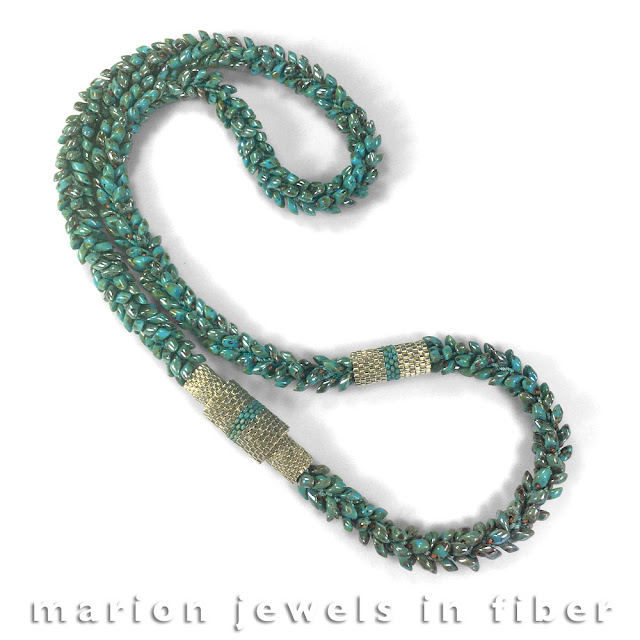
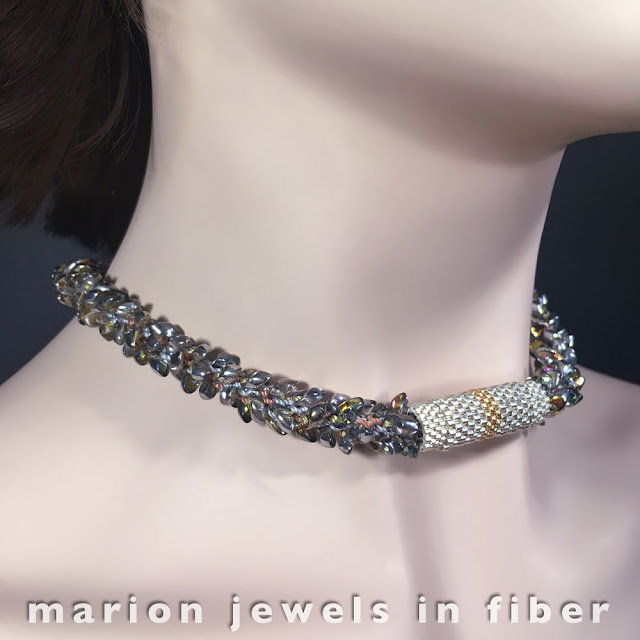
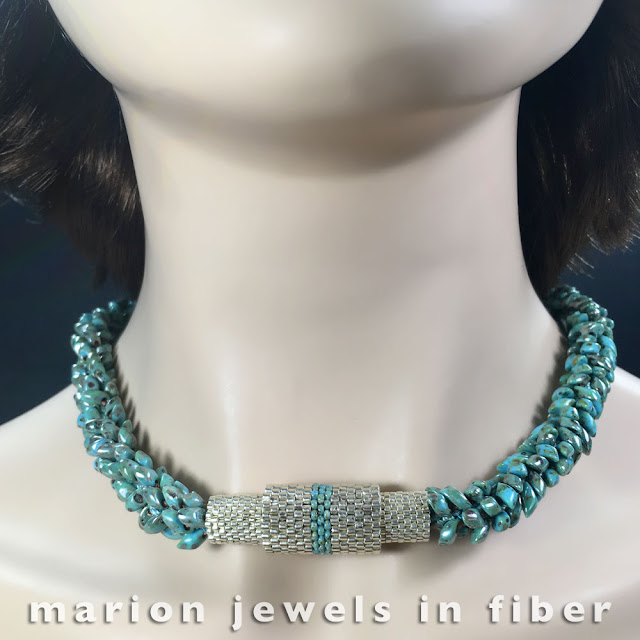
The combination is a really nice addition, making it worthwhile to learn peyote stitching. Here are the combinations I have made so far: 


Peyote Stitch Bail - Step By Step Tutorial (Make a Beaded Connector for Adding a Pendant to a Kumihimo Cord)
El Dorado


Peyote Stitch Bail - Step By Step Tutorial (Make a Beaded Connector for Adding a Pendant to a Kumihimo Cord)

Midnight Scarab

Peyote Stitch Bail - Step By Step Tutorial (Make a Beaded Connector for Adding a Pendant to a Kumihimo Cord)

Place Vendome

Get Kits, Materials & Tools
Kumihimo Necklace Kits - in this post
Nebula Ring Tags - Pendants shown in this post

Related Posts
Thread Burners Review


Monday, August 15, 2022

Bracelet Stack #2 made with Space Dyed Chinese Knotting Cord


Bracelet Stack made with Space Dyed Chinese Knotting Cord

This next bracelet stack is made with "Bright Spring Variation", the second colorway I experimented with. Bracelet #1 is not shown on this stack.


Space Dyed Chinese Knotting Cord shown as a Skein 


How is Space Dyed Yarn or Cord made?
 
The cord is first braided with nylon thread, then it is space dyed in skeins with several colors and/or color gradients creating a pattern around the skein. Most skeins are about 50 inch (128 cm) around with some, not all, space dyed with the same colors on both side of the folded skein so the pattern is mirrored on both sides of the skein and repeats with each turn of the skein. After the dying process, the cord is rinsed and dried. In the last step the cord is rolled on spools.
 

This colorway, Bright Spring Variation, is available in a 20 meter spool. Let's see what can be made with a spool. 


Kumihimo Bracelet #1
 

Double Wrap Kumihimo Bracelets made with Space Dyed Chinese Knotting Cord 

Double wrap kumihimo bracelet made with 7 Strand Braiding Method


The 7 Strand Kumihimo Method is explained in the last post and will be covered in a forthcoming tutorial. This was the second bracelet I made this way with the Space Dyed Chinese Knotting Cord. Previously I have experimented with this method with C-Lon Tex 400 Bead Cord. I started with 50 inch cords forded in half so 25 inch cords to braid with and this bracelet ended up a bit shorter than I hoped with a 12.5 inch total length, and a 6.25 inch bracelet length when worn as a double wrap bracelet. That's even a bit short for my small wrists.


Kumihimo Bracelet #1

Triple Wrap Kumihimo bracelet made with Space Dyed Chinese Knotting Cord

Triple wrap kumihimo bracelet made with 7 Strand Braiding Method


This next experimental bracelet was more successful as I started with twice as much length with 100 inch folded in half to 50 inch. I ended up with a 24 inch length and adjusted the final length back to 21.5 inches to fit my wrist. The marigold (sunflower) button is available on this page, it is the 5th listing.


Square Knot Bracelet #1


This bracelet is made the same way as the shambhala bracelets, however with thinner cords, and with beads only at the sliding cords ends. I added a Fower and Leaves Button as a center charm. It's the 2nd listing on this web page.


Square Knot Bracelet #2

Oops I forgot to take a close up picture...  That's the one with the Teapot Button as a center charm. It's the first listing on this button page. and sliding bead clasp available here. It was made with the remnants leftover of this spool and I had to add beads as I did not have enough cords for all the square knots... 

For more info on these bracelets...

Check the previous post... 

> Space Dyed Chinese Knotting Cord


Space Dyed Chinese Knotting Cord Experimental Bracelets Color Variation #1


I love these new space dyed colors. They are so much fun to play with. Here is the bracelet stack I made with "Turquoise Variation", the first colorway I experimented with.
 
 
What is Space Dyed Chinese Knotting Cord? 
 
Chinese Knotting Cord is a braided nylon cord made in China available in a variety of thickness and usually dyed in solid colors. The cord is made on large braiding machine out of nylon thread, then it is wound on skeins, dyed, rinsed, and dried, then wound on spools. For more info on all the types and sizes of Chinese Knotting Cord, go HERE. 
 
When cord or yarn are dyed with different colors along a skein, the color changes repeat around each cord turn around the skein. This type of dyeing is called Space Dyed. This can be done by hand at an artisanal scale or in a factory setting with many skeins all dyed at the same time. It is a process that is more labor intensive than dyeing solid colors. 

Space Dyed Chinese Knotting Cord shown as a Skein

 
Why are Space Dyed Colors So Much Fun? 
 
If done correctly with interesting color shifts and variations, it lends itself to so many possibilities... So here are my very first experiments with the new Space Dyed Chinese Knotting Cords I just started importing from China. 
 

This colorway, Turquoise Variation, is available in a 20 meter spool. Let's see what can be made with a spool.

Kumihimo Bracelet 
 
Braided with the 7 strand method, started at the loop and ended with a Pinwheel Button. That's the 9th listing on this page.
 
 
I have been playing with a 7 stand kumihimo pattern and I plan to write a better tutorial on this method with a full step by step tutorial with photos and maybe a video and all the best ways to achieve a professional result on the first try... 
 
This braiding method is really easy. If your kumihimo disk has 4 dots, place 4 strands at the dots, then 3 in between the dots, that leave one space with no cord. Or add 4 extra dots in between the dots with a sharpie marker and place the 7 cords by the dots. There is one empty spot. 

Several ways explain the same cord movements of the braiding process:
 
1. The disk is like a clock. Place the empty slot at 1:30, and take the cord that's at 6 and insert it in the empty spot at 1:30. Then rotate the disk counterclockwise until the empty spot is at 1:30 again and repeat.

2. Count the cords from the empty spot clockwise*. 1, 2 and 3 cords, and taking the 3rd cord up to the empty spot. 
 
 3. By the numbers on the disk with a 32 slot disk. Place the 7 cords right in slots before #8, #12, #16, #20, #24, #28, #32. [Place #32 at the top. Take #16 cord to #4. Place #12 at top. Take #28 to #16. Place #24 at top. Take #8 to #28. Place #4 at top. Take #20 to #8. Place #16 at top. Take #32 to #20. Place #28 at top. Take #12 to #32. Place #8 at top. Take #24 to #12. Place #20 at top. Take #4 to #24.] Repeat []. 
 
* This can be done clockwise or counterclockwise. but you need to be consistent. For me since I am right handed, I prefer to hold the disk with my left hand and move the cord with my right hand. And I prefer to move the cord up rather than down... it;s easier, but it can be done the other way... so long as it is consistent.   
 
Left handed? 
With method 1, place your empty spot at 10:30 instead for 1:30. With method 2, count counterclockwise. With method 3, I will write it if anyone is interested...


Tibetan Knot Bracelet
 
 
I made this one with double stands and line the colors so the color shifts would happen at the same time... For the tutorial go here!


Square Knot Bracelet #1

 
Square Knot Bracelet made with Dyed Chinese Knotting Cord
 
This bracelet is made the same way as the shambhala bracelets, however with thinner cords, and with beads only at the sliding cords ends. I added a Teapot Button as a center charm. It's the first listing on this button page.


Square Knot Bracelet #2
 
Square Knot Bracelet made with Dyed Chinese Knotting Cord 
 
This second bracelet is finished with a sliding bead clasp available here. 
 
 
Square Knot Bracelet #3

 Square Knot Bracelet made with Dyed Chinese Knotting Cord
 
For this 3rd bracelet iI did not have a lot of cord left, so adding the beads was a perfect solution as it did not use as much cords as all square knots... The beads are 4mm Czech Fire Polished Beads. 

 
Chain Stitch Bead Crochet Sample


Crochet Sample made with Dyed Chinese Knotting Cord
 
After making all the bracelets above, I just had enough cord left to make a sample... I will make a bracelet of necklace with one of the next color variation.


Friday, March 25, 2022

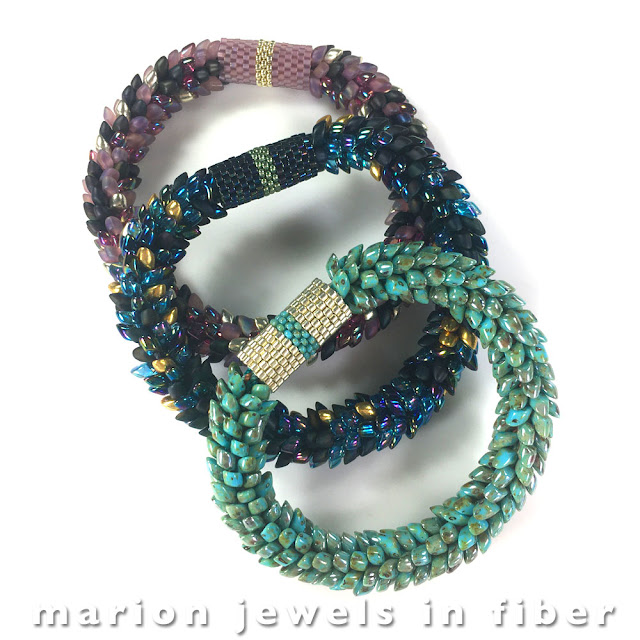
Kumihimo Necklace with Long Magatamas and C-Lon Tex 400 Bead Cord

Kumihimo Necklace with Long Magatamas and C-Lon Tex 400 Bead Cord


Occasionally a design needs to get revisited and updated. Originally in 2015, I designed this Kumihimo Kit with Long Magatamas and C-Lon Tex 400 as a bracelet kit. Now in 2022, kits for necklaces are available. This is due to a number of requests when I taught this project in a Zoom class. Many of the participants wanted to make necklaces instead of the bracelet offered in the class kit.  

The tutorial for this project has grown from 14 to 22 pages and now includes additional design options.


Kumihimo Necklace with Long Magatamas and C-Lon Tex 400 Bead Cord

One option shows how to extend the necklace length by adding a section. This way it can be worn at two different length. Here the bracelet is added to the necklace. 


Kumihimo Necklace with Long Magatamas and C-Lon Tex 400 Bead Cord

Another option shown in the tutorial is how to extend the clasp and peyote sleeve cover width to create a stronger focal point. In this example, the clasp was extended by half and inch.


Kumihimo Necklace with Long Magatamas and C-Lon Tex 400 Bead Cord

Here it was extended by a full inch doubling the width and it has a double sleeve cover, widening the diameter at the center of the clasp.


Kumihimo Necklace with Long Magatamas and C-Lon Tex 400 Bead Cord

Another option now included in the tutorial is to make a more traditional beaded kumihimo bracelet with beads on every cord. The bracelet is a bit heavier, wider in diameter and less flexible. It also has twice as many beads as the regular design with space between the beads, so if you want to do this design, get an extra 20 g bag of Magatam Beads. 

Kumihimo Necklace with Long Magatamas and C-Lon Tex 400 Bead Cord

 Or change the cord placement to get a spiral design as shown on the lower kumihimo braid.


Watch Kumihimo Braiding on YourTube

Before getting a kit, you can view a live demo of the kumihimo braiding process on YouTube. This kit is a great starter kit if you have never done any kumihimo before. It is fun and the instructions are easy to follow. As to starting with a bracelet or a necklace, it really make no difference as to the difficulty level. The bracelet, however, takes less time to braid...


> Kumihimo Kits with Long Magatamas and C-Lon Tex 400 Bead Cord

> More Kumihimo Kits

>  Earlier Post about the Bracelets


Monday, September 11, 2017

Kumihimo Neckpiece with PIP Beads


Kumihimo Neckpieces with PIP Beads


Many kumihimo bracelet patterns can be lengthened to make a neckpiece, but not all of them successfully. A neckpiece or long necklace needs special considerations. Some beaded kumihimo braids will roll over and show their backside making them inappropriate for a neckpiece at the base of the neck or a long necklace. They might work for a tight choker, but who wants to wear a tight choker... 

So with this in mind, I took two of the patterns created for the PIP Beads Kumihimo Bracelets and made neckpieces with them. 


Kumihimo Neckpieces with PIP Beads


This Argento neckpiece is 17 inch long and made using the Half Round PIP Pattern. This pattern has PIPs only on the front and all 8s on the backside. This pattern would not work for a long necklace. For this piece, I doubled the C-Lon Fine Weight Bead Cord and the Satin Cord length, but increasing them by 1.5 is sufficient and multiplied the beads quantities by approximately 3. I used around 360 PIP beads, and about 12 g of Miyuki 8s for this neckpiece. I loaded the beads in 3 batches to keep the EZ Bobs from overflowing.


Kumihimo Neckpiece with PIP Beads


These two neckpieces shown here were made with the PIPSs All Around Pattern, so they are bit more dimensional than the pattern shown above.


Kumihimo Neckpiece with PIP Beads


References


For kits and tutorials go here: PIP Beads Kumihimo Kits and Tutorial

This post continues previous posts on Kumihimo with PIP Beads found here:

Kumihimo with PIP Beads

Compare Kumihimo with Bead Weaving and Crochet Techniques

Kumihimo Earrings with PIP Beads

Saturday, September 2, 2017

Kumihimo Earrings with PIP Beads DIY Kits & Tutorial


Kumihimo Earrings and Neckpiece with Preciosa PIP Beads


This post continues the series of posts about kumihimo with Preciosa PIP beads. The two previous posts are Kumihimo with PIP Beads and Kumihimo Bracelet with PIP Bead - Compare Kumihimo with Bead Weaving and Bead Crochet Techniques.

After designing the Kumihimo PIP Bracelets Kit and Tutorial, I made a few necklaces using the Half Round PIP and the PIPs All Around Design Patterns included in the bracelet tutorial. Both designs work well in a necklace form. The one shown here is 17 inch long and used the Half Round Design. I will be writing a post these necklaces next.

After making the necklace, I needed earrings to wear for a wedding I was attending, so I set all my other projects aside and went to work designing my very first kumihimo earrings. Please note that I went about it without doing any research online whatsoever. I did not want to be influenced by someone else’s designs.


PIP Beads Kumihimo Earring DIY Tutorial & Kit

The first earring I made was a PIP ball earring, but it was not quite distinctive enough, plus the finishing of the end cords was a bit complex for a DIY, so I decided to try for a design with a beaded tassel. The first ones were pretty good, but the bead placement was not quite right yet and the tassel was a tad short, but the Jellyfish design just needed a bit more refinement.


PIP Beads Kumihimo Earrings


Everything gelled in the next attempt. The earring had a nice distribution of the PIP beads in the kumihimo body, and the beaded tassel, the tentacles, was just right. This is the design I adopted for the kit and tutorial. > Kumihimo Jellyfish Earrings with PIP Beads

The tutorial is very comprehensive and includes 15 pages with over 30 pictures, tables and charts. Please note the tutorial assumes you have prior knowledge of the braiding steps and beaded kumihimo. The manual does not included the basic steps. If this is your first kumihimo project, make sure to get the Kumihimo PIP Bracelets Kit and Tutorial first. Make the bracelet first as the bracelet manual includes very detailed pictures showing the braiding steps.

The earring tutorial includes 3 design variations and several options for the beaded tassels. The kits are available in the following color and design variations:


Design 1

That's the basic design... This earring style works well with the neckpiece or by itself.


Copper Venus

The PIP beads are transparent with an AB finish. The 8s and 11s are Miyuki Duracoats in a dark copper finish. The leverbacks are gold filled. The necklace is made with the PIP All Around Design. 


Argento

The PIP beads have a silver metallic coating all around. The 8s and 11s are Miyukis in a gunmetal finish. The leverbacks are sterling silver. The necklace is made with the PIP Half Round Design. 


Azuro Metallico

The PIP beads have a blue metallic coating all around. The 8s and 11s are Miyukis in a AB gunmetal finish. The leverbacks are sterling silver with an oxidized finish. The necklace is made with the PIP All Around Design. 


Sapphira

The PIP beads have a dual finish, transparent colors on one side, with a graphite metallic coating on the other side The 8s and 11s are Miyukis in a gunmetal finish. The leverbacks are sterling silver with an oxidized finish.

Design 2

Design 2 as a shorter kumihimo body. Any of the earring kits shown above can be made into Design 2... You will have a few PIP beads leftover for another project. As to the tassels, I started playing with the individual beaded cord length. The tassels can have blunt cuts, staggered or uneven beaded cord lengths... Your choice.


Coppertone - Design 2

The PIP beads have a dual finish, transparent colors on one side, with a copper metallic coating on the other side The 8s and 11s are Miyuki Duracoats in a bright copper finish. The leverbacks are sterling silver with a light oxidized finish.

Design 3

Design 3 as a longer kumihimo body and the tassels are made with Delicas...


Coppertone - Design 3

Same as above earrings but with a longer kumihimo body, so more PIP beads, and the 8s and 11s have a darker patina copper finish. The tassels are made with Miyuki Delicas with staggered lengths.


Opalesque - Design 3

The PIP beads have a dual finish, transparent colors on one side, with a silver metallic coating on the other side. The 8s and 11s are Miyukis in a gunmetal finish. The leverbacks are sterling silver.


When these earrings were all designed and the samples all finished, I searched online to see if anyone else had designed any earrings similar to these and I could not find anything already published on the internet thus far. I am super happy as I love to pioneer a new style!


The kits and the tutorial are available HERE. Check back soon for the next post on making the necklaces...