Showing posts with label Beads. Show all posts

Monday, October 19, 2020

Updates on Colors for the Dancing Skeleton Jewelry

Dancing Skeleton DIY Tutorial for Day of the Dead or Halloween

If you prefer to shy away from the brighter colors, try a combo with Natural Calavera and White Wood Beads
 

Wodd Beads for Dancing Skeleton DIY Tutorial for Day of the Dead or Halloween

The White Wood beads are made from natural pangantuon wood, a light weight wood with a light color and even texture, sometimes bleached for more even tone. The color gets a bit darker when worn or can be darken with a light application of a natural oil or wax such as micro crystalline or beeswax.


Dancing Skeleton DIY Tutorial for Day of the Dead or Halloween

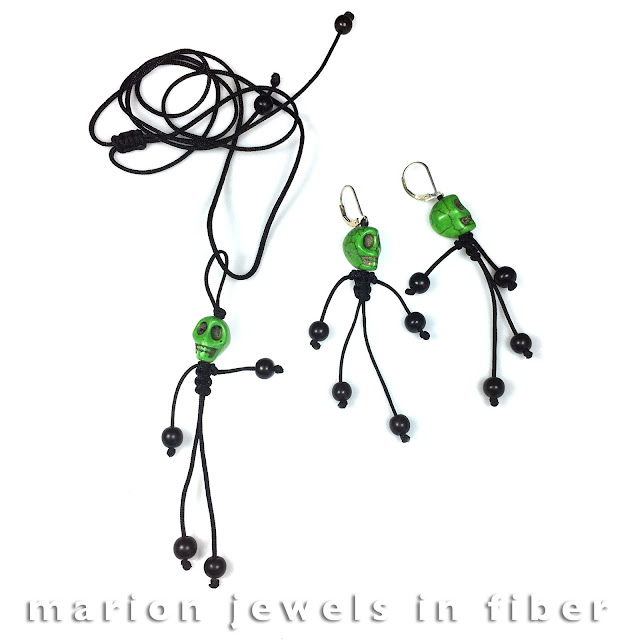
For the Chinese Knotting Cord, I chose Beige Fine Weight for the legs and Black Extra Fine for the arms and body, and for the neck cord.


Dancing Skeleton DIY Tutorial with Calavera Skull Beads

I added extra overhand knots for the shoulders and buttocks for the earrings, but omitted the knots for the buttocks for the amulet. I also omitted the overhand knot above the Calavera beads for the amulet. I used the Beige Fine Weight for the square knot closure, even though it is a bit bulky, but no other thinner Chinese Knotting Cord had an exact color match.


Dancing Skeleton DIY Tutorial for Day of the Dead or Halloween

For this next piece, I made the skeleton fully with the Beige Fine Weight and chose the Beige Medium Weight for a thicker neck cord. A 1.5 mm sterling silver clasp was added to the neck cord.  


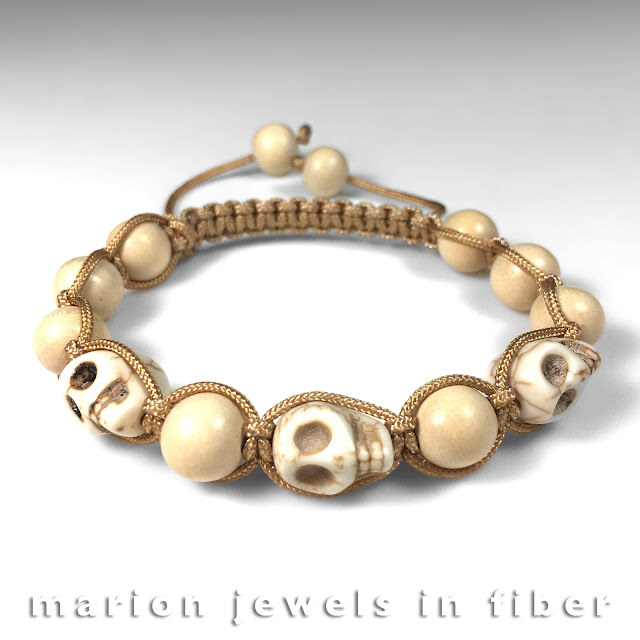
Shambhala Bracelet with Calavera Skull Beads for Day of the Dead or Halloween

For the shambhala bracelet, I chose Beige Fine Weight for the cord that goes through the beads, and Beige Medium Weight for the knotting cord. These white wood beads were rubbed with a light coat of micro crystalline wax to darken them, but just regular wear will darken the white wood a bit over time. Check the previous post for the step by step tutorial to make the Dancing Skeletons. 


Sunday, October 18, 2020

Dancing Skeletons DIY Jewelry Tutorial with Calavera "Skull" Beads for Dia De Los Muertos or Halloween

Dancing Skeleton DIY Jewelry Tutorial

I made many "Huesos Bailando" Dancing Skeleton or Bones earrings, amulets, and bracelets with "Calavera" Skull beads and sold them at the Chico Art Center in conjunction with Dia De Los Muertos exhibits. 
So here is the tutorial with step by step picture. I hope you will enjoy it.


Dancing skeletons are probably the most iconic and playful symbols of Day of the Dead. They represent a life after death and those who have died engaging in their favorite activities. Since Dia De Los Muertos is now celebrated worldwide, why not make an amulet, or a pair of earrings celebrating this Mexican holiday. Day of the Dead is celebrated on November 2, but festivities in the USA usually starts on October 31 on Halloween.  


Calavera Skull Beads for Day of the Dead or Halloween
Calavera (Skull) Beads
For this project you will need skull beads. The ones I have for sale are made of out of magnesite an off-white soft gemstone with little vein lines often used to imitate turquoise and they are about 13.5 mm long. The magnesite beads are carved, dyed, and stranded on an elastic cord. The strands have 15 beads each and can be worn as bracelets as is. Each strand has 7 beads paired by color, and 1 unique colored bead. The color of the single bead changes from strand to strand. For an amulet, you will need 1 Calavera Skull Bead. 

Preliminary Step
Prior to working with these beads, enlarge the bead hole with a reamer. A large fine point reamer used by hand works well for a few beads, but if you go into production an electric reamer is a nice tool to have on hand. Choices for reamers can be found HERE. Use water as a lubricant and let the diamond reamer enlarge the hole without pushing or forcing the tip in. Doing so will overheat and damage the reamer, and it will loose all of its diamonds. 


Ebony Wood Beads for Dancing Skeleton DIY Jewelry

Wood Beads
You will also need 6mm round Black Wood or Black Ebony Wood Beads for the amulets and earrings, and 10mm ones for the bracelets. Black Ebony is a bit heavier than the dyed wood beads, but is currently hard to get due to the typhon that just affected the Philipines. For this piece you will need four 6mm wood beads, or two 6mm and two 8mm ones if you would like the boots to be bigger than the hands. Your choice. Get all the beads HERE


Dancing Skeleton DIY Jewelry Tutorial for Day of the Dead or Halloween


TOOLS
You will need a macrame board, T-pins, a tapestry needle size 18, a bead reamer, and a thread burner. You can get these tools HERE.

CORD & THREAD
For this piece, you will need about 18 inch of Chinese Knotting Cord New Fine (966 Neon Orange for this example), and about 18 inch of of Chinese Knotting Cord Extra Fine (101 Black for this example), and 12 inch of C-Lon Micro Bead Cord in any color. 


Why 2 different sizes Chinese Knotting Cord? I like the arms to be a bit thinner than the legs... and I have all the choices on hand. However, if you prefer using one size only, go for the New Fine and Fine sizes. 


STEP BY STEP


Dancing Skeleton Calavera Skull Bead Jewelry DIY Tutorial


Step 1. Make a self needle with the Micro cord with beeswax. Join both end of the Micro cord and pull along the Chinese Knotting Cord though the hole. Self needle instructions can be found HERE


Dancing Skeleton Calavera Skull Bead Jewelry DIY Tutorial

Step 2. Pull the cord though the bead. If it does not go through easily, ream the bead hole again with bead reamer. 


Dancing Skeleton Calavera Skull Bead Jewelry DIY Tutorial

Step 3. Make an overhand knot for the amulet. An overhand knot is when you fold a cord over itself and go through the loop. Skip this step for the earrings and attach the earring finding here.


Dancing Skull Calavera Skull DIY Jewelry Tutorial for Day of the Dead or Halloween

Step 4. Pull the bead up. 


Dancing Skull Calavera Skull DIY Jewelry Tutorial for Day of the Dead or Halloween

Step 5. With T-pins, attach the loop to the bottom of the macrame board, and the cord ends at the top using a slip knot, or if it reaches insert it into one of the slots. 


Dancing Skull Calavera Skull DIY Jewelry Tutorial for Day of the Dead or Halloween

Step 6. With the tapestry needles attached to one of the black cord end, start a square knot. This shows the first half of the square knot. 


Dancing Skull Calavera Skull DIY Jewelry Tutorial for Day of the Dead or Halloween

Step 7. Tie 3 square knots with the black cord over the orange cord. 


Dancing Skull Calavera Skull DIY Jewelry Tutorial for Day of the Dead or Halloween

Step 8. Melt the ends of the cords with the thread burner into points and string the 6mm beads onto the cords. Or if you prefer you can use 6mm ones for the hands/gloves and 8mm ones for the boots. Clear the bead holes if needed with the large T-pin or the tapestry needle.

About thread burners: They are safer and more precise than lighters, and as lighters, they are not intended for use by children.


Dancing Skull Calavera Skull DIY Jewelry Tutorial for Day of the Dead or Halloween

Step 9. Tie an overhand knots. 

About the next two steps: If this is the very first time you do these steps, practice first on a spare cord. 


Dancing Skull Calavera Skull DIY Jewelry Tutorial for Day of the Dead or Halloween

Step 10. With a thread burner, cut the cord 1 to 2 mm away for the overhand knot. 

Dancing Skull Calavera Skull DIY Jewelry Tutorial for Day of the Dead or Halloween

Step 11. Melt the end right into the knot. Smooth the melted end either with your fingers if they are heat resistant, or with the cap of the burner.  

Dancing Skeleton Calavera Skull Bead Amulet or Earring - DIY Tutorial

Step 12. Repeat Steps 10 and 11 for the 3 other cords. 

ADDITIONAL OPTIONS

Add a necklace cord: Check this video.

Dancing Skull Dia de loss Muertos Calavera Skull Bead DIY Jewelry


Add an extra overhand knots... for the shoulders... and for the buttocks too at Step 7. See neckpiece below for all the extra knots. As I made more and more pieces last year, I found myself adding little touches... 


Dancing Skeleton Calavera skull bead earrings - DIY Tutorial


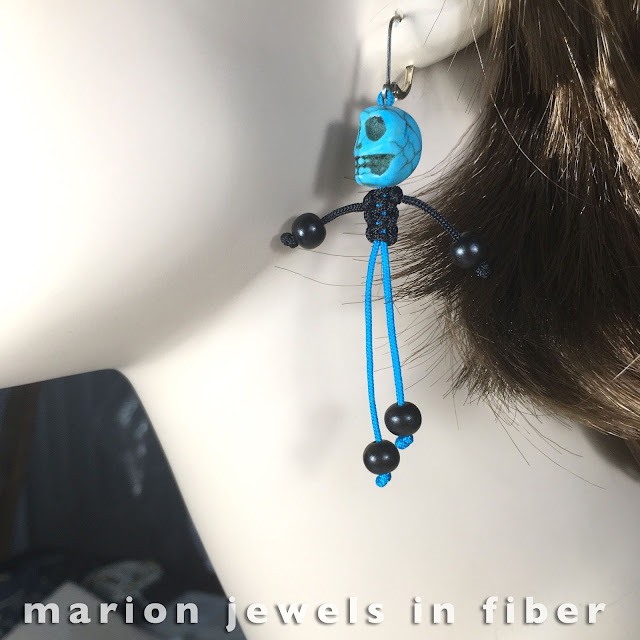
Make earrings: At Step 3, add the earring findings using pliers to open the loop and close it back once the cord in inserted into the earring loop. Skip the overhand knot. At Step 4, pull the bead up leaving a small loop. The Chinese Knotting Cord colors are 546 Cyan in New Fine Weight and Black Extra Fine.

Earring Findings

I really like leverbacks made out of sterling silver, or gold filled for these earrings. Many lower quality findings have nickel in them and bother my ears. You can find these leverbacks HERE


Calavera Skull Beads Shambhala Bracelet

Make Shambhala bracelets: Use 10mm and 6mm Black Ebony Wood Beads. I have also made them as shown here with 5 Calavera Beads, and 6 x 10mm and 2 x 6mm Black Ebony  Beads, or with 3 Calavera beads and 8 x 10mm beads, with 2 x 6mm beads at the end of the slide pulls. 

Calavera Skull beads shambhala bracelet - DIY Tutorial

If you need instructions on how to make Shambala bracelets, go HERE


Dancing Skeleton Calavera Skull Bead Necklace

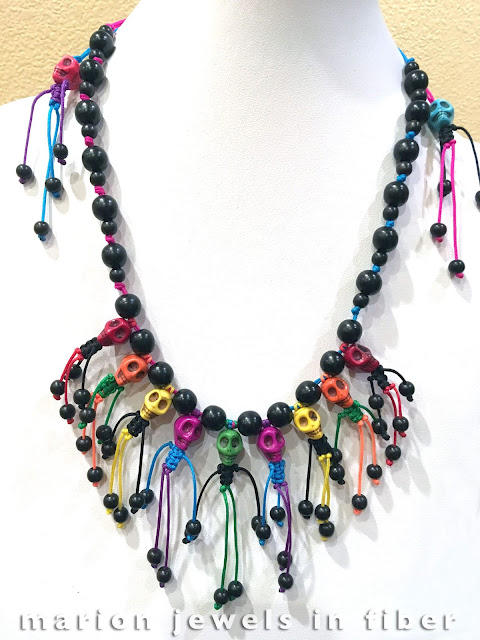
Try a neckpiece... like this one, if you are more ambitious, with 9 hanging skeletons in the front strung in between 10mm ebony beads, plus 2 more as back drops. 

I had fun with the Chinese Knotting Cord colors for this neckpiece, alternating colors such as a green torso for the orange skull. I made it last year especially for the Dia De Los Muertos exhibit at the Chico Art Center. It sold at the show and I have not made another one since...  so it is a one-of-a-kind. 

Upon request I just made kit bags with all the supplies to make the neckpiece and a pair of earring, plus a few charms with leftover supplies. A 19 page tutorial for this necklace comes with the kit and is also available by itself. I thought I would just write a one page printed set of directions, but truly I did not have the words to explain all the steps, so now it is a full step by step tutorial HERE

Check the next post for more color suggestions and combinations with White Wood Beads. 


Saturday, December 7, 2019

Multi Strand Bracelets Variations - Rules are Made to be Broken

Multi Strand Bracelets with Floating Beads and C-Lon Tex 400 Bead Cord


I have been enjoying making these bracelets. There are so many possibilities... as to beads and cord colors... And the pattern can be changed, rules are made to be broken. Here are some variations showing what's possible and how to deal with unanticipated occurrences.

When I first encountered etched beads, I was not sure if I would like them... I have since fallen in love with them. However I encountered a challenge: the bead holes of the etched beads are larger than most other Czech Fire Polished Beads, and the beads were sliding around the C-Lon Tex 400 Bead Cord... But hey I still wanted to work them into the design... The solution was to frame the larger holes etched beads with other beads with smaller holes.

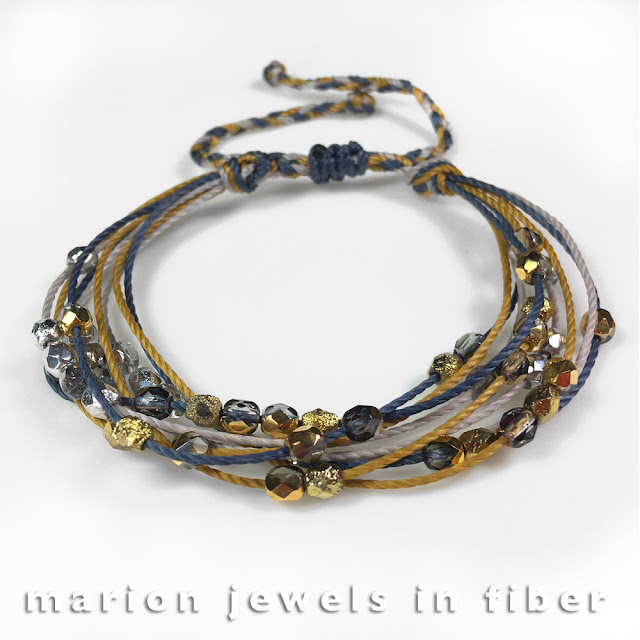
This bracelet is made with 4mm Czech Fire Polished beads, Etched Gold Ore and Indigo Gold Ore. The etched gold ore beads were a bit loose on the C-Lon Tex 400 Bead Cord, so to keep them from sliding around I boxed them in with the Indigo Gold Ore beads. Some of the cords have 3 beads, 1 Etched Gold Ore in the middle with one Indigo Gold Ore on each side, keeping the beads in place. Other cords have 5 beads, 3 Etched Gold Ore in the middle with one Indigo Gold Ore on each side.

Multi Strand Bracelets with Floating Beads and C-Lon Tex 400 Bead Cord

The C-Lon Tex 400 Bead Cord colors are AGO Antique Gold, IND Indigo, and GR Grey.

This next bracelet is a variation of the bracelet shown above with NK Nickel instead for GR Grey and added beads, Etched Argento, also with larger holes, surrounded and blocked by Crystal Argento. The Etched Argento and Crystal Argento beads are loaded onto the Nickel cord. The Etched Gold Ore and Indigo Gold Ore ones are loaded onto the Antique Gold and Indigo C-Lon Tex 400 Bead Cords.


Multi Strand Bracelets with Floating Beads and C-Lon Tex 400 Bead Cord

Other options I like: 6 cords with 3 beads, 3 cords with 3 sets of 3 beads, so 9 beads altogether. 

For more info on these bracelets, go to the previous post. 

Find the beads listed here –> 4mm Czech Fire Polished Beads


Multi Strand Bracelets with Floating Beads and C-Lon Tex 400 Bead Cord


To make these bracelets, get the tutorial, C-Lon Tex 400 Bead Cord, 4mm beads, and a few tools and supplies. 

–> More Info, Kits, Tutorial, Tools


Saturday, August 17, 2019

Necklace Cord for the Knotted Beaded Charms


To make the necklace cord for the knotted bead charm, you will need the following:

–> 1mm Chinese Knotting Cord

–> 1.5 mm Sterling Silver or Gold Filled Clasp

–>  Poly Zap Super Glue

–> Thread Burner

–> Chain Nose Pliers

For longer cords and smaller charms, I like to use a thinner Chinese Knotting Cord, so look at the New Fine and Fine size, and even the Extra Fine size as possible options. Or choose a thicker Chinese Knotting Cord such as the HDQ weight cords for a heavier charm. 

Or forgo the clasp and use a square knot slide closure. That's the same closure used for the Square Knot Bracelet Trio. 

–> Square Knot Bracelet Trio Kits and Tutorials

Go to the previous post for the tutorial on how to make the Knotted Bead Charm. 

Here are some bracelet - beaded charm combo, I like...


Knotted Bead Charms with Hematite or Halo Ring Beads | DIY Video Tutorial

Gold Halo Beads, with Hematite Bead Centers
Bracelet Knotted with C-Lon Tex 400 Bead Cord
Charm knotted with C-Lon Fine Weight Bead Cord Tex 135
Necklace cord made with 1mm Black Chinese Knotting Cord


Knotted Bead Charms with Hematite or Halo Ring Beads | DIY Video Tutorial

All Hematite, with Pearlescent White Hematite Beads
Bracelet Knotted with C-Lon Tex 400 Bead Cord
Charm knotted with the standard size of C-Lon Bead Cord
Necklace cord made with New Fine 201 Pearl Grey Chinese Knotting Cord


Knotted Bead Charms with Hematite or Halo Ring Beads | DIY Video Tutorial

Bracelets made with Gunmetal Halo Beads, and Pearlescent Pink Coral Hematite Beads, knotted with Chinese Coral, Pink Lemonade and Charcoal C-Lon Tex 400 Bead Cord.

Charm knotted with the standard size of C-Lon Bead Cord, with Hematite Ring Beads and Pearlescent Pink Coral Hematite Beads.
Necklace cord made with 1mm Black Chinese Knotting Cord


Knotted Bead Charms with Hematite or Halo Ring Beads | DIY Video Tutorial


Hematite and Halo Ring Beads are very inspiring... I just designed the Square Knot Bracelet Trio using these beads... and I wanted a small necklace to go with them, a small addition that could be made with either leftover beads or just a few additional purchased beads... the idea became the knotted bead charms.


Square Knot Bracelet Trio Tutorial


For making the charms use the following materials:

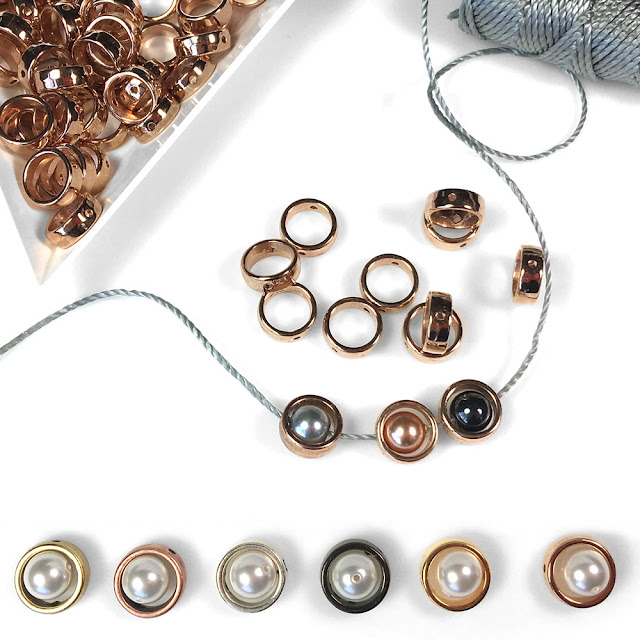
Hematite Rings Perfect Surrounds for 6mm Round Beads

Hematite or Rainbow Titanium Coated Hematite Ring Beads available HERE

or

Knotted Bead Charms with Hematite or Halo Ring Beads | DIY Video Tutorial

Halo Zamak Beads made in Greece available in Antique Brass, Copper or Silver, Gunmetal, Gold or Rose Gold finishes available HERE - All nickel and lead free and meeting European jewelry standards. 

6mm Hematite, Rainbow or Pearlescent Hematite Beads for the center, available HERE

or 
6mm Swarovski Crystal Pearls available HERE

+

4mm Hematite, Rainbow or Pearlescent Hematite Beads for the center, available HERE

or 
4mm Swarovski Crystal Pearls available HERE

Materials & Tools for the Knotted Bead Charm


As for tools, you will need a macrame board, a bead mat, 1 1 3/4" T-pin, beeswax, a large fine point reamer, a thread burner, beading tweezers, scissors. All these are available HERE

As to cords, use C-Lon Bead Cord with the Hematite Rings, and C-Lon Fine Weight Bead Cord Tex 135 with the Halos. You will need about 24 inches or 60 cm per bead charm. 

For the necklace cord for the charm, use Chinese Knotting Cord, it is a braided nylon and it look great as a neck cord and use a small sterling or gold filled clasp. Go to the next post for the video tutorial on how to make the necklace cord for the charms...

Monday, September 11, 2017

Kumihimo Neckpiece with PIP Beads


Kumihimo Neckpieces with PIP Beads


Many kumihimo bracelet patterns can be lengthened to make a neckpiece, but not all of them successfully. A neckpiece or long necklace needs special considerations. Some beaded kumihimo braids will roll over and show their backside making them inappropriate for a neckpiece at the base of the neck or a long necklace. They might work for a tight choker, but who wants to wear a tight choker... 

So with this in mind, I took two of the patterns created for the PIP Beads Kumihimo Bracelets and made neckpieces with them. 


Kumihimo Neckpieces with PIP Beads


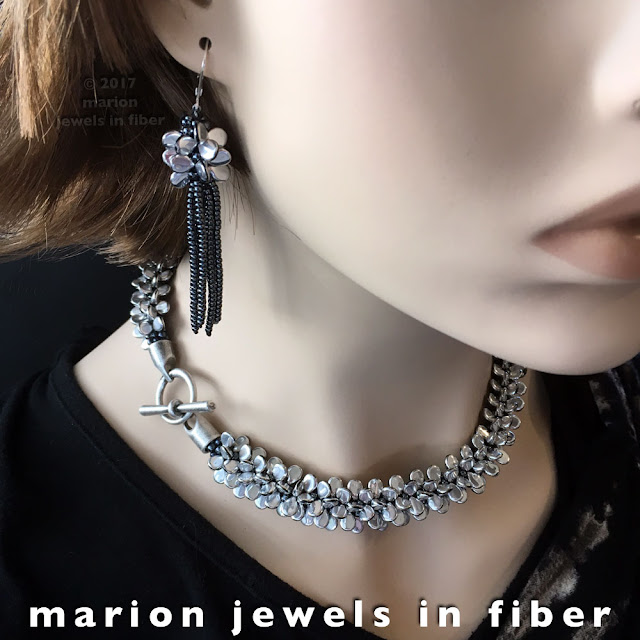
This Argento neckpiece is 17 inch long and made using the Half Round PIP Pattern. This pattern has PIPs only on the front and all 8s on the backside. This pattern would not work for a long necklace. For this piece, I doubled the C-Lon Fine Weight Bead Cord and the Satin Cord length, but increasing them by 1.5 is sufficient and multiplied the beads quantities by approximately 3. I used around 360 PIP beads, and about 12 g of Miyuki 8s for this neckpiece. I loaded the beads in 3 batches to keep the EZ Bobs from overflowing.


Kumihimo Neckpiece with PIP Beads


These two neckpieces shown here were made with the PIPSs All Around Pattern, so they are bit more dimensional than the pattern shown above.


Kumihimo Neckpiece with PIP Beads


References


For kits and tutorials go here: PIP Beads Kumihimo Kits and Tutorial

This post continues previous posts on Kumihimo with PIP Beads found here:

Kumihimo with PIP Beads

Compare Kumihimo with Bead Weaving and Crochet Techniques

Kumihimo Earrings with PIP Beads

Saturday, September 2, 2017

Kumihimo Earrings with PIP Beads DIY Kits & Tutorial


Kumihimo Earrings and Neckpiece with Preciosa PIP Beads


This post continues the series of posts about kumihimo with Preciosa PIP beads. The two previous posts are Kumihimo with PIP Beads and Kumihimo Bracelet with PIP Bead - Compare Kumihimo with Bead Weaving and Bead Crochet Techniques.

After designing the Kumihimo PIP Bracelets Kit and Tutorial, I made a few necklaces using the Half Round PIP and the PIPs All Around Design Patterns included in the bracelet tutorial. Both designs work well in a necklace form. The one shown here is 17 inch long and used the Half Round Design. I will be writing a post these necklaces next.

After making the necklace, I needed earrings to wear for a wedding I was attending, so I set all my other projects aside and went to work designing my very first kumihimo earrings. Please note that I went about it without doing any research online whatsoever. I did not want to be influenced by someone else’s designs.


PIP Beads Kumihimo Earring DIY Tutorial & Kit

The first earring I made was a PIP ball earring, but it was not quite distinctive enough, plus the finishing of the end cords was a bit complex for a DIY, so I decided to try for a design with a beaded tassel. The first ones were pretty good, but the bead placement was not quite right yet and the tassel was a tad short, but the Jellyfish design just needed a bit more refinement.


PIP Beads Kumihimo Earrings


Everything gelled in the next attempt. The earring had a nice distribution of the PIP beads in the kumihimo body, and the beaded tassel, the tentacles, was just right. This is the design I adopted for the kit and tutorial. > Kumihimo Jellyfish Earrings with PIP Beads

The tutorial is very comprehensive and includes 15 pages with over 30 pictures, tables and charts. Please note the tutorial assumes you have prior knowledge of the braiding steps and beaded kumihimo. The manual does not included the basic steps. If this is your first kumihimo project, make sure to get the Kumihimo PIP Bracelets Kit and Tutorial first. Make the bracelet first as the bracelet manual includes very detailed pictures showing the braiding steps.

The earring tutorial includes 3 design variations and several options for the beaded tassels. The kits are available in the following color and design variations:


Design 1

That's the basic design... This earring style works well with the neckpiece or by itself.


Copper Venus

The PIP beads are transparent with an AB finish. The 8s and 11s are Miyuki Duracoats in a dark copper finish. The leverbacks are gold filled. The necklace is made with the PIP All Around Design. 


Argento

The PIP beads have a silver metallic coating all around. The 8s and 11s are Miyukis in a gunmetal finish. The leverbacks are sterling silver. The necklace is made with the PIP Half Round Design. 


Azuro Metallico

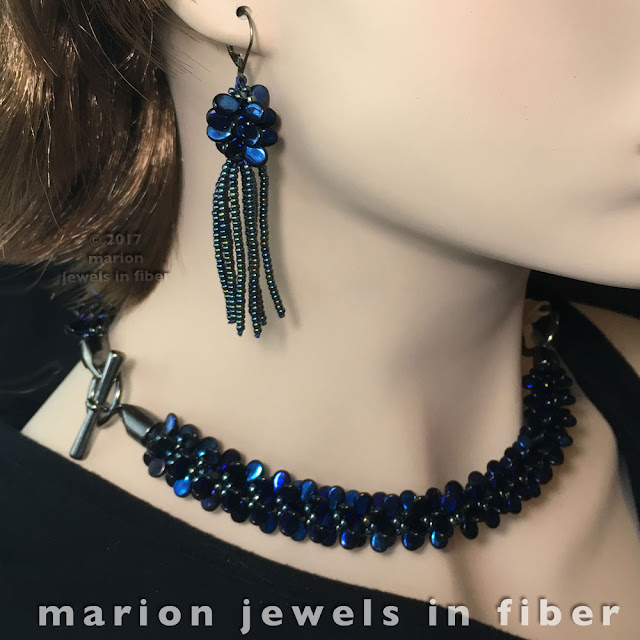
The PIP beads have a blue metallic coating all around. The 8s and 11s are Miyukis in a AB gunmetal finish. The leverbacks are sterling silver with an oxidized finish. The necklace is made with the PIP All Around Design. 


Sapphira

The PIP beads have a dual finish, transparent colors on one side, with a graphite metallic coating on the other side The 8s and 11s are Miyukis in a gunmetal finish. The leverbacks are sterling silver with an oxidized finish.

Design 2

Design 2 as a shorter kumihimo body. Any of the earring kits shown above can be made into Design 2... You will have a few PIP beads leftover for another project. As to the tassels, I started playing with the individual beaded cord length. The tassels can have blunt cuts, staggered or uneven beaded cord lengths... Your choice.


Coppertone - Design 2

The PIP beads have a dual finish, transparent colors on one side, with a copper metallic coating on the other side The 8s and 11s are Miyuki Duracoats in a bright copper finish. The leverbacks are sterling silver with a light oxidized finish.

Design 3

Design 3 as a longer kumihimo body and the tassels are made with Delicas...


Coppertone - Design 3

Same as above earrings but with a longer kumihimo body, so more PIP beads, and the 8s and 11s have a darker patina copper finish. The tassels are made with Miyuki Delicas with staggered lengths.


Opalesque - Design 3

The PIP beads have a dual finish, transparent colors on one side, with a silver metallic coating on the other side. The 8s and 11s are Miyukis in a gunmetal finish. The leverbacks are sterling silver.


When these earrings were all designed and the samples all finished, I searched online to see if anyone else had designed any earrings similar to these and I could not find anything already published on the internet thus far. I am super happy as I love to pioneer a new style!


The kits and the tutorial are available HERE. Check back soon for the next post on making the necklaces...