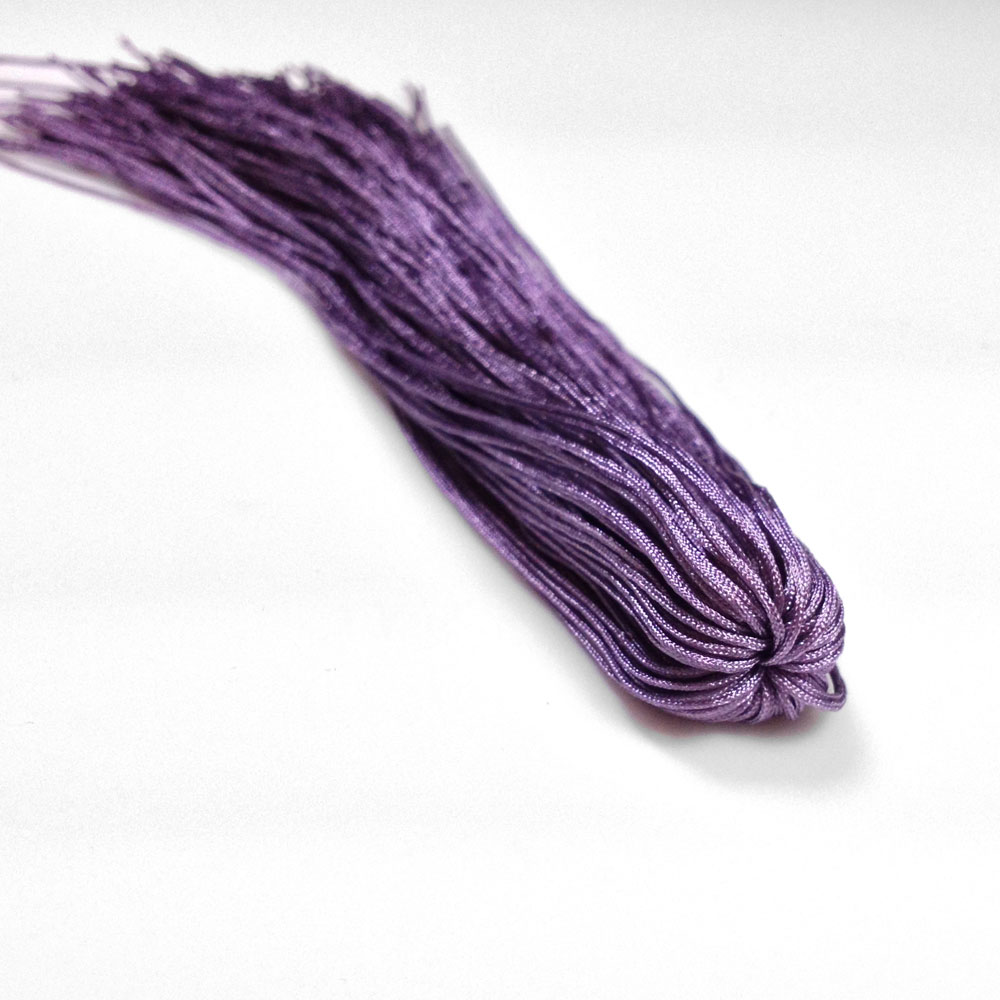
Showing posts with label Tassels. Show all posts

Thursday, October 28, 2021

Sankakusui-Koma | Japanese Tops | Tassel and Loop | Part 1

Sankakusui-Koma | Japanese Tops |  Tassel and Loop | Part 1


For this first part of the Sankakusui-Koma tutorial, we will make the tassel with Winter, a Special Twist Anaito 100% Silk Thread. It is a 3-ply twist of these 3 colors: KNK-800, KNK-075 and KNK-White. We will add a solid color of Anaito 100% Silk Thread  KNK-004 for contrast. See the full project description in the previous post

Part 1: The Tassel and Loop

Silk Tassel Tutorial - Step 1 - Tutorial for Japanese Komas/Tops

1. If you have a thread dispenser for the spools, use it. Note: If you use solid colors on cards, either iron out the creases or wash them away at step 7. 


Silk Tassel Tutorial - Step 1 - Tutorial for Japanese Komas/Tops

2. Fold a 6 inches (15 cm) piece of card stock in 1/2 and wrap it with the silk thread 45 to 60 times depending on how thick you want your tassel to be.


Silk Tassel Tutorial - Step 1 - Tutorial for Japanese Komas/Tops

3. With a 12 inch (31 cm) piece of thread and a tapestry needle, go around the thread bundle at the folded side of the card stock. This will be the tassel suspension cord. Use a stronger bonded nylon cord for this part if desired.


Silk Tassel Tutorial - Step 1 - Tutorial for Japanese Komas/Tops

4. Tie the 2 thread ends together making sure the bundle is highly help. Use a flat knot, aka square knot reef knot, or common knot, right over left, and left over right. Look at how to tie this knot here if you forgot how. Make sure to tighten the first part of the knot before tightening the second half. 

Silk Tassel Tutorial - Step 1 - Tutorial for Japanese Komas/Tops
5. Cut the thread at the opposite side of card stock with sharp scissors. 

Silk Tassel Tutorial  - Tutorial for Japanese Sankakusui-Komas/Tops
6. Choose the color for the neck wrap. Cut an 18 inch (40 cm) length.

Silk Tassel Tutorial  - Tutorial for Japanese Sankakusui-Komas/Tops
7. Wet the tassel under running water. This is especially important if you work with Anaito Silk on cards as creases leftover from being wrapped around the cards need to be washed out or ironed out ahead of time. 
 
Silk Tassel Tutorial  - Tutorial for Japanese Sankakusui-Komas/Tops
8. Wrap the tassel with a piece of clear plastic and secure it with rubber bands. 

Silk Tassel Tutorial  - Tutorial for Japanese Sankakusui-Komas/Tops
9. Pull plastic wrap down to make space for the tassel head and neck. Start the wrap by securing one end of the new thread under the elastic band. 

Silk Tassel Tutorial  - Tutorial for Japanese Sankakusui-Komas/Tops
10. Fold it back into a loop. Hold it right at edge of the plastic wrap.

 Silk Tassel Tutorial  - Tutorial for Japanese Sankakusui-Komas/Tops
11. Wrap around at edge of plastic wrap, pull through loop, and tighten. Repeat wrap and half hitch. 

Silk Tassel Tutorial  - Tutorial for Japanese Sankakusui-Komas/Tops
12. Continue with wraps. End last 2 wraps with half hitches.

Silk Tassel Tutorial  - Tutorial for Japanese Sankakusui-Komas/Tops
13. Put end of thread through the loop. 

Silk Tassel Tutorial  - Tutorial for Japanese Sankakusui-Komas/Tops
14. Pull on thread by plastic wrap. It will pull the end on the right. Once it is right at center, and all the loose ends are tucked in, cut the 2 thread ends. 

Silk Tassel Tutorial  - Tutorial for Japanese Sankakusui-Komas/Tops
15. Bring the plastic wrap up, and cut the ends of the tassel skirt with sharp scissors. I like to use larger scissor for this task. 

Silk Tassel Tutorial  - Tutorial for Japanese Sankakusui-Komas/Tops

The tassel is now completed. Its anatomy comprises of the suspension cord, the head, the wrapped neck, and the tassel skirt. 

16. For the loop, just take a piece of Chinese Knotting Cord Size E for this project or a larger size for larger komas. Fold it in half and tie it with an overhand knot. It makes a loop. 

Sunday, January 24, 2021

Making Malas - How to Choose Cord Colors

A while ago I wrote a post with step by step instructions on how to make Malas. This was after getting a lot of requests on the best cords to use to make Malas and how to make the tassels. Go to the post HERE. Friday, I got a phone call asking me about color choices for a Mala with Rose Quartz, and it requires some follow up and a few tests... so I may as well share this with everyone.

These tests are a great way to choose colors. In addition, they will confirm that the cord size chosen for stringing the beads and knotting between the beads is the correct size. 

The size of the knots in between the beads need to be just right. The knots need to be large enough to keep the beads separated, but if they are too small, they may partially disappear into the bead holes. If they are too large, they take over visually.  

As a rule of thumb, use the standard C-Lon Bead Cord doubled over for 8mm and 10mm gemstone beads, and use C-Lon Fine Weight Bead Cord (that's the Tex 135 with a 0.4mm diameter) doubled over for 6mm gemstone beads. If you use wood or metal beads it gets more complicated as there is not really a standard hole size for these beads, so testing becomes even more crucial. 

Here are my tests:


Making Malas - How to Choose Colors and Cord Sizes


The cord for stringing the beads and knotting in between is the standard size of C-Lon Bead Cord (the Tex 210 with a 0.5mm diameter). The colors are from top to bottom: FL French Lilac, PTL Petal, and AP Apricot. 

The rose quartz 10mm gemstone beads I happen to have are a bit milky so they do not show the bead holes. Other rose quartz beads I have had in the past have been more transparent. French Lilac may have shown as a dark line at the center of the bead, and Apricot may have added a yellow glow to the rose quartz I may not have wanted. 


Making Malas - How to Choose Colors and Cord Sizes


As for the choices for the tassel color, I chose to go with Chinese Knotting Cord Size E, or New E, as the tassel will be large and require about 50 yd of cord. For these tests, from top to bottom, I chose Chinese Knotting Cord Size E: E-415 French Lilac, NewE-312 Pink Blossom, E-320 Bubblegum, and E-941 Pale Coral. 

Other good choices for tassels include the next size up of Chinese Knotting Cord (Size F), silks such as Kanagawa or Fujix Tire, or Griffin Jewelry Silk on spools. 

Links & References: 

–> DIY Instruction on Making Malas with a Tassel

–> C-Lon Bead Cord

–> Chinese Knotting Cord Size E or New E

–> Matching C-Lon with Chinese Knotting Cord and Silks


Thursday, June 23, 2016

Making a Mala with a Tassel - DIY Instructions


Mala with Tassel - DIY Instructions


Malas are Buddhist prayer beads used for meditation. Traditionally 108 beads are strung and hand knotted in between each bead. A central bead named Guru Bead and a tassel are often added to Malas. These elements, the 108 beads, the marker beads, the Guru bead, and the tassel, all have a symbolic significance explained at the end of this post. 

Material & Tools Needed


Mala with Tassel - DIY Instructions


• 108 Beads
The 8mm Mala shown on this tutorial is made with mostly 8mm beads, the marker beads are a bit larger than the other beads. The beaded part is 96 cm/38 inches long. The tassel and Guru bead add another 15 cm/6 inches. I used a larger oval Turquoise bead as the guru bead and added an amethyst bead above the tassel for color contrast. 

Here are some of the choices:

- All 108 beads are 8mm in diameter. 

- Or  104 8mm beads + 4 marker beads. The marker beads can be a different size, or have a different texture, or feel. 

- All 108 beads are 6mm in diameter.

- Or 104 6mm beads + 4 marker beads. The Mala shown on the right below, is made this way with 8mm marker beads. It is 76 cm/30 inches long and the Guru bead and tassel add 13.5 cm/5.25 inches. The male on the left is shown in the step by step of this tutorial. 


Mala with Tassel - DIY Instructions

The beads can include round and faceted gemstones, wood beads such as ebony, seed beads, metals beads, or a mix. For this Mala I chose a mix of round and faceted gemstone beads. 

• The Guru Bead
Larger bead, can a carved buddha bead, in between the 108 beads and the tassel. 

• The Cord
Although silk is more traditional, if you are using gemstones and planning on wearing your Mala, bonded nylon is a better choice. It is more durable than silk... and due to its 3-ply twisted cord construction, it does not stretch as much as braided nylon cord (Chinese Knotting Cord). 

C-Lon Bead Cord for 8mm beads - For stringing the beads, and knotting between each bead. 

C-Lon Fine Weight Bead Cord Tex 135  - Recommended for 6mm beads. With the 6mm beads consider using C-Lon Fine Weight Bead Cord Tex 135 instead of the standard C-Lon Bead Cord Tex 210. The knots between the beads are a bit more delicate and the Mala drapes better. 


Knots between 6mm beads. Top with the standard C-Lon Bead Cord Tex 21 doubled up.
Bottom strand is made with the C-Lon Fine Weight Bead Cord Tex 135 doubled up.
My next 6mm Malas will be made with the finer cord. 


Chinese Knotting Cord or Silk - For the tassel.

Tweezers - For knotting between beads.

Sharp Scissors - For cutting the C-Lon Bead Cord and trimming the tassel

Beeswax - For stringing beads onto the C-Lon Bead Cord. Optional - wire needles or big eye needle.

Fray Check - Optional if all the cords do not fit through the Guru bead.

• Bead Tray - A bead mat or towel will work too

Tapestry Needle - Size 22 or 20. To pull the cord through the tassel center

Chain Nose Pliers - Or any utility pliers to pull the needle through the tassel center.  

Step 1 - Laying the Beads


Mala with Tassel - DIY Instructions

Lay out the beads. The small blue arrow at the bottom is where the Guru bead and tassel will be added. 26 6mm beads are laid out on each side, plus one 8mm marker bead for a 27 beads segment. Do that twice for a total of 54 beads on each side. The red arrows point to the 8mm marker beads. The blue arrows at the top is where the beads will be loaded onto the cord. 

I placed an extra amethyst bead below the Guru bead. I may or may not use it in between the guru bead and the tassel. I added it to the 6mm Mala, but not the 8mm Mala. It added contrast with the Teal tassel, but was not necessary for the French Lilac tassel. 

Step 2 - Stringing the Beads

Cut two lengths of C-Lon Bead Cord 235 cm/96 inches long. Stretch the cord between your hands. This will remove the 10% stretch of this cord. Make an overhand knot with the 2 cords together right at the center with 117 cm/48 inches on each side. 

(Use the Fine Weight size for 6mm beads.)

Make self needles at both ends of the double cord with the beeswax by shredding the ends of the cord with the blade of the scissors, then adding beeswax. Do that a few time until you have a nice point, and cut the end of the point at an angle. Refer to this post on how to load beads onto cord for step by step instructions on how to make a beeswax self needle. 

Mala with Tassel - DIY Instructions


Load a first group of beads. Start at one of the top blue arrows. Knot between the beads with overhand knots. Use tweezers to keep the knot against the bead and use your left index finger and thumb to keep the knot on place when pulling the tweezers off. 


Mala with Tassel - DIY Instructions

Then tighten the knot. You can separate the two cords to do the final pull on the knot. 


Mala with Tassel - DIY Instructions

Continue, loading either one bead or a small group of beads at a time, then knotting in between. 


Mala with Tassel - DIY Instructions


Loading one bead at a time and knotting seems slow, but it is easy. I find it easier and faster to load the beads in small groups, then knotting in between. If you are not sure about the bead layout, loading all the beads at once and on both sides is best for design purposes, but tying the overhand knots between the beads is a bit more awkward as all the beads need to be pulled though the overhand knot before it is tightened.  


Mala with Tassel - DIY Instructions

Here the first side has been done. 54 beads have been strung. Now load and knot the other side, starting at the top arrow. Two 8mm marker beads will be next to one another and will mark the back of the Mala. 

Step 3 - Joining at the Guru Bead


Mala with Tassel - DIY Instructions


Join the ends together and load the Guru bead onto the 4 cords. Add an overhand knot after the bead(s).

If the Guru bead hole is not large enough to accommodate all 4 cords, here are some options. Ream the hole with a diamond reamer until it can accommodate the 4 cords. Or use only one cord from each side. Add a drop of Fray Check on the final knots. Let it dry. Cut one of the cords on each side off and load the Guru beads on the remaining 2 cords. 


Step 3 - The Tassel

Make the tassel > Go to Tassel Tutorial, but wait to trim it until it is in place. You can even get it in place onto the C-Lon Bead Cord prior to wrapping the neck. 

The Tassel Tutorial shows how to make the tassel for the 8mm Mala step by step. This tassel here shown below is made with Chinese Knotting Cord Size E (0.4 mm in diameter) wrapped 60 times around a cardboard box lid 24 cm/9.5 inches around. The finished tassel, once trimmed is 10 cm/4 inches long. 


Mala with Tassel - DIY Instructions


Using a tapestry needle size 22 or 20, pull the C-Lon Bead Cord though the tassel center. Do it one cord at a time so not to disturb the tassel top. If needed, use pliers to pull the needle through. 


Mala with Tassel - DIY Instructions


Load a 'stopper' bead onto the C-Lon Bead Cord. I use a 6mm ebony wood bead with a hole large enough to accommodate all 4 cords. The beads will be right under the tassel skirt.


Mala with Tassel - DIY Instructions

Make an overhand knot and tighten it against the bead, blocking the tassel in place. Then trim the tassel as shown in the tassel tutorial. 

Mala with Tassel - DIY Instructions


A Mala can be made in an afternoon or evening. The processes, choosing the beads, stringing beads, knotting in between the beads, and making the tassel can become a form of meditation. The gemstone beads chosen for the Mala are also important as gemstones have subtle energies that can be felt and should be honored while working on the piece. 

These Malas are made with the following gemstones:

Amethyst - Give strength. Helps healing. Increases intuition and helps overcome addictions.

Blue Goldstone - Man-made with copper. Protection stone. Good for meditation. Symbolizes light found in darkness. Good for long distance healing. 

Hematite - Grounding and protection stone. Calming. 

Turquoise - Helps promote clear communication from the heart. Relieve stress. Protect from pollution. 

Lepidolite - Known as the peace stone. Promotes calm and acceptance. Good for the heart chakra. Brings hope in dark times by bringing a sense of balance and calm. 

I hope you will find this tutorial helpful. I got a number of questions after writing the tassel tutorial about how to attach the tassel to the strung beads. Making Malas is very enjoyable and I plan to make more in the future. Many variations can be made. I have worn the larger Mala for several months now and it is doing very well. I have not noticed any stretching between the beads, although the knots seem to have relaxed a bit. The bottom of the tassel has flared a bit as the braid has opened, and the very tips of the tassel seem a bit lighter. I do not find it to be a problem, it looks good. The Mala  feels good on. And yes, I look forward to wearing the shorter one just made for this post. Namaste! - Marion

Symbolism

108 - The number 108 is considered sacred in Buddhism and Hinduism. This number represents 108 energy lines that converge to form the heart chakra; 108 Hindu Goddess names; 54 letters of the Sanskrit alphabet, each with a feminine and masculine side (Shakti and Shiva) and 54 times 2 equals 108.

Marker Beads - Often marker beads are added to Malas. They have either separate textures or a different diameter than the other beads, but in most instances they are counted in the 108 beads. When crossed while meditating they are there to remind us to stay focused, as a wake up call or gentle reminder. 

Japa Meditation - From Sanskrit. Meditative repetition of a mantra or a divine name, a practice found in Buddhism, Hinduism, Jainism, and Sikhism. The mantra or name may be spoken softly, enough for the practitioner to hear it, or it may be spoken within the reciter's mind.

Guru Bead - The center bead represent the teachers we had along the way or the teacher within. Out of respect one must stop at the guru bead and if you want to continue with the meditation counting beads, turn around to continue counting in the opposite direction. It is a good place to reflect on the intentions of your practice.

Tassel - Represents enlightenment, oneness as all the strands are connected together, connecting all to the divine, a symbol for prana and consciousness.

Meditation with the Mala -
The Mala beads are used to keep count of the mantras in Japa meditation. Recite your mantra on each bead, going around the entire mala until you get to 108 repetitions of that mantra. A separate mantra can be made when crossing over the marker beads. 


References & Links


Tuesday, March 22, 2016

DIY Tassels for Jewelry Continued... Larger Tassels with Chinese Knotting Cord Micro Size E

Mala with Tassel


Tassels, especially larger tassels can be a focal center to a neckpiece or mala. This mala has 108 beads with 4 marker beads (the 4 lepidolite). The 8mm beads are strung with C-Lon Bead Cord and knotted in between. The mala can be worn long singly or doubled up as a shorter piece. The 5 inch (12.5 cm) long tassel is made with Chinese Knotting Cord Micro Size E.

I have made these larger tassels from 4.5 to 5 inches long. I tend to make them long as they can always be shortened. Silk can be used for these these larger tassels, but the ones made with the Chinese Knotting Cord drape better than the silk ones. Smaller tassels can be made with Chinese Knotting Cord or with silk.  > Check this DIY Silk Tassel Tutorial

Materials and Tools for a 5 inch Tassel

40 yards of Chinese Knotting Cord Size E - 0.4mm in diameter
Tapestry Needle Size 22
Sharp Scissors
• A Small Book, Several Layers of Card Stock or a Large Bobbin Plastic Box

DIY Tassel Tutorial

1. Wrap the cord 100-115 times around a box, book, or card stock.  

DIY Tassel Tutorial

2. With a separate piece of cord and the tapestry needle, wrap many times around the cord bundle. 

DIY Tassel Tutorial

3. Use a flat knot to bind the cords. 

DIY Tassel Tutorial

4. Cut the tassel cords along the other end. 

DIY Tassel Tutorial

5. Fold over the cords of one of the sides over to the other side. 
This will make a perfectly symmetrical tassel. 

DIY Tassels Tutorials

6. With a separate piece of cord, wrap the tassel neck, starting with 2 half hitches.

DIY Tassel Tutorial

7. Continue with a simple wrap and finish it with 2 half hitches. 


DIY Tassels Tutorials

8. Stitch the end back into the tassel and through towards the ends of the cord.

DIY Tassels Tutorials

9. To trim the cord ends, wrap a piece of plastic around the tassel. 

DIY Tassel Tutorial

10. Use your sharpest scissors to trim the ends. 

DIY Tassel Tutorial

11. Using the tapestry needle, the tassel can now be attached. Alternatively, it can be attached prior to wrapping the neck at step 5 or before trimming it at step 8.

References


> DIY Instruction on How to Make a Mala with a Tassel


Saturday, August 1, 2015

DIY Silk Tassels for Jewelry

Silk Tassels

One of the latest trend in jewelry is tassels. They are featured everywhere on malas, attached to bracelets, earrings and more... In fashion you can find them on clothing, belts, shoes, purses along with lots of fringes. Tassels can be made out of many different type of materials depending on their final use. They can be simple or complex. 

Here is a tutorial for a silk tassel well suited for jewelry. 

I found filament silk best suited for tassels. The weight and flexibility of the silk makes gorgeous tassels. Kanagawa 100 Denier Silk and Fujix Tire Silk come in an amazing array of colors. Kanagawa 1000 Denier Silk comes in 162 colors; Fujix Tire Silk in 121 colors; Griffin Jewelry Silk in 11 colors. The following tassel was made with Kanagawa color #5. The two Japanese brands, Kanagawa and Fujix Tire, are comparable and they are as far as I know the best filament silk available. Griffin Silk, a beading silk is also a very high quality silk suitable for tassels. 


Silk Tassels Tutorial

1. Cut a folded piece of cardboard a bit longer than the desired length of the tassel.


Silk Tassels Tutorial

2. Insert the thread in the cardboard fold and wind the thread around. 
This one was wound about 45 times around the card. 
The more you wind the thread around the cardboard, the fuller the tassel will be. 


Silk Tassels Tutorial

3. With separate thread, bind all the tassel thread on one of the end.
I go around the bundle twice, then tie the two ends into a flat knot.

4. Cut the thread along the other end of the cardboard while holding the bound end. 
Continue holding the bound end for next step. 


Silk Tassels Tutorial

5. Run the thread under lukewarm water to remove the folds and to make it easier to cut the ends. 
Blot the tassel with a towel to remove excess water. 

This step can be skipped with Griffin Silk, and with silk coming off of spools, but cutting wet silk is easier than cutting dry silk. It is just like getting your hair cut wet rather than dry...


Silk Tassel Tutorial

6. Continuing while the tassel is wet… 
With a separate piece of silk, wrap the tassel neck. 
Stitch the ends back toward the tassel ends. 


Silk Tassels Tutorial

7. To trim the tassel, wrap the tassel in a piece of plastic shed.
Use your sharpest scissors to trim the ends.


Silk Tassels Tutorial

Here is the finished tassel.


Silk Tassels Tutorial


The finished length of this tassel after trimming is 4.5 cm long.
The head is about 5 mm in diameter. 
The bottom of the tassel skirt is about 18 mm wide. 


Silk Tassels made with Kanagawa & Fujix Tire Silk

Tassels made with Kanagawa 1000 Denier Silk and Fujix Tire Silk.
Some are longer, fatter… The fattest one on the right was made with the full card. 


Silk Tassels

Tassels made with filament silk.
The two on the right are made with Griffin Jewelry Silk Size 6. 

The Kangawa and Fujix Tire silk tassels have a bit more sheen than the Griffin ones. Griffin Jewelry Silk is another filament silk often used for stringing beads. It is less sheen and more grip, so a bit easier to handle than Kanagawa & Fujix Tire. It is available in 12 colors at this time. Griffin Jewelry Silk comes in spools. Size 6 has 65 meters per spool.  


Tassel made with Madeira Silk

Tassel made with Madeira Silk

This tassel is soft and fluffy, but the floss does not have the weight of the filament silk, so it does not hang quite as nicely. It might make a good tassel, but it would not be my choice for jewelry. Madeira Silk Floss come in 108 colors. It is made in Germany with spun silk from Switzerland.  


Tassel made with C-Lon Micro Cord

Tassel made with C-Lon Micro Cord. 

This tassel skirt is bit stiff. I may attach this ones to my keys or a purse, but I would not attach it to a strand of beads, nor wear it as a jewelry charm… 


I am now experimenting with tassels made with Chinese Knotting Cord, so far I really like the results with Micro Size E. > Read New Post on Tassels 

See latest post on tassel HERE

Silk - References


Silks available at Jewels in Fiber
All these fine silks are available at Jewels in Fiber online store

Here are the silks, I tested for tassels. I made the same types of tassels growing up in Geneva, Switzerland. I came up with a few improvements while making them this past week… Oh, I was told at the show I just attended that books are good to wind the thread around to make the tassels. I will try this next. 

I have several books on tassels, but I have yet to make one of the fancy tassel featured in them. If you are interested in further research in the art of passementerie, that is the French word for fancy decorative trimming such as tassels, braid and fringing, check books on tassels and look for future posts on the subject!