You can start with a ready made koma form as shown here or make your own out of cardboard. The sizes of the ready made one I received from Japan are as follows:
Small (Very Tiny) - Japan is really into miniatures... 10 x 30 mm rectangle folds into a triangular bi-pyramid 14 mm wide at its center base and 11 mm tall
Medium (Perfect Small Size) - That's the one in this tutorial. 15 x 45 mm rectangle folds into a triangular bi-pyramid 21 mm wide at its center base and 17 mm tall
Large (Still Small) - I will play around with this size next... 20 x 60 mm rectangle folds into a triangular bi-pyramid 28 mm wide at its center base and 22 mm tall
Larger Sizes - Print this PDF template at 100%. Or if you want smaller sizes print at lower percentage. Cut the paper shapes. Glue the shapes to cardstock or mark the cardstock the same way. Cut the cardstock. Mark the folds, and score them using a ruler and the back of a butter knife or a bone folder if you have one. Fold away each at each score mark and smooth the fold with your ruler.
1. Orient correctly with score lines at back.
2. Attach the tassel with a piece of double stick tape. For more precise rectangle pieces, cut the tape with scissors. The dispenser cutting edge tool is not accurate enough. If you want to add a bead between the top and the tassel, add it before this step.
3. Fold cord back onto the double stick tape and cut. Repeat for loop.
4. Apply drop of glue to secure. Ot if you prefer you can apply a second piece of tape over the first one as shown on next photo.
5. Pre-attach pieces of double stick tape on top left and left, and bottom right and right as shown in red.
6. Secure thread for wrapping the shape with double stick tape. Leave it attached to the spool or card. Have it come out by the loop at top. Note: this tassel has a bead attached on the suspension cord.
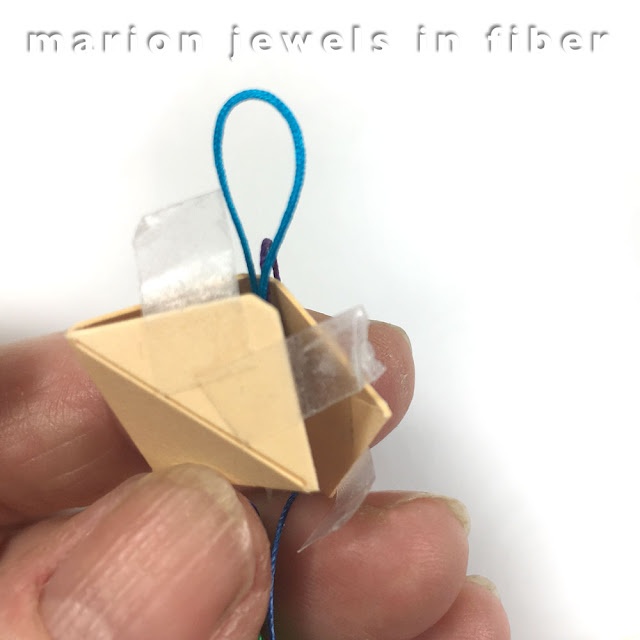
7. Fold top left corner toward loop. Secure double stick tape. Add more pieces of tape if necessary.
8. Fold bottom right corner towards tassel. Secure tape, adding more if necessary. Add double stick tape to the three top and bottom edges of the triangular pyramid. You do not need to cover the base edge of the bi-pyramid.
Optional
• The very tips, the 3 corner at the base of the pyramids remain uncovered, so if you want, color them with a permanent marker like a sharpie.
• Before closing the shape, fill it with rice or a bell if you want it to make sounds.


No comments:
Post a Comment