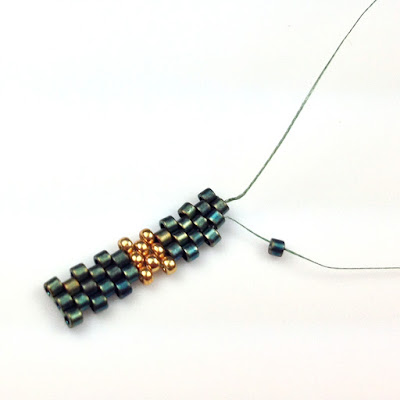
Start by beading the first 3 rows, using either the Traditional Method shown here or the 2 Needle Start.
Traditional Start
Go to Step 2 on the Odd-Count Tutorial.
2 Needle Start
It makes sense to use the 2 Needle Start, since you will need 2 needles to proceed anyways.
1. The first 3 rows are completed. The bead count by columns:
6 Delicas Size 10, 3 Seed Beads Size 11, 6 Delicas Size 10
2. Place the mini-clampon lower thread, right at bead.
With the top thread go through the bead at the arrow.
3. Add 1 bead. Insert the needle into the next beads, and repeat.
Sorry the in-between picture was too blurry to use...
4. Continue until the end of the row, switching beads for center stripe.
Remove mini-clamp and pull on both thread to tighten the work.
4. Place mini-clamp on the thread on the right side.
Proceed with peyote with the thread on left side, going to the right.
Add a bead and catching the beads that protrude in between additions.
5. Add the last 'loose' bead on this row
6. Place the mini-clamp against the last bead.
7. Switch to top thread/needle. Go though the last bead added.
Continue as in above steps.
8. Continue until you have 14 beads on each edges.
The thread ends are coming out on opposite sides.
9. End one side of the thread. There is several ways to do this:
You can travel the thread to the other edge.
Or go around 4 beads repetitevely in a circle.
Let the thread end hang out the edge.
10. Check for fit. Oops, best done before the last step...
11. Zip both side together catching the protruding beads on each side one at a time.
Check other tutorials to see zipping close-ups. Repeat step 9 for the second thread end.
12. Melt the ends with a thread burner.
Caution: Test this first with extra beads and thread.
Do not burn your work or your fingers.
I cut the thread first a few millimeters away from the bead edge, then hold a good thread burner towards the thread without touching the actual thread. The heat is enough to melt the thread and it creates a drop of molten thread. When it touches the bead edge, push the melted spot right unto the bead hole.
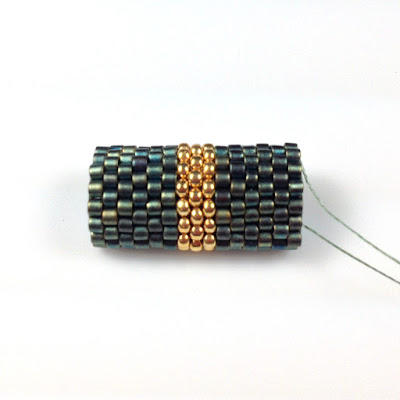
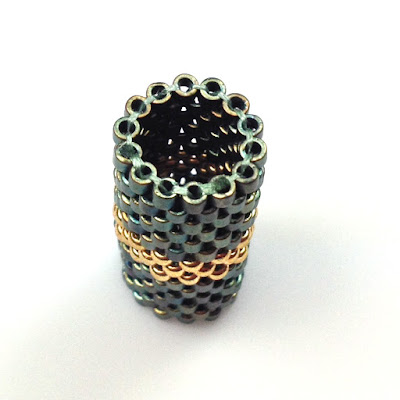
13. Here is the bead edge finished. The melted ends are barely noticeable.
14. Attach the Peyote sleeve to one side of the clasp by stitching it in a few places into the braid. Use a leftover piece of beading thread to do that. The finished peyote sleeve, now attached to one side of the magnetic clasp, when the bracelet is closed, becomes the focal point for the bracelet.
This 2 Needle Method has instantly become one of my favorite Peyote technique, even though I am usually reluctant to work with 2 needles. The finished product may not as tight as the regular odd-number peyote method, but both edges feel alike, whereas with the regular odd-method, one edge usually feels stiffer than the other due to the addition of the extra turn around beads.
This sleeve was done with 6 lbs PowerPro in Green. Check this review on beading thread.
References
Peyote Stitch TutorialsEven-Count Peyote Sleeves with Delicas Size 11
Even-Count Peyote Sleeves with Seed Beads Size 11
Get Kits, Materials & Tools
Peyote Beaded Sleeves
Kumihimo Bracelet with Long Magatamas & C-Lon Tex 400 Bead Cord
Magnetic End Clasps in Gold or Silver Tone
Related Posts
Why add Beaded Sleeves over Magnetic Clasps? Beside the esthetic…
Thread Burners Review
Why add Beaded Sleeves over Magnetic Clasps? Beside the esthetic…
Thread Burners Review


2 comments:
HOLA AMIGA.. PASE A SALUDARTE, FELICITARTE POR TUS HERMOSOS TRABAJOS Y A DECIRTE QUE SIEMPRE ERES BIENVENIDA A MI HUMILDE RICONSITO EN EL QUE COMPARTO CON TODAS MIS TRABAJOS, INQUIETUDES... APARTE DE LA ACTUALIDAD EN MI PAÍS, ENTRE OTRAS TANTAS COSAS... SALUDOS, BESOS, BENDICIONES Y ABRAZOS DE OSO PARA TI Y TUS SERES QUERIDOS...
ZHOBEYDA...
I will try this way of stitching odd count peyote. I alway end up with the odd count side being much too tight compared to the end with the even counts. I hope this solves that problem!
Post a Comment