Saturday, September 20, 2014

Hand Sewing in Leather with C-Lon Bead Cord and C-lon Bead Cord Tex 400

Determining actual size over the internet is not an easy thing. Having the real material on hand to test is always best. But occasionally distance and time makes it impractical to wait for samples.

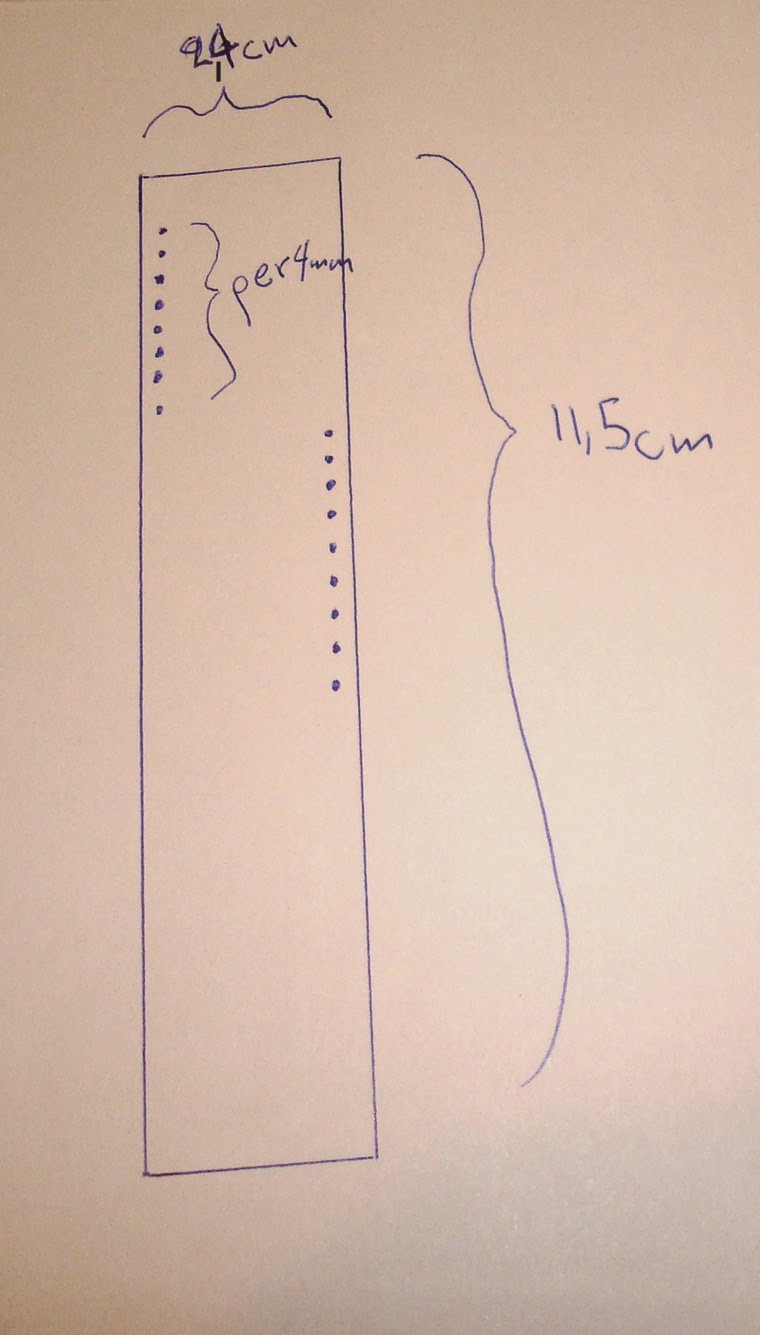
Today I was asked to sew into a piece of paper to simulate hand sewing into leather. I was to cut a piece of paper to a 2.4 cm by 11.5 cm and to sew a few cm of hand stitching with C-Lon Bead Cord (on right) and C-lon Bead Cord Tex400 (on left), sewing with holes 4mm apart.


Hand Sewing with C-Lon Bead Cord
Sketch submitted for request
I printed a rectangle on a piece of paper using Photoshop with the measurement listed above. Then with the help of a steel ruler I punched holes 4mm apart using an awl. 

Comparing Hand Sewing with C-Lon Bead Cord & C-Lon Tex 400 Bead Cord


As I was sewing, I could not pull hard enough on the stitches as the paper I chose was not stiff enough. Next, I will try this on leather, so keep posted!

Princess-Warrior Bracelet Continued


Occasionally I find better buttons for a design, so I changed the antique copper flower buttons to heart buttons for the closure for this bracelet. The flowers are still used as decorative elements.


Then we can play around with positioning. 


By bringing the flowers closer together...


Or setting them at a diagonal...


or by using them for another project and leaving them out completely...


Or we can create a triangular composition with the flowers. This is my favorite one at present. 

Let me know if you come up with another possibility... See earlier posts about Turkish Flat Bead Crochet and the Princess Warrior Bracelets

Get kits, bead & button packages, and the tutorials > Turkish Flat Bead Crochet & Princess Warrior Bracelet Kits

Wednesday, August 27, 2014

The Princess Warrior Bracelet Collection

Variations of the Princess Warrior Bracelet - Golden Flowers done with C-Lon Bead Cord in Black & Tan,
Gold Miyuki Duracoat Galvanized Beads and Italian Metal Buttons


This is the next step up from the Turkish Flat Bead Crochet Bracelet. The Turkish Flat Bead Crochet is patterned after Turkish Oya, the beautiful crochet trims found mostly around scarves edges in Anatolia. 

This new bracelet is an original design. I have never seen it done anywhere, although that does not mean someone else did not stumble on this same design elsewhere. This wider bracelet is made with C-Lon Bead Cord and Miyuki 6/0 beads, whereas the Turkish Flat Bead Crochet Bracelet is made with C-Lon Bead Cord Tex 400 and 5/0 beads. This sophisticated bracelet is reminiscent of armor, the Viking or Greek, "Princess Warrior" look, so I decided to keep this collection with metallic beads. The kits are made with Miyuki duracoat galvanized beads and include Italian metal buttons collected over time. The duracoat finish gives the Miyuki beads a durable metallic coat, so you can expect the bracelet to last over time.

Princess Warrior Bracelet - Golden Flowers Bead & Button Pack & Spool of C-Lon Bead Cord 

Several of the bracelets I have been wearing are earlier prototypes made as I was refining the techniques to create the final bracelets. The final design adopted for this bracelet tutorial minimizes stretch, wear well over time, and includes technical aspects that will help if ever the buttons need to be moved, restitched, or the button loops repaired.

Picture from the tutorial

Once the final design was selected, I photographed each of the steps while making the bracelet. The next step was to make a second bracelet while writing the instructions and looking at the photos. Then, I revised the written instructions accompanying the photos, while making a third bracelet.  The full tutorial is a 15 page PDF document with over 20 large pictures. A paired and scaled down printed version comes with the kits and the larger PDF version is sent by email. Both include the Turkish Flat Bead Crochet Mantra, an easy way to remember the pattern. 


Princess Warrior Bracelet - Silver Zuni Circles Bead & Button Pack & Spool of C-Lon Bead Cord 

Matching materials for these kits has been a challenge. I can attest to it by the number of bead finishes and buttons I purchased over time that did not make the final cut. Most of the Italian buttons used in these kits are no longer available, so the number of kits available is limited to the stock on hand.


Princess Warrior Bracelet - Bronze Double X

While wearing the earlier and final versions of this bracelet at shows, shops, restaurants, I have gotten lots of comments from people at large. This bracelet attracts lots of attention from a wide range of people of all ages, so make one for yourself, one for your daughter, or some for friends.


Princess Warrior Bracelet - Pewter Bindu Circles 

Design variations can be done by adding attached elements, by changing the width of the bracelets and of course by altering colors, beads, and buttons. 

Princess Warrior Bracelet - Antique Copper Flowers

The Antique Copper Flower Bead & Button kit is the only one that comes with newly produced copper buttons. These flower buttons are a traditional button design. The Bronze Double X comes with Bronze Metallic Miyuki Beads Size 6 - the metallic finish on these beads is more susceptible to darkening over time than the Duracoat finishes. 

Complete Princess Warrior Kit with the Tool Bag including a Super Max Thread Burner
Bead & button packages are also available for the simpler version of this bracelet made with C-Lon Bead Cord Tex 400 and Miyuki Seed Bead Size 5.

Get kits, bead & button packages, and the tutorials > Turkish Flat Bead Crochet & Princess Warrior Bracelet Kits
Sunday, June 1, 2014

What I am working on - a sneak preview...


After several false starts, many pieces started and taken apart, materials not working out perfectly - button and beads not matching well enough, I am finally getting closer to finishing designing a new kit.  This process was halted for over a year when life got in the way in a major way. Now things are settling down and there is once again the time and desire to work on new designs. Here is one of the project I am working on. 


It is Turkish Bead Crochet taken to the next step. The concept came to me while experimenting with possibilities - I have not seen nor copied any designs I saw, nor is the concept a traditional approach as far as I know. The kit will include the instructions, the beads, buttons and the cord as well as recommendations for the best crochet hooks and tools for the project.  


I am just waiting for a few additional beads to arrive to make the final prototypes, then I will choose the best pieces and they will be made into kits.

Hints, the kits will have a fair amount of metallic beads & buttons. 


Shambhala Bracelet with Chinese Knotting Cord in Fluo Mix


Neon colors and fluorescent mix are not usually my cup of tea, but I was interested in seeing how the Fluo Mix would do when tying square knot sennits, then got interested in what the result would be for a shambhala type bracelet. 

Here are the results:

The left square knot sennit was made with 1mm Weight with a 1 cord core or center. The square knots are 7mm wide. 

The next sennit was made with the HDQ Weight with a 1 cord core or center. The square knots are 8mm wide. 


The bracelet on the left was made with the 1mm Weight. 

I made this bracelet to fit my wrist, wore it around the house and found it to be a fun accessory. My husband saw it and wanted his own... thus the two bracelet, His & Hers... He even named the bracelet His & Hers Surf Shambhala Bracelet.

The bracelet on the right was made with the HDQ Chinese Knotting Cord and a center slide closure as he wanted the adjustment beads to be close to his wrist. 

The bracelet on the left was made with a side closure and longer hanging beads. 


Want to make your own? Get a kit, the material or just the cord. 


Broken Kitchenaid Mixer... Repair or replacement?


This subject is a bit off topic, but it is often a subject I think about often when designing jewelry. Will it be a piece that can be repaired or will it have to be redone completely when something break? 

My stand-up Kitchenaid mixer had been leaking oil and right before Christmas it finally gave up completely and stop mid-mixing my cookie dough. I looked for someone, a shop, a repair person to fix it, but come up empty. Then I searched online for possibilities and found an online tutorial on how to fix it. It took me several month to finally get the courage to take the machine apart. Other than having to deal with the rotten grease, it was fairly easy.


And just as in the video, one of the gear - designed to fail - had failed. 

Then next I cleaned up the machine the best I could with old rags, Q-tips. Laid everything as neatly as I could so I could find all the parts again and placed an order online for the replacement parts: the gear, gasket and new grease - this time food quality grease, hoping it would smell better, which it did - thank you. 


Once all the parts arrived, it was time to put everything together. My brother-in-law's advice: if any part is left on the counter (the washing machine) when you put it back together, take it apart again... Ha, ha, ha... He must have ESP. The only problem I run into putting together was the five screws right under the motor. One screw out of 5 would not fit. After switching them around, switching the order I put them in, just placing them carefully in place and only giving the one turn each, one screw still would not get in, regardless of what I did. I gave up, put in 4 screws out of five and yes I was left with a part on my counter, one screw. 

Next come the ultimate test, did it all work - even with a missing screw? Yay - It works, I have a working machine again! 

To celebrate I made a traditional Swiss flourless carrot cake for a gluten-free guest. Let me know if you would like the recipe.