This post continues the series of posts about kumihimo with Preciosa PIP beads. The two previous posts are Kumihimo with PIP Beads and Kumihimo Bracelet with PIP Bead - Compare Kumihimo with Bead Weaving and Bead Crochet Techniques.
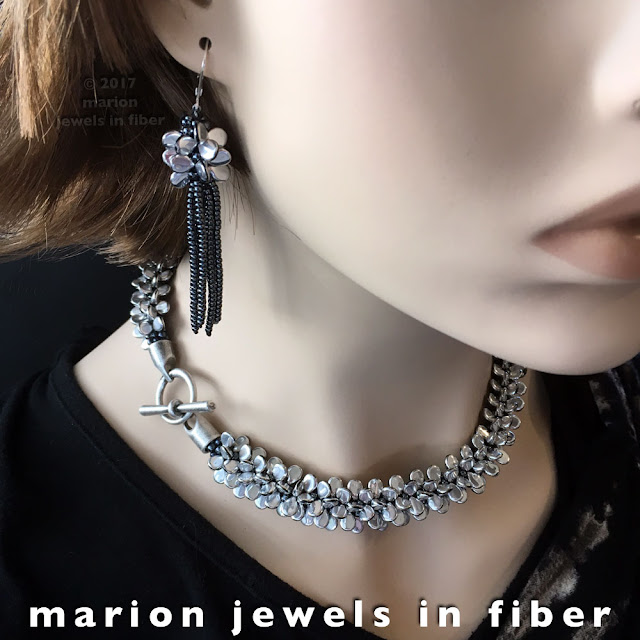
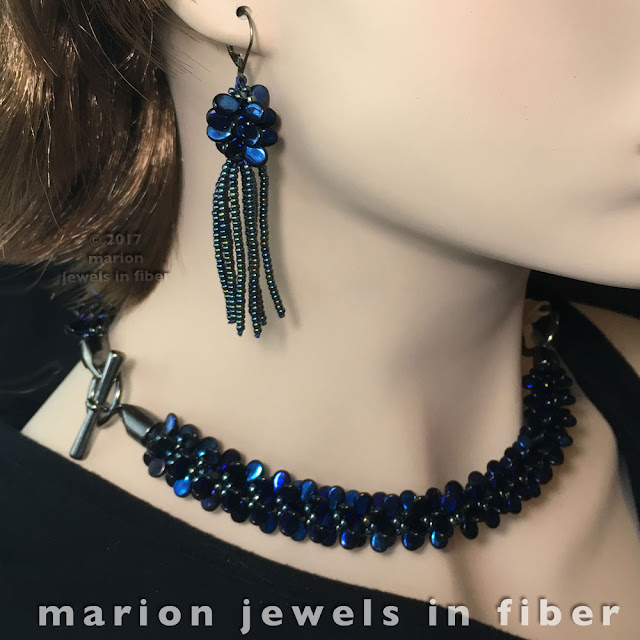
After designing the Kumihimo PIP Bracelets Kit and Tutorial, I made a few necklaces using the Half Round PIP and the PIPs All Around Design Patterns included in the bracelet tutorial. Both designs work well in a necklace form. The one shown here is 17 inch long and used the Half Round Design. I will be writing a post these necklaces next.
After making the necklace, I needed earrings to wear for a wedding I was attending, so I set all my other projects aside and went to work designing my very first kumihimo earrings. Please note that I went about it without doing any research online whatsoever. I did not want to be influenced by someone else’s designs.

The first earring I made was a PIP ball earring, but it was not quite distinctive enough, plus the finishing of the end cords was a bit complex for a DIY, so I decided to try for a design with a beaded tassel. The first ones were pretty good, but the bead placement was not quite right yet and the tassel was a tad short, but the Jellyfish design just needed a bit more refinement.

Everything gelled in the next attempt. The earring had a nice distribution of the PIP beads in the kumihimo body, and the beaded tassel, the tentacles, was just right. This is the design I adopted for the kit and tutorial. > Kumihimo Jellyfish Earrings with PIP Beads
The tutorial is very comprehensive and includes 15 pages with over 30 pictures, tables and charts. Please note the tutorial assumes you have prior knowledge of the braiding steps and beaded kumihimo. The manual does not included the basic steps. If this is your first kumihimo project, make sure to get the Kumihimo PIP Bracelets Kit and Tutorial first. Make the bracelet first as the bracelet manual includes very detailed pictures showing the braiding steps.
The earring tutorial includes 3 design variations and several options for the beaded tassels. The kits are available in the following color and design variations:
Design 1
That's the basic design... This earring style works well with the neckpiece or by itself.
Copper Venus
The PIP beads are transparent with an AB finish. The 8s and 11s are Miyuki Duracoats in a dark copper finish. The leverbacks are gold filled. The necklace is made with the PIP All Around Design.
Argento
The PIP beads have a silver metallic coating all around. The 8s and 11s are Miyukis in a gunmetal finish. The leverbacks are sterling silver. The necklace is made with the PIP Half Round Design.
Azuro Metallico
The PIP beads have a blue metallic coating all around. The 8s and 11s are Miyukis in a AB gunmetal finish. The leverbacks are sterling silver with an oxidized finish. The necklace is made with the PIP All Around Design.
Sapphira
The PIP beads have a dual finish, transparent colors on one side, with a graphite metallic coating on the other side The 8s and 11s are Miyukis in a gunmetal finish. The leverbacks are sterling silver with an oxidized finish.
Design 2
Design 2 as a shorter kumihimo body. Any of the earring kits shown above can be made into Design 2... You will have a few PIP beads leftover for another project. As to the tassels, I started playing with the individual beaded cord length. The tassels can have blunt cuts, staggered or uneven beaded cord lengths... Your choice.
Coppertone - Design 2
The PIP beads have a dual finish, transparent colors on one side, with a copper metallic coating on the other side The 8s and 11s are Miyuki Duracoats in a bright copper finish. The leverbacks are sterling silver with a light oxidized finish.
Design 3
Design 3 as a longer kumihimo body and the tassels are made with Delicas...
Coppertone - Design 3
Same as above earrings but with a longer kumihimo body, so more PIP beads, and the 8s and 11s have a darker patina copper finish. The tassels are made with Miyuki Delicas with staggered lengths.
Opalesque - Design 3
The PIP beads have a dual finish, transparent colors on one side, with a silver metallic coating on the other side. The 8s and 11s are Miyukis in a gunmetal finish. The leverbacks are sterling silver.
When these earrings were all designed and the samples all finished, I searched online to see if anyone else had designed any earrings similar to these and I could not find anything already published on the internet thus far. I am super happy as I love to pioneer a new style!
The kits and the tutorial are available HERE. Check back soon for the next post on making the necklaces...


