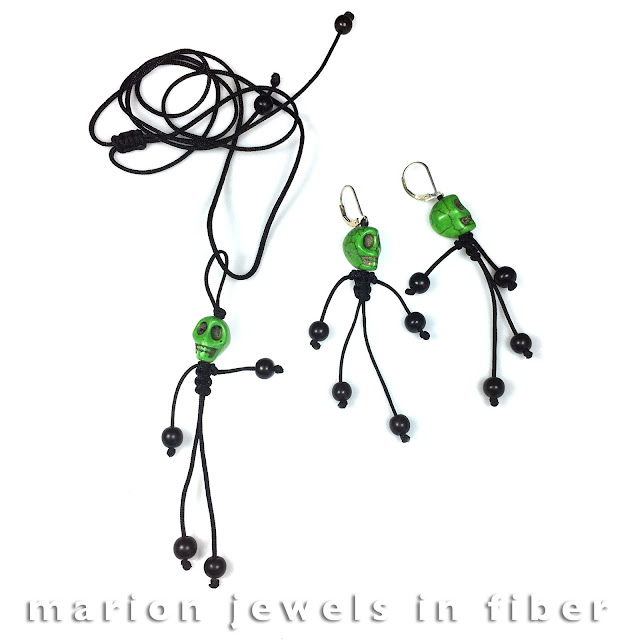
I made many "Huesos Bailando" Dancing Skeleton or Bones earrings, amulets, and bracelets with "Calavera" Skull beads and sold them at the Chico Art Center in conjunction with Dia De Los Muertos exhibits. So here is the tutorial with step by step picture. I hope you will enjoy it.
Dancing skeletons are probably the most iconic and playful symbols of Day of the Dead. They represent a life after death and those who have died engaging in their favorite activities. Since Dia De Los Muertos is now celebrated worldwide, why not make an amulet, or a pair of earrings celebrating this Mexican holiday. Day of the Dead is celebrated on November 2, but festivities in the USA usually starts on October 31 on Halloween.
Calavera (Skull) Beads
For this project you will need skull beads. The ones I have for sale are made of out of magnesite an off-white soft gemstone with little vein lines often used to imitate turquoise and they are about 13.5 mm long. The magnesite beads are carved, dyed, and stranded on an elastic cord. The strands have 15 beads each and can be worn as bracelets as is. Each strand has 7 beads paired by color, and 1 unique colored bead. The color of the single bead changes from strand to strand. For an amulet, you will need 1 Calavera Skull Bead.
For this project you will need skull beads. The ones I have for sale are made of out of magnesite an off-white soft gemstone with little vein lines often used to imitate turquoise and they are about 13.5 mm long. The magnesite beads are carved, dyed, and stranded on an elastic cord. The strands have 15 beads each and can be worn as bracelets as is. Each strand has 7 beads paired by color, and 1 unique colored bead. The color of the single bead changes from strand to strand. For an amulet, you will need 1 Calavera Skull Bead.
Preliminary Step
Prior to working with these beads, enlarge the bead hole with a reamer. A large fine point reamer used by hand works well for a few beads, but if you go into production an electric reamer is a nice tool to have on hand. Choices for reamers can be found HERE. Use water as a lubricant and let the diamond reamer enlarge the hole without pushing or forcing the tip in. Doing so will overheat and damage the reamer, and it will loose all of its diamonds.
Wood Beads
You will also need 6mm round Black Wood or Black Ebony Wood Beads for the amulets and earrings, and 10mm ones for the bracelets. Black Ebony is a bit heavier than the dyed wood beads, but is currently hard to get due to the typhon that just affected the Philipines. For this piece you will need four 6mm wood beads, or two 6mm and two 8mm ones if you would like the boots to be bigger than the hands. Your choice. Get all the beads HERE.
TOOLS
You will need a macrame board, T-pins, a tapestry needle size 18, a bead reamer, and a thread burner. You can get these tools HERE.
CORD & THREAD
For this piece, you will need about 18 inch of Chinese Knotting Cord New Fine (966 Neon Orange for this example), and about 18 inch of of Chinese Knotting Cord Extra Fine (101 Black for this example), and 12 inch of C-Lon Micro Bead Cord in any color.
Why 2 different sizes Chinese Knotting Cord? I like the arms to be a bit thinner than the legs... and I have all the choices on hand. However, if you prefer using one size only, go for the New Fine and Fine sizes.
STEP BY STEP
Step 3. Make an overhand knot for the amulet. An overhand knot is when you fold a cord over itself and go through the loop. Skip this step for the earrings and attach the earring finding here.
Step 4. Pull the bead up.
Step 5. With T-pins, attach the loop to the bottom of the macrame board, and the cord ends at the top using a slip knot, or if it reaches insert it into one of the slots.
Step 6. With the tapestry needles attached to one of the black cord end, start a square knot. This shows the first half of the square knot.
Step 7. Tie 3 square knots with the black cord over the orange cord.
About thread burners: They are safer and more precise than lighters, and as lighters, they are not intended for use by children.
Step 9. Tie an overhand knots.
About the next two steps: If this is the very first time you do these steps, practice first on a spare cord.
Step 10. With a thread burner, cut the cord 1 to 2 mm away for the overhand knot.

Step 11. Melt the end right into the knot. Smooth the melted end either with your fingers if they are heat resistant, or with the cap of the burner.
ADDITIONAL OPTIONS
Add a necklace cord: Check this video.
Add an extra overhand knots... for the shoulders... and for the buttocks too at Step 7. See neckpiece below for all the extra knots. As I made more and more pieces last year, I found myself adding little touches...
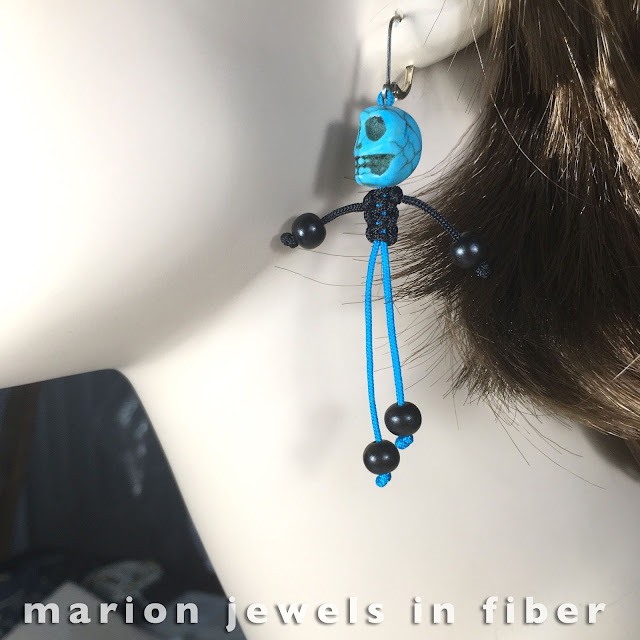
Make earrings: At Step 3, add the earring findings using pliers to open the loop and close it back once the cord in inserted into the earring loop. Skip the overhand knot. At Step 4, pull the bead up leaving a small loop. The Chinese Knotting Cord colors are 546 Cyan in New Fine Weight and Black Extra Fine.
I really like leverbacks made out of sterling silver, or gold filled for these earrings. Many lower quality findings have nickel in them and bother my ears. You can find these leverbacks HERE.
Make Shambhala bracelets: Use 10mm and 6mm Black Ebony Wood Beads. I have also made them as shown here with 5 Calavera Beads, and 6 x 10mm and 2 x 6mm Black Ebony Beads, or with 3 Calavera beads and 8 x 10mm beads, with 2 x 6mm beads at the end of the slide pulls.
If you need instructions on how to make Shambala bracelets, go HERE.
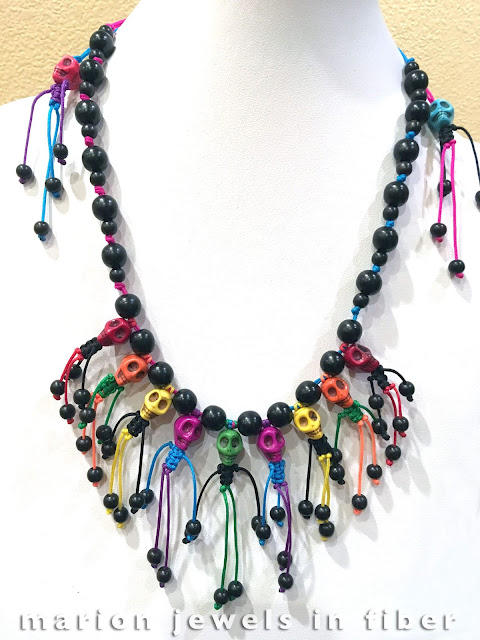
Try a neckpiece... like this one, if you are more ambitious, with 9 hanging skeletons in the front strung in between 10mm ebony beads, plus 2 more as back drops.
I had fun with the Chinese Knotting Cord colors for this neckpiece, alternating colors such as a green torso for the orange skull. I made it last year especially for the Dia De Los Muertos exhibit at the Chico Art Center. It sold at the show and I have not made another one since... so it is a one-of-a-kind.
Upon request I just made kit bags with all the supplies to make the neckpiece and a pair of earring, plus a few charms with leftover supplies. A 19 page tutorial for this necklace comes with the kit and is also available by itself. I thought I would just write a one page printed set of directions, but truly I did not have the words to explain all the steps, so now it is a full step by step tutorial HERE.
Check the next post for more color suggestions and combinations with White Wood Beads.


Hey, due to requests, I just added a Neckpiece and Earrings Supply Bag. Get all the supplies in one bag and instruction on how to build the neckpiece
ReplyDelete