Sunday, August 23, 2015

Kumihimo Bracelet Duo & Necklace Plus Continued - Santorini Colorway


Kumihimo Bracelet Duo & Necklace Plus - Santorini

In the previous post, the colorway featured was Place Vendome. 
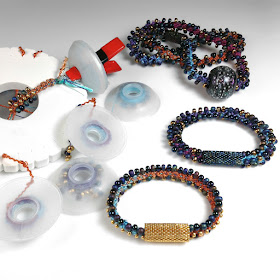
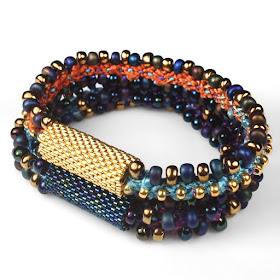
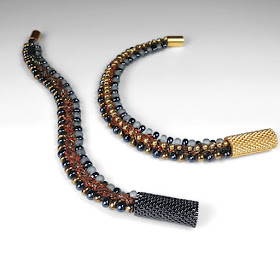
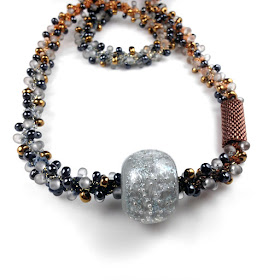
Here are the photos of the kumihimo bracelets and necklace done with the Santorini colorway.

Oh, and why Santorini? The colors reminds me of the Minoan murals in Crete. Then I thought of the lost Minoan civilization of Atlantis, but the Atlantis has a bit too much attached to its name, so Santorini seemed much more appropriate as a name as it is the island where Atlantis may have been, before being destroyed when its volcano exploded… 


Kumihimo Bracelet Duo & Necklace Plus - Santorini
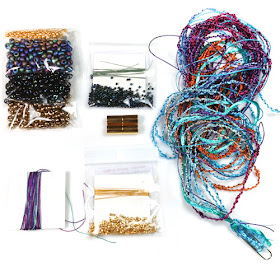
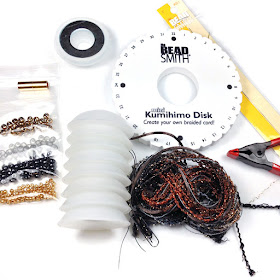
Here is the materials for the Kumihimo Bracelet Duo…

Kumihimo Bracelet Duo Kit

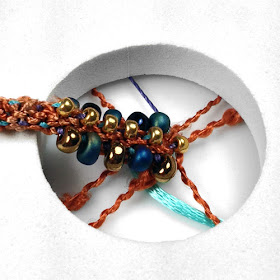
The start of bracelet #1


Bracelet #1
Left shows the back side of the bracelet, nice a soft against the wrist with no beads.
Right shows the front side with the small bead ridge in the center. 

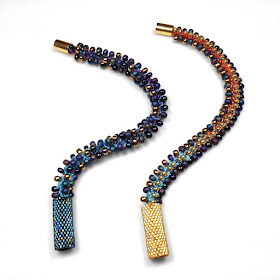
Kumihimo Bracelet Duo - Santorini

Here are the two bracelet done with this kit. 
Bracelet #1 on the right; bracelet #2 on the left. 


What's intriguing is the texture and color differences between these two bracelets. It is also possible to switch and start with bracelet #2 first, then the color arrangement would be changed. 
Kumihimo Bracelet Duo  - Santorini

Bracelets stacked


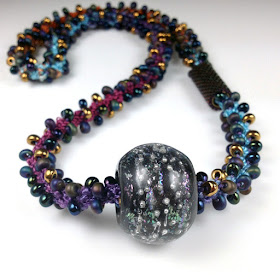
Kumihimo Necklace Plus - Santorini


The Necklace Plus makes a long necklace and a bracelets, or two necklaces, your choice. 
A handmade glass bead can be added. 


 Kumihimo Necklace Plus - Santorini

The large bead can sometimes slide on over the clasp and beads. 


Kumihimo Necklace Plus - Santorini

Other times, depending on the actual diameter of he inside hole, the beads needs to be integrated into the braid. Each bead is handmade one at a time, so inside diameter are not exact. 


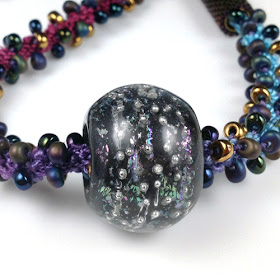
Kumihimo Necklace Plus - Santorini - Focal Glass Bead

The borosilicate bead contains silver globs and dichroic fragments within, giving it life when it moves. 

This pieces were braided with Rayon Bouclé that is space dyed, C-Lon Bead Cord, 4mm Magatamas, these beads are in the form of a droplet, Size 8 seed beads for bracelet #1, gold tone magnetic clasps covered by Peyote Sleeves. The focal large glass bead is an optional add on to the kit. > Get a kit

Kumihimo Bracelet Duo & Necklace Plus

Kumihimo Bracelet & Necklace Kits

Occasionally a new kit starts with a skein of yarn. 
I fell in love with the texture of the rayon boucle and its colors. 
It is a space dyed yarn with gorgeous colors, but would it work for kumihimo?


Kumihimo Bracelet & Necklace Kits


I started with the necklace...


Kumihimo Bracelet & Necklace Kits


Then tried a flat looking bracelet with beads only on the side - it is shown on the left.
It is made with the standard round braid but it looks like a flat braid.
Then I altered it by adding a ridge of smaller beads down it center… See bracelet on right. 


When I finished the first bracelet, I had lots of yarn left, so I added a second bracelet.

Kumihimo Bracelet & Necklace Kits

The second bracelet has a different bead placement. 
It makes it more interesting when both bracelets are worn together. 

Kumihimo Necklace Kit

Then I added a focal bead to the necklaces and Peyote sleeves over the clasps. 
This one is Black Starburst - a borosilicate glass with silver globs and dichroic chips inside. 
It is handmade in the USA. 


Kumihimo with Focal Bead
This one is Silver Moon. Not sure which one I like best… 


Kumihimo Bracelet & Necklace Kits

Here is what comes with the Bracelet Duo and the kumihimo tools that are needed. 


This colorway is Place Vendome > Get a kit or if you already have all the materials for this project, just the PDF of the instructions.  

Of course this process took some time. I got the skeins in two colorways in February and now it is August. And I still have to package the Necklace Kit Plus and finish the instructions for the Necklace Plus. Necklace Plus? Oh, that's because you can make two necklaces, or one long necklace and a bracelet with the kit.  

I brought this kit to my last show, last weekend in Portland. I only had the Bracelet Duo ready in the two colorways, Place Vendome and Santorini. Santorini sold out… Now, of course I need to post all the pictures showing the Santorini color way. See next post entry. 


Oh, why Place Vendome? The colors reminded me of Paris, the classy colors of the architecture and Place Vendome came to mind. I looked again at pictures of this beautiful square in Paris off Rue Rivoli and yes the colors are similar, with soft greys, soft rusts, some charcoal and some golds and bronze… 


Saturday, August 1, 2015

DIY Silk Tassels for Jewelry

Silk Tassels

One of the latest trend in jewelry is tassels. They are featured everywhere on malas, attached to bracelets, earrings and more... In fashion you can find them on clothing, belts, shoes, purses along with lots of fringes. Tassels can be made out of many different type of materials depending on their final use. They can be simple or complex. 

Here is a tutorial for a silk tassel well suited for jewelry. 

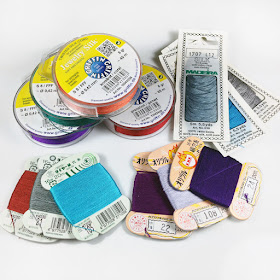
I found filament silk best suited for tassels. The weight and flexibility of the silk makes gorgeous tassels. Kanagawa 100 Denier Silk and Fujix Tire Silk come in an amazing array of colors. Kanagawa 1000 Denier Silk comes in 162 colors; Fujix Tire Silk in 121 colors; Griffin Jewelry Silk in 11 colors. The following tassel was made with Kanagawa color #5. The two Japanese brands, Kanagawa and Fujix Tire, are comparable and they are as far as I know the best filament silk available. Griffin Silk, a beading silk is also a very high quality silk suitable for tassels. 


Silk Tassels Tutorial

1. Cut a folded piece of cardboard a bit longer than the desired length of the tassel.


Silk Tassels Tutorial

2. Insert the thread in the cardboard fold and wind the thread around. 
This one was wound about 45 times around the card. 
The more you wind the thread around the cardboard, the fuller the tassel will be. 


Silk Tassels Tutorial

3. With separate thread, bind all the tassel thread on one of the end.
I go around the bundle twice, then tie the two ends into a flat knot.

4. Cut the thread along the other end of the cardboard while holding the bound end. 
Continue holding the bound end for next step. 


Silk Tassels Tutorial

5. Run the thread under lukewarm water to remove the folds and to make it easier to cut the ends. 
Blot the tassel with a towel to remove excess water. 

This step can be skipped with Griffin Silk, and with silk coming off of spools, but cutting wet silk is easier than cutting dry silk. It is just like getting your hair cut wet rather than dry...


Silk Tassel Tutorial

6. Continuing while the tassel is wet… 
With a separate piece of silk, wrap the tassel neck. 
Stitch the ends back toward the tassel ends. 


Silk Tassels Tutorial

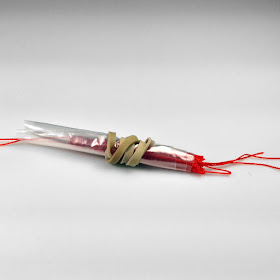
7. To trim the tassel, wrap the tassel in a piece of plastic shed.
Use your sharpest scissors to trim the ends.


Silk Tassels Tutorial

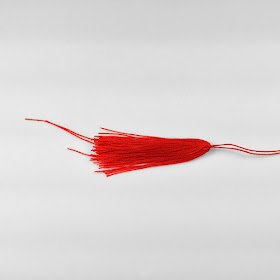
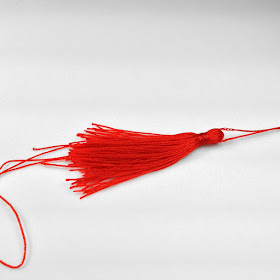
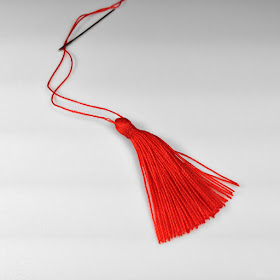
Here is the finished tassel.


Silk Tassels Tutorial


The finished length of this tassel after trimming is 4.5 cm long.
The head is about 5 mm in diameter. 
The bottom of the tassel skirt is about 18 mm wide. 


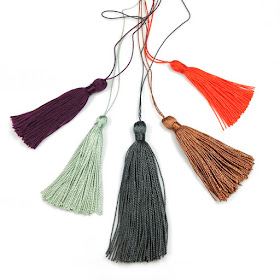
Silk Tassels made with Kanagawa & Fujix Tire Silk

Tassels made with Kanagawa 1000 Denier Silk and Fujix Tire Silk.
Some are longer, fatter… The fattest one on the right was made with the full card. 


Silk Tassels

Tassels made with filament silk.
The two on the right are made with Griffin Jewelry Silk Size 6. 

The Kangawa and Fujix Tire silk tassels have a bit more sheen than the Griffin ones. Griffin Jewelry Silk is another filament silk often used for stringing beads. It is less sheen and more grip, so a bit easier to handle than Kanagawa & Fujix Tire. It is available in 12 colors at this time. Griffin Jewelry Silk comes in spools. Size 6 has 65 meters per spool.  


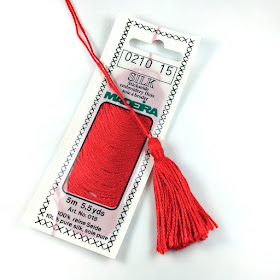
Tassel made with Madeira Silk

Tassel made with Madeira Silk

This tassel is soft and fluffy, but the floss does not have the weight of the filament silk, so it does not hang quite as nicely. It might make a good tassel, but it would not be my choice for jewelry. Madeira Silk Floss come in 108 colors. It is made in Germany with spun silk from Switzerland.  


Tassel made with C-Lon Micro Cord

Tassel made with C-Lon Micro Cord. 

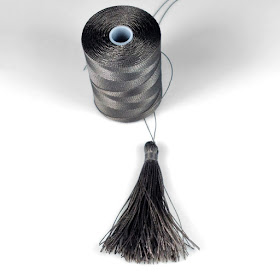
This tassel skirt is bit stiff. I may attach this ones to my keys or a purse, but I would not attach it to a strand of beads, nor wear it as a jewelry charm… 


I am now experimenting with tassels made with Chinese Knotting Cord, so far I really like the results with Micro Size E. > Read New Post on Tassels 

See latest post on tassel HERE

Silk - References


Silks available at Jewels in Fiber
All these fine silks are available at Jewels in Fiber online store

Here are the silks, I tested for tassels. I made the same types of tassels growing up in Geneva, Switzerland. I came up with a few improvements while making them this past week… Oh, I was told at the show I just attended that books are good to wind the thread around to make the tassels. I will try this next. 

I have several books on tassels, but I have yet to make one of the fancy tassel featured in them. If you are interested in further research in the art of passementerie, that is the French word for fancy decorative trimming such as tassels, braid and fringing, check books on tassels and look for future posts on the subject!